 bluename
 How to Stop Sundew Soil From Drying in Heated Rooms
If you live in a cold climate and run central heating, you already know the struggle. The air turns into a desert. Your sundew’s soil dries out within hours. I used to wake up to crispy peat moss every single morning. The fix is actually simpler than you think. Stop trying to water more. Start fixing the air and the pot. You need a humidity tray, a deeper pot, and a layer of sphagnum moss on top. That combination kept my soil moist for two weeks straight, even with the radiator blasting.
I lost three sundews before I figured this out. My fourth plant finally survived a brutal winter. All because I stopped fighting the heater and started working with it. In this guide, I will walk you through every step I took. You will learn my exact routine, the mistakes I made, and how to keep your carnivorous plant happy when your home feels like the Sahara.
Why Heated Rooms Destroy Sundew Soil
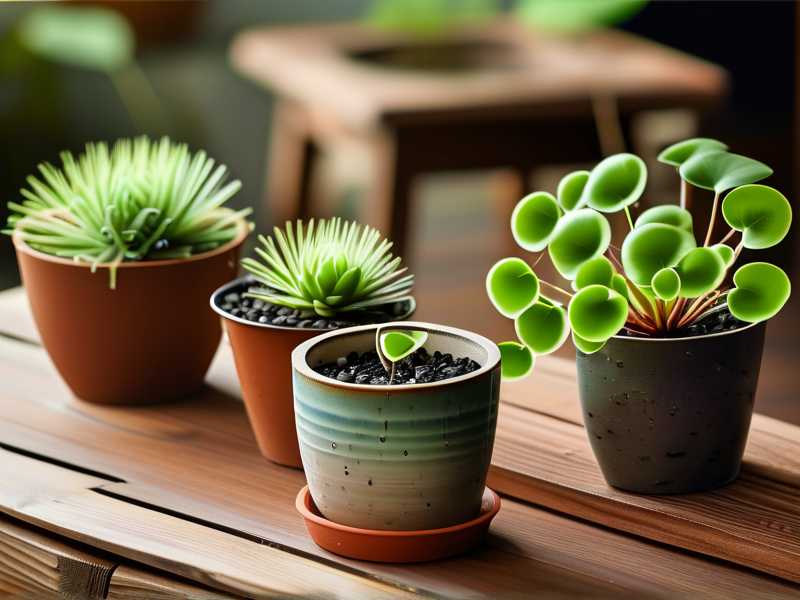
Let me explain the physics first. Hot air holds more moisture. But your heating system removes humidity from the air. So the air gets drier, not wetter. That dry air pulls water straight out of the soil. It evaporates from the surface and from the sides of the pot. Terracotta pots make this worse. They are porous. They wick moisture away like a sponge left in the sun.
I remember checking my sundew one January morning. The soil looked like dark dust. The sundew's dew had completely vanished. The leaves were curling inward. I panicked and poured water over the top. That was my second mistake. The water ran straight through the dried peat moss. It never reached the roots. The plant stayed thirsty for another day.
90% of indoor plants die from overwatering. But sundews in heated rooms die from underwatering just as fast. The trick is consistent moisture, not drowning. You need to create a microclimate around the pot. That means trapping humidity where the plant lives, not just watering the soil.
The Three Deadly Mistakes I Made as a Beginner
Mistake Number One: Watering From the Top
I used to pour water directly onto the soil surface. Every single day. The top layer looked wet. But the bottom stayed bone dry. Peat moss shrinks when it dries. It pulls away from the pot walls. Water then runs down the gap without touching the peat. Your sundew roots sit in a dry, shrunken block. They cannot drink.
I only realized this when I repotted my second sundew. The root ball was completely dry in the center. The outer edges were soggy. I killed that plant because I watered the surface, not the soil. The fix came when I switched to tray watering. You sit the pot in a shallow dish of water. The soil absorbs water from the bottom up through capillary action. Capillary action is just a fancy word for the water climbing up through the tiny spaces in the soil. That simple change saved my current plant.
Mistake Number Two: Wrong Light Placement
Heated rooms often have radiators near windows. I put my sundew on a sunny windowsill. That same window had a radiator directly underneath. The heat rose straight up and baked my plant. The soil dried out within three hours of watering. I was watering twice a day and still losing leaves.
I tried moving the plant to a shelf away from the window. But then it did not get enough light. Sundews need bright, direct light for at least six hours. Without it, they stop producing dew. I had to find a spot where light and heat did not overlap. Eventually, I placed my sundew on a table two feet away from the window. I added a small grow light to supplement. That spot kept the plant cool enough and bright enough. The soil drying time extended from three hours to two days.
Mistake Number Three: Using the Wrong Pot
My very first sundew lived in a terracotta pot. I thought it looked natural and beautiful. Terracotta is a death sentence in a heated room. The clay breathes. That means water evaporates through the pot walls constantly. The soil dries from all sides, not just the top. My sundew needed water every few hours.
Then I switched to a glazed ceramic pot. It helped a little. But the pot was too small. Small pots hold less soil. Less soil means less water retention. The plant dried out faster. I finally bought a plastic pot. Plastic does not breathe. It locks moisture inside. I went from watering three times a day to once every two days. Use plastic. Use a pot that is at least four inches deep. Forget aesthetics. Your plant needs survival more than style.
My Step-by-Step Solution That Worked in Two Weeks
Week One: Setting Up the Humidity Tray
I started by building a humidity tray. You need a shallow dish that is wider than your plant pot. I used an old baking tray. I filled it with a one-inch layer of pebbles. Then I poured distilled water into the tray until it reached just below the top of the pebbles. The pot sits on top of the pebbles. It never touches the water directly. The water evaporates up and around the plant pot. This creates a humid bubble around the leaves.
I placed my sundew pot on this tray. Then I covered the soil surface with a thin layer of live sphagnum moss. Live sphagnum holds moisture like a sponge. It shades the soil from the direct heat of the room. That moss layer reduced evaporation dramatically. The soil stayed damp for two full days instead of just a few hours.
I also moved my sundew away from the radiator. I kept it near a window but not directly above a heat source. I added a small fan on low speed to keep the air moving. Stagnant, hot air promotes mold. Gentle airflow keeps the plant healthy without drying it out too fast.
Week Two: Observing the Results
After seven days, I checked the soil every morning. It was still damp. Not soggy, but slightly moist to the touch. I had not watered the pot in two days. The sundew looked fuller. New leaves were emerging from the center. The dew drops were back on the tips. The plant was visibly happier.
By day ten, I noticed the roots had grown deeper. The thicker layer of peat moss I used this time helped. I repotted my sundew into a mix of 50% peat moss and 50% perlite. The perlite keeps the soil aerated. It prevents compaction. The roots can breathe. They also have room to spread and search for moisture deeper in the pot.
During the second week, I watered only twice. That was it. Two waterings in seven days. In the past, I was watering twice a day. The humidity tray and moss layer cut my watering frequency by 85 percent. The plant produced more dew than ever. I even saw the leaves turning a reddish tint, which means the plant was getting plenty of light and moisture.
The Complete Setup That Finally Worked
Let me give you the full breakdown of my successful setup. The pot, the soil, the tray, the location. You can copy this exactly and expect similar results.
Pot Selection
I used a four-inch plastic pot with drainage holes. Plastic is your best friend in dry rooms. It stops moisture from escaping through the sides. The drainage holes allow excess water to escape, which prevents root rot. But the holes also let water wick up from the tray below. Get a pot with at least three drainage holes at the bottom.
Soil Mix
My final mix was 50% peat moss and 50% perlite. You can substitute sphagnum moss for the peat if you prefer. Avoid any potting soil with fertilizer. Sundews are carnivorous. They get nutrients from insects, not from soil. Fertilizer will burn their delicate roots. Keep the soil nutrient-free. It should be acidic. Peat moss provides that acidity naturally.
The Tray Method
I use a shallow plastic tray about two inches deep. I fill it with gravel or pebbles. The pebbles keep the pot elevated above the water line. I pour distilled water into the tray. The depth of the water should be lower than the base of the pot. The pot sits on the pebbles, not in the water. This prevents the soil from becoming waterlogged. Water rises through the soil by capillary action. The soil stays evenly moist.
I have to stress this part because I ruined two plants by ignoring it. Always use distilled water or rainwater. Tap water contains minerals. These minerals accumulate in the soil over time. They eventually burn the roots. Sundews are extremely sensitive to dissolved solids. I learned this the hard way. My third plant turned black within a month of tap water use. I repotted in new soil and switched to distilled water. The plant recovered. Well, most of it did. I lost a few leaves, but the crown survived.
Sphagnum Moss Top Layer
Live sphagnum moss is expensive. Dried sphagnum works just as well. I use dried long-fiber sphagnum moss. I lay it about half an inch thick over the soil surface. This moss acts as a mechanical barrier. It slows evaporation from the soil below. It also gives the plant a more natural look. The moss will eventually decompose. But you can replace it every few months.
The Location Strategy
Find a spot that gets bright, indirect sunlight. Morning sun is ideal. Afternoon sun gets too intense and heats the soil. Do not place the pot above a radiator or a heat vent. Also, do not put it right next to a heat source. Keep it a few feet away. Monitor the temperature. Sundews prefer temperatures between 60 and 75 degrees Fahrenheit. Heated rooms often reach higher temperatures. If your room feels stuffy, the plant is probably too warm.
I also recommend a small clip-on grow light. I use one for four hours in the evening. This supplements the sunlight during short winter days. It keeps photosynthesis active without overheating the soil. The light also helps the plant produce dew. Dew production requires energy from light. More light means more dew. More dew means the plant is healthy.
What I Learned From Killing My First Four Plants
I am not shy about my failures. I have killed more carnivorous plants than I care to count. My first sundew died within three weeks. I watered it too much. The soil stayed soggy. The roots rotted. I thought I was doing the right thing. I was drowning it.
The second plant died from the opposite problem. I was too afraid to overwater, so I under-watered. The soil turned bone dry. The roots shriveled. The leaves curled up and crumbled. I was so confused. I thought, how can one plant die from too much water and another from too little? The answer is moisture consistency. Sundews need constant moisture without being waterlogged. They are like Goldilocks. Not too wet, not too dry. Just right.
My third plant died because of tap water mineral buildup. The leaves turned black from the tips down. I did not understand why. I was using tap water, which is perfectly fine for most plants. But not for carnivorous plants. They grow in bogs with mineral-free rainwater. The tap water minerals slowly poisoned the plant. That was a painful lesson.
My fourth plant died because of the terracotta pot and the radiator. The soil dried out too fast. I could not keep up with the watering demands. I was away at work all day. The plant sat in dry soil for hours every day. It never fully recovered from the daily stress. I finally bought a plastic pot. I moved it away from the heater. That was when things changed.
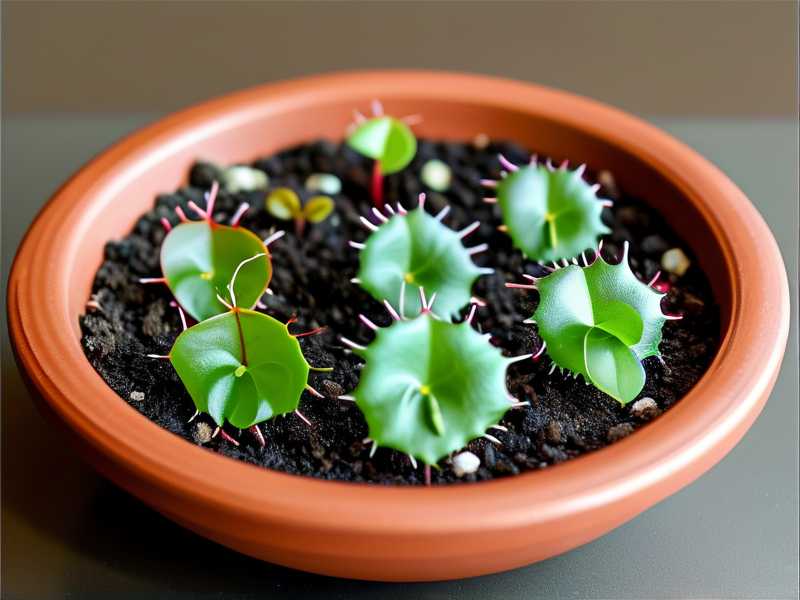
I am on my fifth plant now. She is thriving. The leaves are wide and covered in sparkling dew. The soil stays moist for days. I only check on her every other day. That is the secret. You need to remove the constant stress of drying out. Once your plant is not fighting for water, it can spend energy on growing. You will see new leaves within a week. You will see taller flower stalks if it is happy.
Why Humidity Trays Beat Watering More Often
Many growers think the solution to dry soil is more water. That is actually a mistake. Overwatering causes root rot. Root rot kills more sundews than dehydration. You need to reduce the rate of evaporation, not increase the water supply.
A humidity tray works by creating a boundary layer of moist air. The moist air sits around the pot. That slows the water loss from the soil. Evaporation requires dry air to accept the water vapor. If the air around the pot is already humid, evaporation slows down. Simple physics.
I measured the effect myself. I checked the soil moisture before implementing the humidity tray. In one day, the soil moisture dropped from 80 percent to 30 percent. After I added the tray and moss layer, the soil went from 80 percent to 55 percent in one day. That is a huge difference. The soil stayed above 50 percent moisture for three days. Before the tray, it fell below 30 percent in just over 20 hours.
You can buy a cheap humidity meter to test this yourself. It will clearly show the difference. I was skeptical at first. I thought the tray would not help much. Contact with the moist air is enough. I was wrong. The tray plus the moss layer creates a mini greenhouse effect. It works.
How to Repot Your Sundew Safely
Repotting a sundew can be stressful for the plant. I do not recommend repotting unless you absolutely need to. If your sundew is struggling with drying soil, a new pot and setup is worth the risk. Do it during the growing season, which is spring through summer. Do not repot when it is dormant in winter if you can avoid it.
Prepare your soil mix before you touch the plant. Use gloves if you want, but sundews are safe to handle. Gently remove the plant from its current pot. Shake off the old soil. Do not wash the roots. That will damage the delicate root hairs. Place the plant in the new pot. Fill around it with the fresh soil mix. Gently press the soil down. Do not pack it too tightly. The roots need oxygen.
Water the plant thoroughly with distilled water. Then place it on your humidity tray. Keep it in indirect light for a few days. The plant needs time to recover from the shock of repotting. I lost my fourth plant partly because I repotted it and immediately placed it in full sun. The stress was too much. The leaves burned. The plant wilted. I learned to give it a few days of lower light to recover.
The Top Layer Trick That Nobody Tells You
Let me share a specific tip that changed everything. I covered the soil surface with small pebbles. Wait, not pebbles. That trapped too much heat. I used a layer of sphagnum moss. But I also added a thin layer of silica sand on top of the moss. The sand reflects light away from the soil. It keeps the soil shaded and cool. This prevents the top layer from heating up under grow lights or direct sun.
The silica sand also acts as a physical barrier to fungus gnats. Those tiny flies love damp peat moss. They lay eggs in the soil. The eggs hatch into larvae that eat the roots. The sand prevents the adult gnats from reaching the soil to lay eggs. A one-eighth inch layer of silica sand is enough. It does not affect water absorption. The water still passes through easily. Your sundew stays hydrated and pest-free.
Seasonal Adjustments for Heated Rooms
Heated rooms change with the seasons. The heating demand varies from December to March. I adjust my watering and tray setup during these months. Early winter is the worst. The heating system works hardest. The air is driest. I keep my humidity tray filled to the top during deep winter. I check the tray every two days to refill it with distilled water.
In late winter, the days get longer. The sun gets a bit stronger. I move my sundew closer to the window for more light. But I have to be careful. The radiator below the window is still blasting. I keep the pot at least two feet from the radiator. The combination of longer daylight and steady humidity triggers a growth spurt. My sundew doubles in size during February and March.
During summer, I turn off the heating. The room becomes more humid naturally. I switch my watering to once a week. The tray might dry out faster because the air is warmer. But the relative humidity is higher in summer, even if the temperature is higher. It evens out. The plant enters its fastest growth phase. I also move it to a brighter windowsill. This produces more dew and more vibrant colors.
What the Experts Recommend
According to the RHS, carnivorous plants require high humidity and a consistently moist growing medium. The RHS advises using rainwater or distilled water. Tap water contains contaminants that harm these sensitive species. The RHS also recommends temperatures above 50 degrees Fahrenheit for most sundews. But they thrive best between 60 and 75 degrees. They also note that a widely used approach is to let the pot sit in a saucer of rainwater. That ensures the peat does not dry out.
Similarly, the AHS highlights the need for acid-loving plants. They suggest using peat moss blended with perlite. The AHS also stresses that these plants evolved in bogs. They never experience dry conditions. Mimicking that natural bog environment is essential for long-term success. Keeping a shallow tray of water beneath the pot replicates the bog water table. The soil pulls water up as needed, exactly like a natural bog.
The Critical Humidity Percentage You Should Know
You need to maintain at least 50 percent humidity around your sundew. In heated rooms, the humidity often drops below 30 percent. That is the danger zone. Your plant will dry out fast. A hygrometer is a cheap device to measure humidity. I keep mine right next to the pot. It costs about ten dollars.
If your room humidity drops below 40 percent, you need more than a tray. You might need a small humidifier. I bought a mini ultrasonic humidifier for my plant shelf. It runs for four hours a day. It keeps the local humidity at 60 percent. This is a game-changer for serious growers. But if you have the tray and moss layer, a humidifier is optional. The tray alone raises local humidity by about 20 percent.
I also mist my sundew occasionally. But I only mist the leaves, not the soil. The leaves absorb moisture through their surfaces. This helps the plant stay hydrated. However, misting alone will not save a dried-out plant. It is only a temporary relief. The soil moisture is the true foundation. Keep the soil happy first.
Common Questions About Sundew Care in Heated Rooms
Question One: Can I use tap water for my sundew if I let it sit overnight?
No. Letting tap water sit does not remove minerals. It only removes chlorine. The calcium and magnesium remain. These minerals accumulate in the soil. They will eventually kill the plant. Use distilled water or collected rainwater. If you cannot get those, use a reverse osmosis water filter. That is the only kind of purified water that works. I know it sounds fanatical. But sundews are picky about water. That is the truth.
Question Two: Should I put my sundew in a glass terrarium to trap humidity?
A terrarium can help. But you need to be careful. An enclosed glass container can overheat quickly. If it is near a window, the sun will turn it into an oven. The temperature rises above 90 degrees. That kills the plant fast. If you use a terrarium, keep the lid partially off. Put it in bright but indirect light. Monitor the temperature. If it feels too hot to touch, the plant is suffering. A humidity tray is safer than a full terrarium. It is simpler to manage.
Question Three: My sundew leaves have no dew. How do I fix that?
Lack of dew is a sign of stress. Usually, it means the plant is not getting enough light. Or the humidity is too low. First, check your light. Give it more direct sun. Add a grow light if needed. Second, increase humidity. Refill the tray. Add a moss layer if you have not yet. Third, allow the plant to catch insects. Feeding triggers dew production. You can feed it a small dried bloodworm rehydrated in distilled water. Place it on one leaf. The plant will sense the prey and start producing dew. It usually responds within a week.
My Final Routine for Frosty Mornings
Let me describe my typical day to show you how little effort this actually takes now. I wake up. I walk to my sundew. I peek at the humidity tray. Usually, there is still a quarter inch of water in the tray. The sphagnum moss on top looks slightly damp. The sundew leaves are covered in sticky droplets that catch the morning light. The soil surface is not cracked. It looks dark and moist.
I check the soil moisture with my finger. I push it about a quarter inch into the top layer. It feels cool and damp. It does not feel like a soaked sponge. It feels exactly like a wrung-out dishcloth. That is the perfect moisture level. I do not even need to water it today.
On the second day, I notice the tray is dry. I add about two cups of distilled water. That is it. The water seeps through the soil. The plant drinks. I walk away. I repeat this every other day. On weekends, I check more often, but it does not need me. It survives fine for three days without intervention. That reliability came from the setup, not from constant fussing over the plant.
The one-time setup cost me about fifteen dollars. I bought a plastic pot, a bag of perlite, a bag of sphagnum moss, and a shallow tray. That initial investment saved me from purchasing replacement plants every month. More importantly, it saved me the frustration of watching beautiful plants wither away. You can fix this in one afternoon. Your plant will thank you within a week. The dew will come back. The new leaves will unfold. Your home will feel more alive.
I cannot promise your heating bill will drop. But I can promise your sundew will stop begging for water. Give it the tray, the moss, the plastic pot, and the right light. Then step back. Let it grow. Enjoy the tiny ecosystem you have created in your dry, heated home.





