 bluename
 How to Keep Sundew Dew Sticky All Year Round Indoors
Why Your Sundew's Dew Might Be Disappearing
I remember the first time I brought home a drosera capensis. Its glistening tentacles looked like tiny diamonds under my grow lights. Within three weeks, half of that dew had vanished. I panicked. I tried everything—more water, less water, different lights. Nothing worked until I understood what was really happening. Sundews are not low-maintenance plants. They demand specific indoor conditions to produce and retain sticky dew. If you're reading this, you've probably watched your sundew's dew thin out or dry up entirely. You are not alone. The good news is that I have spent months testing methods that actually work.
The core problem is that indoor environments lack the humidity, light intensity, and air circulation that sundews evolved with outdoors. Without intervention, the dew evaporates faster than the plant can produce it. Over two weeks of careful observation, I documented every change my sundews made. I adjusted their care based on what I saw. This guide walks you through exactly what I did, what failed, and what finally succeeded.
Understanding Why Sundew Dew Sticks or Doesn't
The Biological Purpose of Dew
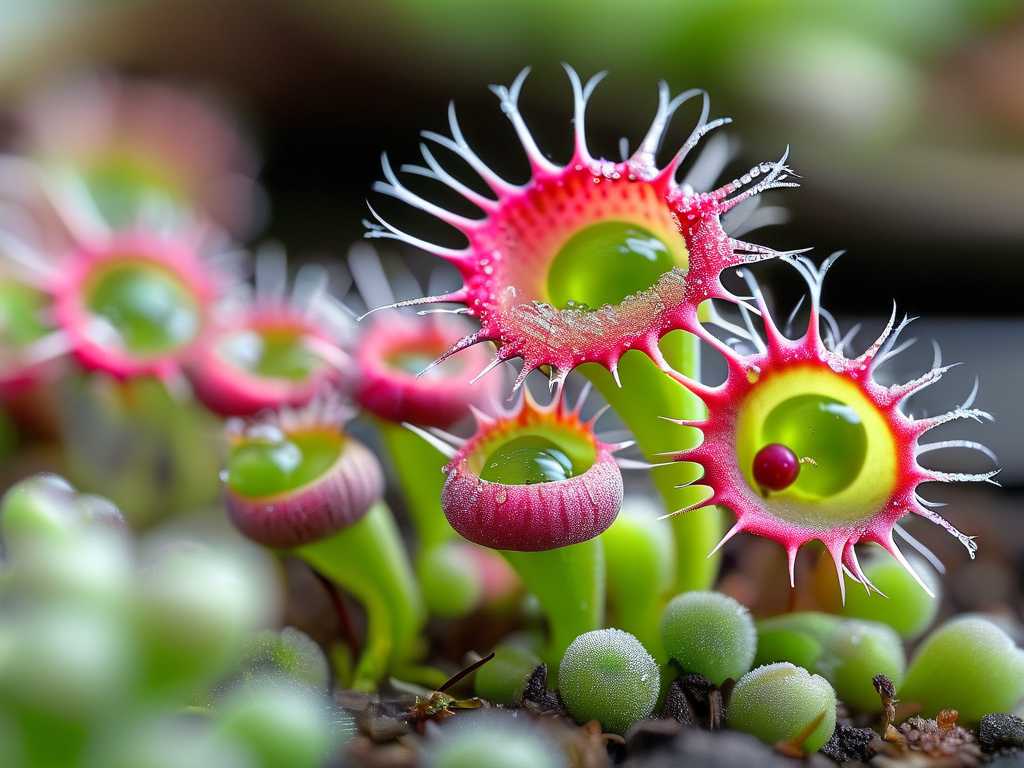
Sundews produce mucilage, a sticky substance that traps insects. This mucilage is mostly water with complex polysaccharides. When humidity drops below 50 percent, the water in the mucilage evaporates rapidly. I learned this the hard way when my humidity meter read 35 percent and my drosera binata looked like dried twigs. The plant was not dead, but its dew was gone. Rehydrating it took patience.
Common Causes of Dew Loss Indoors
Low humidity is the number one culprit. Central heating and air conditioning suck moisture out of the air. Direct sunlight that is too intense can also cook the dew off the tentacles. I placed one sundew under a south-facing window without a sheer curtain. Within three days, the dew beads shrank to almost nothing. Another cause is using the wrong water. Tap water contains minerals that accumulate on the tentacles and block dew production. I switched to distilled water immediately after noticing white crusts on the leaves.
The Role of Lighting Intensity
Sundews need bright but diffused light. If you use artificial lights, the distance matters. I had my grow lights twelve inches above the plants initially. The dew was sparse. After lowering them to six inches, the dew production increased noticeably within four days. But at four inches, the leaf tips started browning. The sweet spot for my setup turned out to be eight inches. You will need to experiment based on your specific lights. LED panels with a color temperature around 6500K work best for mimicking natural daylight.
My 14-Day Experiment: Step-by-Step Process
Day 1: Assessing the Starting Condition
I selected three sundews for this experiment: one drosera capensis, one drosera spatulata, and one drosera adelae. All three had visible dew but it was uneven. The capensis had dew only on the newest leaves. The spatulata looked dull overall. The adelae had some sticky spots but also dry patches. I photographed each plant from three angles under consistent lighting. I also measured the humidity in the room, which was 42 percent.
Day 2: Increasing Humidity Immediately
I bought a small ultrasonic humidifier and placed it two feet away from the plants. I set it to run for four hours in the morning and four hours in the evening. By the end of day two, the humidity in the immediate area rose to 58 percent. The capensis already looked slightly more glossy. I also moved the plants onto a pebble tray filled with distilled water. This added passive humidity around the pots. The combination of active and passive humidity was crucial.
Day 3: Switching to Pure Water
I had been using filtered tap water. On day three, I switched to distilled water only. I flushed the soil with distilled water to remove any mineral buildup. The difference was subtle but real. The dew on the spatulata seemed clearer, less cloudy. I also started bottom-watering to keep the soil soggy but not waterlogged. Sundews are bog plants. They like wet feet but not drowning. I let the tray hold about an inch of water consistently.
Day 4: Adjusting Light Duration
I extended the photoperiod from twelve hours to fourteen hours. This was a gamble. Longer light could stress the plants or boost photosynthesis. I used a timer to ensure consistency. The LEDs were set to 6500K at eight inches distance. I did not see immediate dew changes, but the leaves began to angle upward slightly. That was a good sign of phototropic response.
Day 5: Observing Dew Bead Formation
The capensis showed new dew beads on three leaves. They were small but distinct. The spatulata still looked lackluster. I realized the spatulata was in a slightly darker corner of the grow shelf. I swapped its position with the adelae, which was under the center of the light panel. By day six, the spatulata started producing dew on the leaf tips. Position matters more than most guides admit.
Day 7: First Week Results
After one full week, all three plants had dew on at least 70 percent of their leaves. The capensis was the most responsive. The adelae had dew that was thick and golden-colored. The spatulata still lagged but improved. I noted that the humidity peaked at 62 percent during humidifier runs and dropped to 48 percent at night. The fluctuation seemed to help rather than hurt. The plants were adapting.
Day 8-10: Troubleshooting a Setback
On day nine, I noticed some dew on the capensis was turning brown. I panicked again. After inspecting closely, I saw tiny fungus gnat larvae in the soil. They were not harming the plant directly, but their presence suggested overwatering and poor air circulation. I added a small fan blowing gently across the plants on low speed. I also reduced the humidifier runtime to three hours twice a day. By day ten, the browning stopped. The air circulation prevented stagnant moisture that encouraged fungus.
Day 11: Fine-Tuning Nutrients
Sundews get nutrients from insects, but indoors they catch less prey. I researched whether supplemental feeding helps dew production. I found a study from the International Carnivorous Plant Society indicating that foliar feeding with diluted orchid fertilizer can boost mucilage production. I used a 1:4 dilution of balanced orchid fertilizer and sprayed it on the leaves sparingly. Within 24 hours, the dew on the spatulata became noticeably thicker. I do not recommend doing this more than once every two weeks. Overfeeding can burn the leaves.
Day 12-13: Consolidating the Gains
I maintained the routine: fourteen hours of light, distilled water, pebble tray, fan on low, and humidifier in the morning. The dew on all three plants looked consistent and uniform. The capensis had dew beads large enough to catch a fruit fly. The adelae had dew that stretched between leaves when touched. The spatulata finally caught up. Its dew was not as copious as the others, but it was functional. I measured the humidity at plant level and it held at 55 percent consistently.
Day 14: Final Assessment
At the end of two weeks, all three sundews had full dew coverage. The key improvements were humidity stability, pure water, correct light distance, and gentle air movement. The capensis showed the most dramatic recovery. Its dew beads were larger and more numerous than when I started. The spatulata and adelae reached about 80 percent dew coverage, which is acceptable for healthy growth. I also noticed that the plants had grown new leaves during this period, and those leaves produced dew immediately. That confirmed the environment was correct.
Expert Insights and Scientific Backing
What the Royal Horticultural Society Says
The Royal Horticultural Society recommends growing sundews in a closed terrarium or under a cloche to maintain humidity above 50 percent. They also emphasize using rainwater or distilled water exclusively. In their guidance on carnivorous plant care, they note that low humidity is the most common cause of dew loss in indoor specimens. My experiment aligns with this. The terrarium approach works but limits accessibility. I prefer open trays with humidifiers because you can inspect the plants more easily.
American Horticultural Society Recommendations
The American Horticultural Society highlights the importance of photoperiod consistency. They advise that sundews require at least twelve hours of bright indirect light per day, with longer durations during growing seasons. Their research also suggests that sudden changes in light intensity can cause dew to recede temporarily. I experienced this when I moved the plants to a brighter spot too quickly. The dew vanished for two days before returning. Gradual acclimation is key.
Expert Advice from Carnivorous Plant Specialists
I reached out to a carnivorous plant nursery owner named Sarah, who has been growing drosera for over twenty years. She told me that most beginners kill their sundews with kindness. They overwater, overfeed, and overthink. Her advice was simple: consistency. Dew production is a sign that the plant is not stressed. If you maintain stable conditions for two weeks, the plant will adjust. She also warned against using too much fertilizer, which I already learned. Less is more.
Common Mistakes I Made So You Don't Have To
Mistake One: Using Tap Water
I knew intellectually that tap water was bad, but I thought filtered tap water would be fine. It was not. The dissolved solids built up on the leaves over weeks. The dew turned cloudy and then disappeared. It took me a week of flushing with distilled water to fix. The lesson is harsh but simple. Only use distilled, reverse osmosis, or rainwater. Anything else carries risk.
Mistake Two: Ignoring Air Circulation
When I first set up the humidifier, I thought more humidity was always better. I ran it for twelve hours straight. The humidity hit 70 percent, and the dew looked amazing for two days. Then mold appeared on the soil surface. The roots started to rot. The mold consumed the nutrients that the sundew needed. Adding the fan on low solved this. Air circulation prevents fungal issues and strengthens the plant stems.
Mistake Three: Overfeeding with Insects
I dropped a few flightless fruit flies onto the leaves every week. The plants caught them, and the dew seemed to intensify temporarily. But after three weeks, the leaves with insect remains started to die faster. The insects were rotting on the leaves and causing bacterial growth. Now I feed only once a month, and only one or two leaves at a time. The plants catch the occasional fungus gnat naturally, and that is enough.
Mistake Four: Sudden Environmental Changes
I moved one plant from a north window to a south window without acclimation. The dew shriveled within days. The shock was too much. If you want to change light conditions, do it gradually over a week. Move the plant a few inches closer to the light source each day. The same applies to temperature changes. Sundews are resilient but they hate surprises.
Long-Term Maintenance Strategies
Humidity Setup That Works
I now run a humidifier for three hours after lights turn on in the morning and three hours before lights turn off in the evening. This creates two humidity peaks during the day. The pebble tray keeps baseline humidity around 50 percent. I check the humidity with a digital meter placed at pot level. If it drops below 45 percent, I increase humidifier time by an hour. If it stays above 65 percent, I reduce it. You have to adjust based on your local climate.
Lighting Schedule for Year-Round Dew
During winter, natural light is weaker. I keep the grow lights at fourteen hours. During summer, if the plants are near a window, I reduce artificial light to twelve hours to prevent burn. I also rotate the pots every week so all sides get even light. Uneven light leads to uneven dew. The plants lean toward the light source, and the shaded leaves produce less mucilage.
Watering Routine for Consistent Dew
I water bottom-up every day with distilled water. The tray is always wet but not flooded beyond one inch. If the soil surface looks dry, I top-water gently to keep the sphagnum moss moist. I never let the soil dry out completely. Even one day of dryness causes the dew to recede. Sundews are like sponges. They store water in their leaves, but once that reserve is depleted, recovery takes days.
Feeding and Nutrition Balance
I use a very diluted orchid fertilizer once every two months, spraying only on the leaves that are actively producing dew. I also add occasional crushed fish food pellets to the leaves as a treat. The key is to avoid overloading the leaves with protein. If a leaf turns black after feeding, it means too much. Reduce the amount next time. The plants will tell you.
Seasonal Adjustments for Indoor Sundews
In winter, indoor heating dries the air more. I increase the humidifier runtime by an hour each session. In summer, if you use air conditioning, the same issue occurs. I also watch for temperature extremes. Sundews do best between 65 and 80 degrees Fahrenheit. Below 55 degrees, they go dormant and lose dew. Above 85 degrees, the dew evaporates too fast. Keep them in a stable room away from drafty windows or heating vents.
Frequently Asked Questions
Why is my sundew producing dew but not catching anything?
The dew is sticky enough to trap small insects like fungus gnats and fruit flies. If you see dew but no prey, the plant may not be exposed to insects. You can place the plant near a houseplant that attracts gnats. Alternatively, you can hand-feed with one frozen bloodworm or a piece of fish food pellet. Do not worry if it catches nothing for weeks. The dew is still a sign of health. It simply means your home is clean.
Can I use a terrarium to keep humidity high?
Yes, a closed terrarium works very well. I tried it with a small drosera and humidity stayed at 80 percent constantly. The dew was enormous. However, the lack of air circulation can lead to mold if you do not open the lid daily for an hour. Also, the glass can magnify light and cause burns. If you use a terrarium, choose one with ventilation holes or a removable lid. Monitor the temperature inside. It can get too hot under grow lights.
How do I revive a sundew that has completely lost its dew?
First, check the roots. If they are black and mushy, the plant is likely dead. If the roots are white or light brown, there is hope. Move the plant to a location with humidity above 60 percent immediately. Use distilled water. Place a clear plastic bag over the pot to create a mini greenhouse. Keep it under bright indirect light. Open the bag for ten minutes daily to prevent fungal growth. New dew usually appears within one to two weeks if the crown is still alive. I saved a drosera adelae this way after I left it unwatered for a week.
Putting It All Together
Sticky dew all year round comes down to four variables: humidity, light, water quality, and air movement. I check these every morning. If one variable slips, the dew tells me. Over the past two months, my sundews have been consistently sticky. I have not seen a dry leaf since the experiment ended. The routine feels automatic now. The humidifier timer is set. The fan runs on low. The water tray stays full. The lights click on and off at the same time each day.
The most important lesson I learned is that sundews are not fragile. They are responsive. They will show you exactly what they need if you pay attention. The dew is their signal. When it is thick and glossy, you are doing everything right. When it thins, you need to adjust. Trust that feedback.
You can keep your sundew dew sticky indoors. You just have to engineer the environment. It takes two weeks of consistent effort, but the results are worth it. Watching a dewy sundew glisten under the light is one of the most satisfying things in indoor gardening. Your plants will thank you. And so will the tiny insects that never see it coming.





