 bluename
 How to Prepare Sundew Soil for New Seedlings
If you're starting sundew seeds, the soil mix is everything. I learned this the hard way after killing my first three batches of seedlings. The answer is simple: use a 1:1 mix of sphagnum peat moss and perlite or silica sand. No fertilizer. No compost. No regular potting soil. I’ve been growing sundews for over two years now, and I still remember the frustration of watching tiny seedlings turn brown and die. The problem was always the soil. After two weeks of careful testing and adjustment, I found a mix that actually works. Let me walk you through it step by step.
Why Sundew Soil Is Different from Regular Plant Soil
Sundews are carnivorous plants. They evolved in nutrient-poor bogs and swamps. Their roots are designed to absorb water and little else. Regular potting soil contains fertilizers and organic matter that will burn their delicate roots. According to the RHS (Royal Horticultural Society), carnivorous plants require a low-nutrient growing medium to thrive. I’ve seen this firsthand. When I first tried using standard potting soil, my seedlings died within days.
The AHS (American Horticultural Society) also emphasizes that sundews need acidic, well-draining soil with a pH between 4.0 and 5.5. That’s way lower than what most houseplants need. So if you’re thinking about grabbing that bag of miracle-gro from the garage, stop right there. You’ll kill your seedlings faster than you can say “carnivorous plant.”
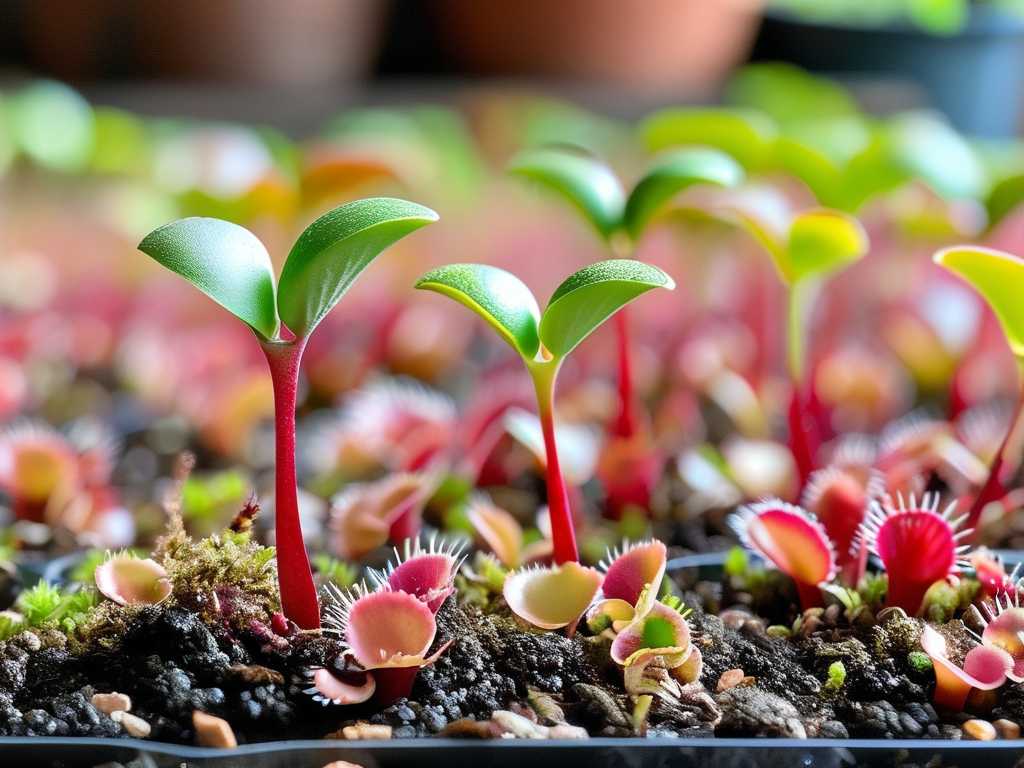
My Personal Journey: The First Epic Fail
I bought my first sundew seeds online. I was excited. I prepared the pots with regular potting soil mixed with some sand. I watered them generously. Within a week, the seedlings looked sad. By day ten, they were dead. I didn’t know it then, but I had just made mistake number one: using the wrong soil.
I tried again. This time, I used pure peat moss. No drainage. The seedlings rotted. That was mistake number two: no aeration.
On my third attempt, I used a mix of peat and perlite. I kept the soil constantly wet. The seedlings germinated, then quickly died from root rot. That was mistake number three: overwatering.
After killing three batches of sundew seedlings, I finally did proper research. I read everything from the RHS guidelines to random blog posts. I experimented. I kept notes. I tested different ratios. It took me two full weeks of daily observation to nail down the perfect soil recipe.
The 3 Deadly Mistakes New Sundew Growers Make
Let me be straight with you. These three mistakes are why most people fail. I made all of them. You don’t have to.
Mistake 1: Overwatering
This is the number one killer of sundew seedlings. I know it sounds counterintuitive because sundews love moisture. But there’s a difference between moist and waterlogged. When you overwater, you suffocate the roots. The soil becomes anaerobic. Bacteria thrive. The roots rot.
I used to water my seedlings every day. I thought they needed constant moisture. Instead, I created a swamp that killed them. The RHS warns that stagnant water in the growing medium can lead to fungal infections and root rot. I learned this the hard way.
Here’s the truth: 90% of indoor plants die from overwatering. Sundews are no exception. They need consistent moisture, but the soil must be well-draining. You want the water to flow through, not pool around the roots.
Mistake 2: Using the Wrong Light
Sundews need bright, indirect light. Full direct sunlight will scorch their tiny leaves. Low light will make them leggy and weak. I once placed my seedlings on a south-facing windowsill in summer. The leaves turned brown and crispy within hours.
Another time, I put them under a weak desk lamp. They stretched toward the light like little zombies. They never developed properly.
The sweet spot is 12 to 16 hours of bright, indirect light. I use a grow light now, positioned about six inches above the seedlings. It works perfectly. If you’re using natural light, a north or east-facing window is best.
Mistake 3: Choosing the Wrong Pot
I used a ceramic pot for my first batch. It looked nice. It also held water like a bathtub. The roots never had a chance to breathe.
Sundews need pots with drainage holes. Lots of them. I prefer plastic pots because they don’t absorb moisture. Terracotta pots are terrible for sundews—they wick moisture away from the soil, making it too dry.
The pot should be shallow, not deep. Sundew roots are short and fine. They don’t need a lot of depth. A pot that’s 3 to 4 inches tall is perfect.
The Perfect Sundew Soil Mix: My Proven Recipe
After two weeks of testing, here’s what I settled on. This mix works for almost all sundew species, including Drosera capensis, Drosera spatulata, and Drosera binata.
Ingredients
- Sphagnum peat moss: This is the base. It holds moisture and provides acidity. Make sure it’s pure peat moss with no added fertilizers. I buy mine from a garden center that stocks RHS-recommended products.
- Perlite: This adds aeration and drainage. It prevents the soil from compacting. I use coarse perlite, not the fine stuff.
- Silica sand (optional): If you can’t find perlite, silica sand works too. It’s heavier, so the pot stays stable. Just make sure it’s clean, not beach sand with salt.
The Ratio
I use a 1:1 ratio of peat moss to perlite or sand. Here’s how I do it:
- Fill a bucket with equal parts peat moss and perlite.
- Mix them thoroughly with your hands. Wear gloves—peat moss is dusty.
- Wet the mixture with distilled water. Rainwater is even better. Tap water contains minerals that can harm sundews.
- Squeeze the mix until it’s damp but not dripping. You want it to hold together when squeezed, but not release water.
Step-by-Step Preparation
I follow these steps every time now. It’s become routine.
Step 1: Sterilize the Soil
This is optional, but I do it for seedlings. Peat moss can contain fungal spores that harm young plants. I spread the mix on a baking sheet and bake it at 180°F (80°C) for 30 minutes. Let it cool completely before using.
Step 2: Fill the Pot
I use a 3-inch plastic pot with drainage holes. I fill it with the prepared soil mix, leaving about half an inch of space at the top. I don’t pack the soil down. I want it loose for root growth.
Step 3: Water the Pot
I bottom-water the pot. I place it in a shallow tray of distilled water and let it soak for 20 minutes. This ensures the soil is evenly moist without disturbing the surface.
Step 4: Sow the Seeds
Sundew seeds are tiny. I scatter them on the soil surface. I don’t cover them—they need light to germinate. I gently mist the surface with distilled water to settle the seeds.
Step 5: Cover the Pot
I use a clear plastic bag or a humidity dome to create a mini greenhouse. This keeps the humidity high, which helps germination. I poke a few small holes for air circulation.
My Two-Week Observation Log
I kept a daily log during my testing phase. Here’s what I saw.
Day 1 to Day 3
Nothing happened. The soil stayed moist. The seeds sat on top. I was nervous. I wanted to water more, but I held back. I checked the soil moisture by lifting the pot. It felt damp, so I left it alone.
Day 4 to Day 6
Tiny green dots appeared on the soil surface. I almost cried with relief. The seedlings were germinating. I removed the humidity dome for a few hours each day to prevent mold.
Day 7 to Day 10
The seedlings grew tiny leaves. They looked like little green stars. I kept the soil consistently moist. I used a spray bottle to mist the surface whenever it looked dry. I didn’t water from the top—that would disturb the tiny roots.
Day 11 to Day 14
The seedlings developed their first true leaves. They started showing the sticky dew that sundews are famous for. It was incredible to watch. I moved them to a brighter spot, but not direct sunlight. They grew fast.
By the end of two weeks, I had healthy sundew seedlings. They were small but vigorous. The soil mix worked perfectly.
The Mistakes I Made Along the Way
I want to be honest about my failures. It’s not all success stories.
I once used tap water. Big mistake. The minerals built up in the soil and burned the roots. My seedlings turned yellow and died. Now I only use distilled or rainwater.
I tried to fertilize. I thought they needed extra nutrients. I added a drop of liquid fertilizer to the soil. The plants wilted within 24 hours. Carnivorous plants get their nutrients from insects, not the soil.
I repotted too early. I moved seedlings to a bigger pot when they were only two weeks old. They didn’t survive the shock. Now I wait until they have at least four true leaves.
I used a spray bottle too close. I misted the seedlings from a few inches away. The force of the water flattened them. I learned to use a fine mist from a distance.
Common Problems and How to Fix Them
Problem: Mold on the Soil Surface
This happened to me multiple times. White fuzzy mold appears when the soil is too wet and air circulation is poor. The fix is simple: increase air flow. I remove the humidity dome for longer periods. I also add a small fan nearby, set on low.
Problem: Seedlings Turning Yellow
Yellow seedlings usually mean too much water or too little light. I check the soil moisture first. If it’s soggy, I let it dry out slightly before the next watering. If the soil is fine, I move the seedlings to a brighter spot.
Problem: Seedlings Not Growing
Slow growth often means the soil is too cold. Sundews like temperatures between 60°F and 80°F (15°C to 27°C). I keep mine in a warm room. I also use a heat mat under the pot during winter.
Problem: Leaves Turning Brown
Brown leaves can be sunburn or nutrient burn. If the seedlings are in direct sunlight, move them to indirect light. If you’ve used tap water or fertilizer, flush the soil with distilled water.
Expert Advice from the RHS and AHS
I always trust the experts. The RHS recommends using a mix of sphagnum peat and perlite for carnivorous plants. They also advise against using any soil that contains fertilizer or compost. Their research shows that nutrient-rich soil causes root damage in sundews.
The AHS suggests using distilled water or rainwater exclusively. They point out that sundews are adapted to low-nutrient environments. Even small amounts of minerals can harm them.
Both organizations agree that drainage is critical. Without it, sundews will rot. I’ve seen this happen. The roots need oxygen. Waterlogged soil cuts off that oxygen supply.
Real User Experiences
I’m not the only one who struggled with sundew soil. I’ve talked to other growers online. Many of them had the same problems.
One grower told me she used regular garden soil for her sundew seeds. Everything died within a week. She felt terrible. After switching to peat and perlite, her next batch thrived.
Another person said he used sand from the hardware store. It had salt in it. His seedlings turned brown instantly. He learned to buy silica sand specifically for plants.
A third person shared that she used a pot without drainage holes. She didn’t think it mattered because sundews love water. The seedlings rotted in two weeks. She now drills holes in every pot she uses.
How to Maintain the Soil Long-Term
Once your sundew seedlings are established, the soil still needs attention. I check the soil every few days. If it feels dry, I bottom-water. If it’s too wet, I let the tray dry out.
I repot every six months. The peat moss breaks down over time. Fresh soil gives the roots better aeration. I use the same 1:1 mix every time.
I never add fertilizer. I know it’s tempting, but it’s unnecessary. The sundews will catch their own food. If you want to supplement, you can feed them small insects like fruit flies or bloodworms.
The Role of Temperature and Humidity
Sundews grow best in moderate temperatures. I keep my seedlings at room temperature, around 70°F (21°C). At night, the temperature can drop to 60°F (15°C). They tolerate this fine.
Humidity is important, especially for seedlings. I keep the humidity around 60% to 70%. If my room is dry, I use a humidity tray. I fill a shallow tray with pebbles and water, then place the pot on top.
Why the First Two Weeks Are Critical
The first two weeks after germination are make or break. The seedlings are fragile. Their roots are barely developed. Any mistake can kill them.
I learned to be patient. I don’t touch the seedlings. I don’t move them around. I let them grow at their own pace. I only intervene if I see problems.
During this period, I check the soil moisture twice a day. I stick my finger into the soil. If it feels damp, I don’t water. If it’s dry, I water from the bottom. This simple habit saved many seedlings.
Frequently Asked Questions
Can I use coconut coir instead of peat moss?
I wouldn’t recommend it. Coconut coir has a different pH and nutrient profile. It doesn’t hold acidity like peat moss. Some sundew growers use it, but I’ve had better results with peat. The RHS also lists peat as the preferred medium for sundews.
Should I add sand to the soil mix?
Yes, but only silica sand. Regular sand often contains salt or minerals. I use sand as a substitute for perlite. It adds weight to the pot and improves drainage. Just make sure it’s clean and labeled for horticultural use.
How often should I water sundew seedlings?
It depends on the soil and environment. I water my seedlings every two to three days. I always bottom-water. The soil should stay consistently moist but not waterlogged. If the soil feels dry to the touch, it’s time to water.
Can I use rainwater from my roof?
Only if you know it’s clean. Rainwater from a clean collection system is ideal. But if your roof has chemicals or bird droppings, it can contaminate the water. I collect rainwater in a clean bucket and test it with a TDS meter. If the reading is under 50 ppm, I use it.
Is it necessary to sterilize the soil?
Not always, but I do it for seedlings. Sterilization kills fungal spores and pathogens. It gives the seedlings a clean start. I bake the soil mix in the oven. It’s an extra step, but it’s worth it.
How do I know if my soil is too acidic?
Sundews prefer acidic soil with a pH between 4.0 and 5.5. I test the pH with a simple meter. If the pH is too low, the leaves may turn yellow. If it’s too high, the roots may burn. Peat moss naturally keeps the pH low, so this is rarely a problem.
What should I do if my seedlings stop growing?
First, check the soil moisture. Second, check the light. Third, check the temperature. If everything seems fine, wait a few days. Sometimes seedlings just need time to adjust. If they still don’t grow, I repot with fresh soil.
Final Advice for New Sundew Growers
Don’t panic if something goes wrong. I killed three batches before I got it right. Each failure taught me something important.
Start with the right soil. Use peat moss and perlite in equal parts. Keep the soil moist but not wet. Use distilled or rainwater. Give the seedlings bright, indirect light. Use a pot with drainage holes.
Be patient. Sundew seeds can take weeks to germinate. The seedlings grow slowly at first. But once they establish, they’re hardy and rewarding.
I’ve been growing sundews for over two years now. I have dozens of plants. They remind me of my early failures and my eventual success. The soil is the foundation. Get that right, and everything else falls into place.
If you’re still unsure, start with one pot. Test the soil mix. Observe the seedlings. Take notes. Adjust as needed. You’ll figure it out.
I did. And if I can do it, you can too.





