 bluename
 How to Prepare Sundew Soil for Leaf Cuttings
Here is the direct answer: Mix one part peat moss with one part perlite. That is it. Do not add fertilizer. Do not use potting soil. I learned this the hard way after killing three trays of cuttings. The correct sundew soil for leaf cuttings must be nutrient-free and acidic. Let me walk you through the exact process I use now.
I am a plant hobbyist. I have been growing carnivorous plants for about five years. I started with Venus flytraps. Then I moved to sundews. Honestly, I found sundews easier once I figured out the soil. But the soil part tripped me up badly at first. I remember my first attempt at leaf cuttings. I felt confident. I used regular potting mix mixed with sand. Everything died within a week. That was a rough lesson. Now I stick to a simple, reliable recipe.
My Complete Sundew Soil Recipe for Leaf Cuttings
I use this mix for all my Drosera leaf cuttings. It works for temperate species and tropical ones. The key is mimicking their natural bog environment.
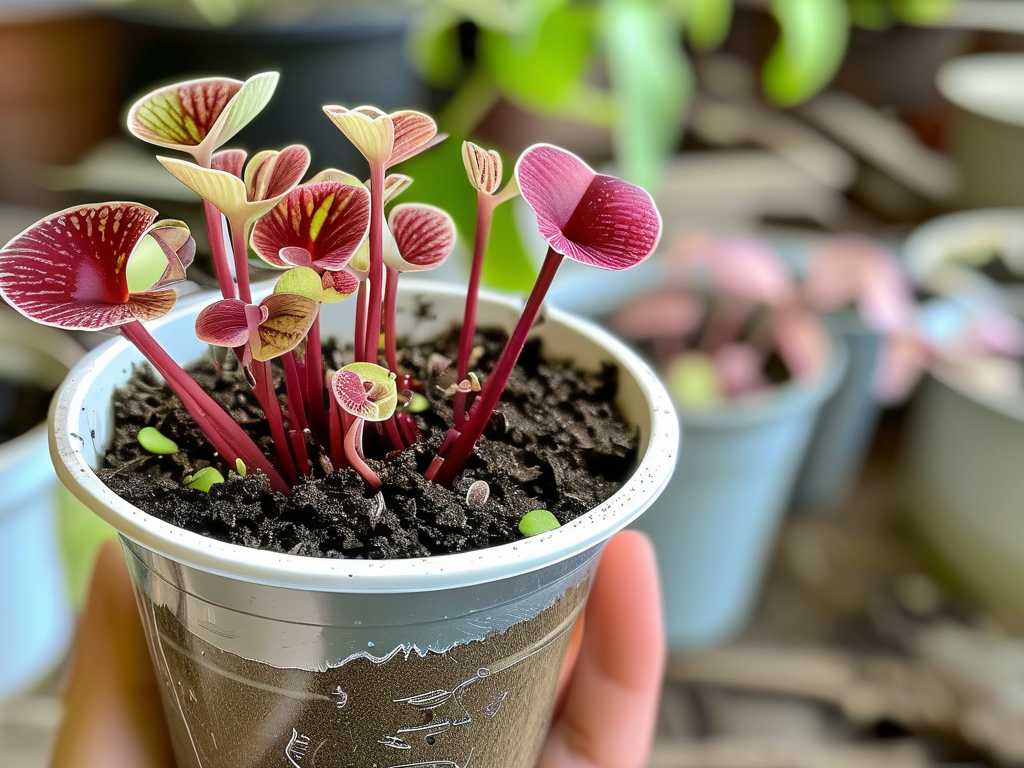
Ingredients I Use
- Sphagnum peat moss: I buy Canadian sphagnum peat moss. No added fertilizers. No wetting agents. Check the bag carefully. Some brands add nutrients for regular plants. That kills sundews.
- Perlite: Horticultural perlite works best. It improves drainage and aeration. I use medium grade. Not too fine. Not too chunky.
- Distilled water: This is non-negotiable. Tap water contains minerals. Sundews are sensitive to dissolved solids. I use distilled water for everything.
The Mixing Process
I started using a 1:1 ratio by volume. I take one cup of peat moss. I take one cup of perlite. I mix them together in a large bowl. I wear gloves because peat moss is dusty. I also wear a mask sometimes. The dust can irritate lungs.
I wet the mix with distilled water before putting it in pots. Dry peat moss is hydrophobic. It repels water. If you put dry peat in a pot and water it, water runs through without soaking in. So I add water slowly while mixing. I squeeze the mix. It should hold together when squeezed but not drip water. Think of a wrung-out sponge. That is the perfect moisture level.
Then I fill my pots or trays. I do not pack the soil down. I gently press it. Loose soil allows roots to spread easily.
Observing Results Over Two Weeks
I want to share what I saw during a recent propagation session. I took leaf cuttings from my Drosera capensis. I prepared the soil exactly as described. I placed the cuttings on the surface. I did not bury them. I covered the tray with a clear plastic dome to maintain humidity.
Day 1 to Day 3: Nothing much happened. The soil stayed moist. The cuttings looked fresh. I kept the tray in bright indirect light. No direct sun yet.
Day 4 to Day 7: I noticed tiny bumps forming on the leaf edges. These are the primordia. They will become new plants. The soil looked good. No mold. No algae. I checked moisture daily. I added a little distilled water when the top felt slightly dry.
Day 8 to Day 10: Small green specks appeared. Tiny plantlets. I got excited. I saw roots starting to grow into the perlite. The perlite really helps with air circulation around the roots.
Day 11 to Day 14: The plantlets were clearly visible. Some had two or three tiny leaves. I removed the dome for a few hours each day to acclimate them. The soil remained consistently moist but not wet. I did not waterlog it.
I compared this to my earlier attempts. The difference was night and day. The proper soil made propagation almost effortless.
The 3 Critical Mistakes Beginners Make with Sundew Soil
I made all of these mistakes. I want you to avoid them.
Mistake 1: Overwatering
This is the biggest killer. 90% of indoor plants die from overwatering. Sundews are especially sensitive. Their roots need oxygen. Soggy soil suffocates roots. Root rot sets in quickly. I used to water my cuttings every day. I thought they needed constant moisture. Wrong. The soil should be damp, not waterlogged. I water only when the top layer feels slightly dry. For me, that is every 2 to 3 days depending on humidity.
Mistake 2: Wrong Light Placement
I placed my first batch of cuttings in direct sunlight. I thought more light meant faster growth. The leaves fried. The soil dried out in hours. Leaf cuttings need bright but indirect light. I use a north-facing windowsill. Alternatively, I use fluorescent lights placed about 6 inches away. Too much light stresses the cuttings. Too little light causes weak growth.
Mistake 3: Using the Wrong Pot
I used a clay pot once. Bad idea. Clay pots wick moisture away from the soil. Sundew soil needs to stay consistently moist. Clay pots cause the soil to dry out unevenly. I also used a pot without drainage holes. Water pooled at the bottom. Root rot happened fast. Now I use plastic pots with drainage holes. Plastic retains moisture better. I use shallow trays. Sundew roots are shallow. A pot that is 3 to 4 inches deep works perfectly.
Why Peat Moss and Perlite Work So Well
The RHS explains that carnivorous plants evolved in nutrient-poor, acidic bogs. Peat moss mimics this environment. It is acidic with a pH around 4.0 to 5.0. Sundews love that. Peat moss holds moisture well. It does not break down quickly. It stays airy.
Perlite adds structure. It prevents the peat from compacting. Compacted peat suffocates roots. Perlite creates tiny air pockets. Roots grow through these pockets easily. I notice healthier root systems with perlite.
The AHS also emphasizes using low-nutrient media for carnivorous plants. Fertilizers burn their roots. Standard potting soil contains fertilizer. That is why it fails.
Alternative Soil Options I Tried
I experimented with different mixes. Here is what I found.
Sand Instead of Perlite
I tried using coarse silica sand instead of perlite. It worked okay. But sand is heavier. It compacts more over time. I prefer perlite for root aeration. Sand can also contain minerals. I had to wash it thoroughly. Too much trouble.
Coco Coir
I read online that coco coir works. I tried it. Not my favorite. Coco coir retains too much water. It stays wet for days. My cuttings got moldy. Some rotted. I stick with peat moss now.
Long-Fibered Sphagnum Moss
This works great for many species. I use it for rare sundews like Drosera regia. But for common sundews, peat-perlite is simpler. Long-fibered sphagnum holds less water. You must water more often. I find peat-perlite easier to manage.
Step-by-Step Guide: Preparing Sundew Soil for Leaf Cuttings
Let me describe my routine from start to finish.
- Gather materials: peat moss, perlite, distilled water, plastic pots, a tray, a clear dome or plastic bag.
- Put on gloves. I use disposable nitrile gloves.
- Mix one part peat moss with one part perlite in a bowl. I use a measuring cup for consistency.
- Add distilled water slowly while mixing. Squeeze the mix. It should hold its shape.
- Fill plastic pots. Fill to about half an inch from the rim. Do not pack tightly.
- Place soil in a tray. Add distilled water to the tray. Let the soil wick water upward. This prevents disturbing the surface.
- Take leaf cuttings from a healthy sundew. Use clean scissors or tweezers. Cut a leaf near the base.
- Lay cuttings on the soil surface. Press gently. Do not bury them.
- Cover with a dome or plastic bag. This keeps humidity high.
- Place under bright indirect light. No direct sunlight.
- Check moisture daily. Add water to the tray when the top feels dry.
- Wait two to three weeks. Tiny plantlets will appear.
- Gradually remove the dome over a few days to harden off the new plants.
Troubleshooting Common Problems
I ran into issues over the years. Here are solutions.
Mold on Soil Surface
Mold appears when conditions are too wet and air circulation is poor. I solved this by opening the dome for an hour daily. I also removed any dead leaves. If mold persists, I sprinkle cinnamon on the soil. Cinnamon is a natural fungicide. It works.
Yellowing Plantlets
Yellow leaves mean too much light or nutrient deficiency. Since we use nutrient-free soil, the problem is usually light. I moved my tray to a slightly shadier spot. The plantlets turned green again within days.
Stagnant Growth
Cuttings that do not grow need more warmth. I use a heat mat set to 75°F (24°C). This speeds up metabolism. I also check that the soil is not too cold. Cold soil slows everything down.
Long-Term Care After Rooting
Once plantlets have three to four leaves, I transplant them. I use the same soil mix. I put each plant in its own small pot. I place the pots in a tray with distilled water. Sundews like their feet wet. Literally. I keep the tray water level at about quarter to half an inch.
I fertilize lightly. I use MaxSea fertilizer diluted to quarter strength. I spray the leaves. I never fertilize the soil. The roots absorb nothing from soil. The RHS confirms this. Sundews get nutrients from trapping insects. But indoor plants need supplemental feeding.
I also repot every year. Peat moss breaks down over time. Fresh soil keeps roots healthy.
Why Soil Matters More Than You Think
I killed my first ten sundews. Not exaggerating. I thought any soil worked. I used potting soil from the garden center. I added sand. I added vermiculite. Everything died. I almost quit growing carnivorous plants.
Then I joined an online forum. Someone told me to use peat and perlite only. I tried it. My next batch of sundews thrived. Leaf cuttings rooted in two weeks. I felt stupid for not listening earlier.
The soil is the foundation. Get it wrong, and nothing else matters. Get it right, and sundews grow like weeds.
Sundew Species That Root Easily with This Soil
Not all sundews are the same. But many root well with this mix.
- Drosera capensis: Very forgiving. Roots from any leaf. I propagate this species constantly.
- Drosera spatulata: Easy. Small leaves form plantlets quickly.
- Drosera adelae: Works well. Keeps soil extra moist for this species.
- Drosera binata: Roots fine. Needs slightly more light after rooting.
- Drosera aliciae: Perfect. Grows like a champ.
For tropical sundews, I keep the soil warmer. Temperate sundews tolerate cooler conditions. But the soil recipe remains the same.
Frequently Asked Questions
Can I use regular potting soil for sundew leaf cuttings?
No. Regular potting soil contains fertilizers and organic matter that burn sundew roots. It also has a higher pH. Sundews need acidic, nutrient-free soil. Use only peat moss and perlite.
How often should I water sundew leaf cuttings?
Water when the top of the soil feels slightly dry. For me, that is every 2 to 3 days. Use distilled water only. Keep the soil moist but not waterlogged. Overwatering causes rot.
Do I need to fertilize sundew leaf cuttings?
No. Leaf cuttings get energy from the parent leaf. They do not need fertilizer. After plantlets form true leaves, you can spray them with diluted fertilizer. But during rooting, skip fertilizer entirely.
Final Thoughts from My Experience
Preparing sundew soil for leaf cuttings is simple. I promise. Stick with peat moss and perlite. Use distilled water. Avoid fertilizers. Give bright indirect light. That is the secret.
I wasted months and money on wrong mixes. I wish someone had told me this clearly. Now I tell everyone. Soil matters more than anything else. Do not overcomplicate it.
Start with a small batch. Observe the results over two weeks. You will see tiny plantlets form. That joy is worth the effort. Good luck with your sundew propagation journey. I am confident you will succeed the first time with the right soil.





