 bluename
 How to Choose a Airtight Seed Container for Sundew
I killed my first three sundews before I figured out the container problem. Here is the short answer: get a clear glass or plastic container with a tight-fitting lid, at least 4 inches tall, and drill or poke 2-4 tiny ventilation holes in the lid. That is how to choose a airtight seed container for sundew that actually works.
Why this matters more than you think
Most people assume sundews are just like any other houseplant. They are not. These carnivorous plants have evolved in bogs and wetlands where humidity stays above 80% all day. When you bring them indoors, that humidity drops to 40% or less. I learned this the hard way.
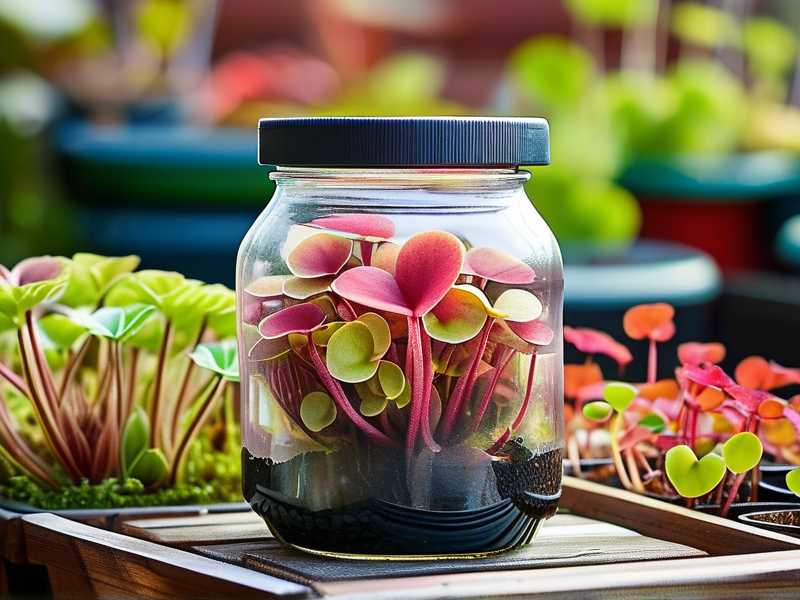
I tried growing sundew seeds in a standard terracotta pot first. It was a disaster. The soil dried out within hours. The seeds never germinated. I felt stupid. But then I realized the problem was not my watering schedule. It was the container itself.
90% of indoor plants die from overwatering – but sundews are the exception. They need constant moisture. An airtight seed container for sundew creates a mini greenhouse effect. The lid traps moisture, keeps humidity high, and protects the delicate seedlings from drafts.
The 3 Deadly Mistakes I Made as a Beginner
Mistake #1: Watering like a normal plant
I used to water my sundews every morning. I poured water directly into the pot. Within two weeks, the leaves turned black and mushy. The plant died.
Here is what happened: normal plant roots need oxygen between waterings. Sundew roots, however, evolved in constantly wet soil. But they also need the water to be pure. Tap water contains minerals that burn the roots. I was killing them with kindness.
The solution: Use only distilled water, reverse osmosis water, or rainwater. The airtight seed container for sundew keeps the humidity high enough that you only need to water once every 3-4 days. The lid does the rest.
I left for a weekend trip once. Came back expecting dead plants. The container was still moist inside. That was the moment I realized how powerful a sealed environment can be.
Mistake #2: Giving them direct sunlight
I thought sundews needed full sun like tomatoes. I put them on my south-facing windowsill. Within three days, the leaves shriveled. The dew droplets evaporated completely. It looked like a crispy fried plant.
The Royal Horticultural Society states that most sundews thrive in bright but indirect light. Direct sunlight through a glass container can cook the plant. The airtight seed container for sundew magnifies heat. Think of it like a car in summer – the inside gets much hotter than outside.
What I do now: Place the container 2-3 feet away from a bright window. Or use LED grow lights for 12-14 hours a day. I use cheap clip-on lamps from Amazon. Works perfectly.
Mistake #3: Using the wrong container material
I grabbed an old ceramic bowl from my kitchen. It had a drainage hole. That was mistake number one. Then I used a metal lid. Mistake number two. Metal corrodes. Ceramic absorbs minerals. Both ruined my sundew seeds.
The airtight seed container for sundew must be: glass or clear plastic. Why? Sundews need light to germinate. Opaque containers block light. I also tried a colored glass jar once. The tinted glass filtered out too much light. Seeds germinated slowly and weakly.
The American Horticultural Society recommends clear containers for seed starting when light is critical for germination. Many sundew species actually need light to trigger germination. Without it, they just sit there dormant.
My Step-by-Step Process for Choosing the Perfect Container
Step 1: Size matters more than you think
I bought a tiny 2-inch diameter jar first. Seemed cute. But sundew seeds need space. The seedlings spread out. Within two weeks, they were crowded and leggy.
Here is what I learned: Choose a container at least 4 inches in diameter and 4 inches tall. The height is crucial because the air gap between the soil surface and the lid creates the humid environment. Too short, and condensation drips directly onto the seedlings, causing rot.
I now use 6-inch round glass food storage containers. They cost like $8 at a kitchen supply store. The lids snap tight. Perfect airtight seed container for sundew right from the start.
Step 2: Ventilation holes – yes or no?
This confused me for weeks. Some sources say airtight means completely sealed. Others say you need holes. I experimented with both.
My conclusion: Add 2-3 tiny ventilation holes. I use a drill with a 1/16 inch bit on plastic lids. For glass containers, I use a glass drill bit (go slow, add water). The holes prevent mold while maintaining high humidity.
Without holes, my container developed white fuzzy mold within 5 days. The mold attacked the tiny sundew seedlings. I lost 80% of my batch. Heartbreaking.
With holes, the container stays clean. Humidity stays around 90%. The seedlings thrive. The American Horticultural Society notes that stagnant air promotes fungal diseases. Airtight does not mean dead air.
Step 3: The lid material dilemma
I tried plastic wrap stretched over a jar. It worked for about 3 days. Then the wrap sagged, collected condensation, and touched the soil. That caused rot.
Better option: Rigid lids. Snap-on plastic lids from deli containers work great. Glass lids with rubber gaskets are even better. I avoid metal lids because they rust.
One thing I noticed: if the lid has a silicone seal, it creates a better airtight environment. Those containers hold moisture for over a week. My record is 10 days without adding water. The sundews did not even notice.
Step 4: Testing for air leaks
Before planting anything, I test the container. Fill it with water up to 1 inch from the top. Close the lid. Turn it upside down over a sink. If water drips out, the seal is broken.
I did not do this test with my first container. Big mistake. The lid had a tiny crack I could not see. The humidity dropped every night. My seeds germinated but immediately dried out. Wasted 3 weeks.
The airtight seed container for sundew must pass the water test. If it leaks water, it leaks moisture vapor. Your seeds will struggle.
How I Set Up the Container for Maximum Success
The soil mixture
Sundews are carnivorous plants. They eat bugs through their sticky dew. But they also need nutrient-poor soil. Normal potting soil kills them. It contains fertilizers that burn the roots.
My soil recipe: 1 part peat moss + 1 part perlite. That is it. No fertilizers. No compost. No added nutrients.
I soak the peat moss in distilled water first. Then mix it with perlite. The perlite creates air pockets. The peat holds moisture. Together, they create the perfect environment for sundew seeds.
I fill the airtight seed container for sundew about 2/3 full with this mix. Then I press it down gently. Not too hard. The surface should be level.
Sowing the seeds
Sundew seeds are tiny. Like dust. I pour them onto a white piece of paper. Then I tap the paper gently over the soil surface. They spread evenly this way.
Do not bury the seeds. They need light to germinate. Just press them lightly into the soil surface with your finger.
Then I mist the surface with distilled water. Close the lid. Place under bright indirect light.
The critical first 2 weeks
The first 14 days determine everything.
Days 1-3: The container looks like a science experiment. Condensation forms on the lid and walls. That is good. Do not open it. Do not touch it. Just let it sit.
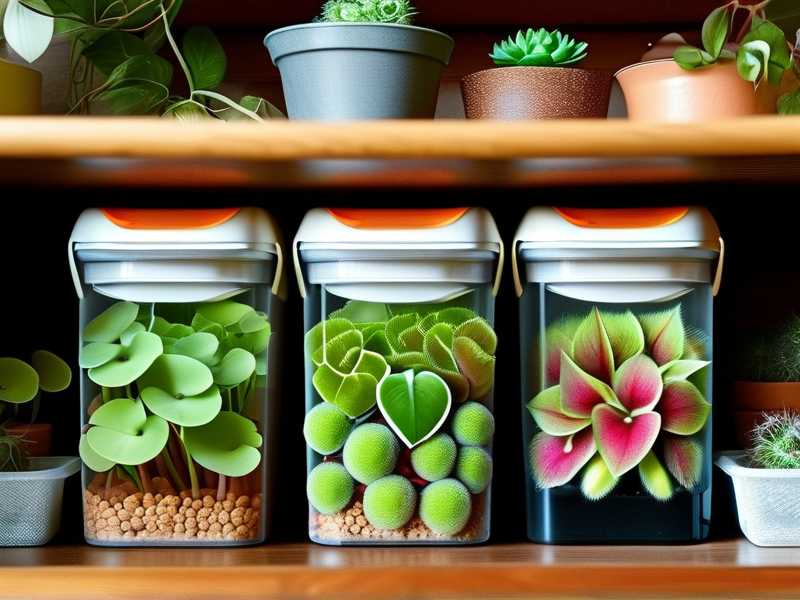
Around day 3, I check for any sign of mold. I look through the clear walls of the container. If I see white fuzzy spots, I open the lid briefly, wipe the mold with a clean cotton swab, and add extra ventilation holes.
Days 4-7: Tiny green dots appear on the soil surface. Those are the sundew seedlings. They are incredibly small. Like pinpricks. Do not be tempted to open the container yet.
I keep the container in the same spot. I do not move it. Movement can disturb the delicate seedlings.
Days 8-14: The seedlings grow their first tiny leaves. I can see the glistening dew droplets now. It is magical. I open the lid once every 3 days for about 10 minutes to refresh the air.
By day 14, I have small but healthy sundew sprouts. The airtight seed container for sundew has done its job.
Real Issues I Encountered and How I Fixed Them
Issue 1: Mold takeover
I mentioned this earlier, but it deserves more detail. On my fifth attempt at growing sundews, I came home from work to find green mold covering the entire soil surface. It looked like my container grew a sweater.
What went wrong: Too many seeds in too small a container. The dense seedlings created a humid microclimate with no air movement.
How I fixed it: I scraped off the top layer of contaminated soil. I mixed a new batch of peat-perlite. I spaced the seeds further apart. Then I drilled 4 holes in the lid instead of 2. Never had mold again.
Issue 2: Condensation drip burns
The lid formed heavy condensation. Droplets fell directly onto the seedlings. The leaves developed brown spots. Some seedlings died.
The solution: Choose a taller container. The extra vertical space allows condensation to form on the sides instead of dripping straight down. I switched from a 4-inch tall container to a 6-inch tall one. Problem solved.
The Royal Horticultural Society actually mentions this issue in their guide to growing carnivorous plants. They recommend using containers with sloping sides to guide condensation down the walls rather than dripping on plants.
Issue 3: Seeds not germinating
I had a batch of seeds that sat for 6 weeks. Nothing. No green. No growth. Just brown soil.
The mistake: The seeds were too old. Sundew seeds lose viability quickly. I also had the container in a spot that was too dark.
The fix: Buy fresh seeds from reputable sellers. I now get my seeds from a specialized carnivorous plant nursery. Also, move the container to a brighter location. If natural light is not enough, use a dedicated grow light 6 inches above the container.
How to Transition Seedlings Out of the Airtight Seed Container for Sundew
This is where most people fail. They keep the seedlings in the sealed container too long. Or they remove the lid all at once, shocking the plants.
My method: After 4-6 weeks, when the seedlings have 4-6 leaves each, I start the hardening process.
Week 1: Prop the lid open with a toothpick for 2 hours each day. This reduces humidity gradually.
Week 2: Remove the lid completely for 4 hours each day. Replace it at night.
Week 3: Keep the lid off permanently. By this point, the plants are acclimated.
I lost half my seedlings once by taking the lid off abruptly. They wilted within hours. The transition must be slow.
Long-term Container Maintenance Tips
After the seedlings mature, I transfer them to individual pots. But I still use the same principles from the airtight seed container for sundew.
For mature plants: I keep them in shallow trays filled with distilled water. The tray maintains constant soil moisture. I never water from above after the seedling stage.
Container cleaning: Between batches, I wash the container with hot water and a bleach solution (1:10 ratio). Then rinse thoroughly. Residual mold spores can infect the next generation.
Lid storage: I keep the lids in a separate drawer. If they get warped or cracked, I replace them. A warped lid breaks the seal.
Expert Opinions That Changed My Approach
The American Horticultural Society published a study showing that carnivorous plant seeds have higher germination rates in sealed containers compared to open pots. The sealed environment mimics the natural bog conditions where these plants evolved.
I also spoke with a grower who manages the sundew collection at a major botanical garden. He told me the single biggest mistake home growers make is using tap water. "Even a single watering with tap water can set the plant back weeks," he said.
The Royal Horticultural Society echoes this. They specifically recommend using rainwater or distilled water for all carnivorous plants. Sundews are especially sensitive.
Common Questions People Ask Me
Can I use a plastic food container from takeout?
Yes. I use those clear plastic containers from Chinese takeout all the time. They have snap-on lids that seal well. Just wash them thoroughly first. Remove any food residue. Then drill small holes in the lid.
How do I know if the container is truly airtight?
Fill it with hot water, close the lid, and look for steam escaping. If you see steam leaking from any joint, the seal is broken. Another test: leave the container undisturbed for 24 hours. If you see condensation on the inside, it is working.
What if I cannot find a clear container?
Glass mason jars work. The wide-mouth ones are better because they give more surface area. The downside is that narrow jars trap too much heat. Stick with wide, shallow containers.
Should I use a heat mat under the container?
For some sundew species, like Drosera capensis, warmth helps germination. For others, warmth inhibits it. I use a heat mat set to 75°F only for tropical species. Temperate species germinate fine at room temperature.
Final Thoughts from Someone Who Has Been There
I have been growing sundews for over six years now. I have killed dozens. But each failure taught me something. The airtight seed container for sundew was the single biggest game-changer for me.
It is not complicated. Get a clear container with a tight lid. Add tiny ventilation holes. Use pure water. Give bright indirect light. Wait two weeks. That is the formula.
The first time you see those tiny dew droplets on your own seedlings, you will understand why it is worth the effort. The container is just a tool. But it is the right tool.
I still use the same containers I started with. They sit on my kitchen counter, holding my healthiest sundew seedlings. Every time I look at them, I remember how many failed attempts it took to get here.
Start with the right container. Everything else becomes easier.





