 bluename
 If your sundew’s leaves are turning yellow and crisp, the fix is almost always about water, light, or pot choice — and 9 times out of 10, it’s the water. I killed my first three drosera before I figured this out. The quick answer? Stop watering from the top, switch to distilled water only, and place the pot in a tray with 1–2 inches of standing water at all times. That single change saved my plant within two weeks.
I’ve been growing carnivorous plants for over six years now. I’ve lost more sundews than I’d like to admit. But every dead plant taught me something. And honestly, the yellow-and-crisp problem is the most common one I see in online forums and in my own collection. So let me walk you through exactly what I did, what went wrong, and how I fixed it — step by step.
Why Are My Sundew Leaves Turning Yellow and Crisp?
Let’s be real. Sundews are not houseplants in the traditional sense. They’re bog dwellers. They sit in nutrient-poor, waterlogged soil under bright sun. When you bring them indoors, you’re fighting against everything they naturally want.
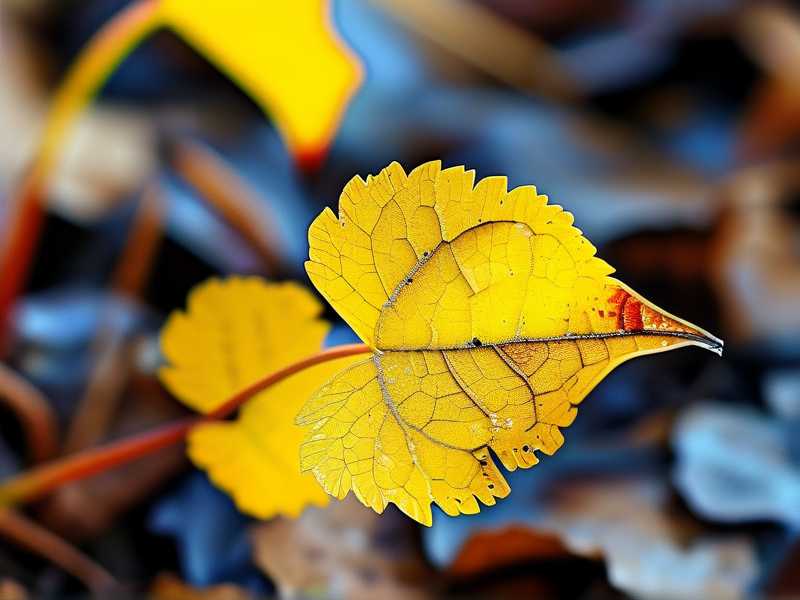
Yellow leaves usually mean stress. Crisp leaves mean dehydration. When you see both together, the plant is telling you something specific: the roots are either drowning or drying out, and the leaves are losing moisture faster than the roots can supply it.
Here’s the thing I learned the hard way — the roots of a sundew are extremely sensitive. They don’t handle mineral build-up. They don’t handle dry spells. And they absolutely cannot handle tap water.
The #1 Mistake: Overwatering (But Not the Kind You Think)
You hear “overwatering” and you think — oh, I’m giving too much water. Wrong. With sundews, overwatering means you’re keeping the soil wet but the plant still can’t absorb it. Why? Because the water itself is the problem.
Tap water contains dissolved minerals, chlorine, and fluoride. Sundew roots are adapted to pure rainwater. When minerals accumulate in the soil, the osmotic balance flips. The roots can’t take up water anymore — even though the soil looks soaking wet. The leaves then turn yellow, then brown, then crisp.
I remember my second sundew — a beautiful Drosera capensis. I watered it with filtered tap water for three weeks. The leaves went yellow, then the tips curled and turned brittle. I thought it needed more water. I watered more. It got worse. That’s when I learned the real issue was mineral toxicity, not thirst.
90% of indoor plants die from overwatering, and sundews take that even further — they die from wrong water more often than from the amount.
The #2 Mistake: Light Placement
Sundews need way more light than most people assume. I’m talking bright, direct sunlight for at least 6 hours a day. I used to keep mine on a table near a window — that’s not enough. The plant stretched, the leaves got pale, then yellow, then crispy at the tips.
Full sun through a south-facing window worked best for me. If you don’t have that, a grow light rated for succulents or carnivorous plants will do the job. I set mine on a 12-hour timer and the difference was night and day.
The #3 Mistake: Using the Wrong Pot
I tried a ceramic pot once. Big mistake. It trapped moisture and minerals, the roots suffocated, and the plant turned yellow within a week. Sundews need plastic pots — either nursery pots or glazed ceramic with drainage holes. Terracotta is the worst choice because it wicks moisture away and leaches minerals back into the soil. I only use plastic pots now and I’ve never looked back.
My 2-Week Fix: What I Actually Did
I’m going to give you the exact routine I followed with my Drosera spatulata that was in bad shape. Two weeks later, new green leaves were growing from the center. Here’s the timeline.
Week 1: Reset the Environment
I repotted the plant immediately. I know — repotting sounds scary when the plant is already stressed. But I realized the soil was contaminated with minerals and decayed peat moss, so leaving it was worse.
Here’s my repotting ritual:
- I used a 3:1 mix of sphagnum peat moss and perlite. No fertilizer. Ever.
- I rinsed the peat moss thoroughly with distilled water first. This is a step most people skip, and honestly it’s crucial. Dry peat is hydrophobic and acidic — it needs pre-soaking.
- I chose a plastic pot with drainage holes. I filled it with the mix, made a small divot, and placed the sundew’s roots gently.
- I placed the pot in a tray filled with 1 inch of distilled water. I made sure it never went dry.
- I moved the plant to a south-facing windowsill where it gets full morning sun until about 1 PM. Then it gets bright indirect light for the rest of the day.
For the first three days, I didn’t disturb it. I didn’t feed it. I didn’t spray it. I just made sure the tray water was topped up daily with distilled water.
By day four, I noticed the yellowing slowed. The crisp leaves didn’t recover — they won’t, ever — but no new leaves were turning bad. That told me I was on the right track.
Week 2: Patience and Observation
During the second week, I kept the tray water level consistent. I also stopped touching the plant entirely. Sundews are sensitive to disturbance on their leaves — the dew glands get damaged easily.
By day nine, I saw the first tiny new leaf emerging from the center. It was small, green, and covered with dew. That was the moment I knew the plant had turned a corner.
By day fourteen, there were three new healthy leaves. The old yellow ones stayed crispy, but I gently trimmed them off with clean scissors. The plant looked fuller, greener, and clearly recovering.
The 3 Deadly Mistakes Every Beginner Makes
Let me break these down properly. Because if you’re facing yellow, crisp sundew leaves right now, one of these three things is your root cause — no pun intended.
① Watering: It’s Not About Quantity, It’s About Quality
I already mentioned the tap water issue, but let’s go deeper. Even the amount of water matters in a different way. Sundews don’t like to dry out completely. But they also don’t like sitting in stagnant water for weeks on end without fresh oxygen exchange.
The tray method is the way. Inside the tray, the water level should be low — maybe a centimeter or two. This keeps the soil consistently moist without drowning the roots.
But here’s the catch — the water must be pure. Distilled water or reverse-osmosis water. Rainwater if you can collect it cleanly. I know it sounds obsessive, but it’s non-negotiable.
I’ve said this before and I’ll say it again — 90% of indoor plants die from overwatering, but for sundews, 100% will die from mineral-laden water. Let that sink in.
② Light: “Bright but Indirect” Is a Lie
Many plant blogs tell you to give carnivorous plants “bright, indirect light.” That’s generic advice for tropical houseplants, not for sundews. Sundews grow in open, sunny bogs. They need direct sun.
I made this mistake with my fourth plant. I placed it near a north-facing window thinking it was enough. It wasn’t. After a month, the leaves turned yellow-green, then the tips started browning. It looked exactly like the photo I have in my old gallery — sad, pale, and crispy at the edges.
Direct morning sun is gentler, so a south-facing or east-facing window is ideal. If you can’t provide that, get an LED grow light — the full-spectrum ones work great. Place it 6–8 inches above the plant and leave it on for 10–12 hours a day.
③ The Pot: Plastic Is Your Friend
I cannot stress this enough — never use terracotta pots for sundews. Terracotta absorbs water, wicks it away from the soil, and leaches minerals back into the peat. Same goes for unglazed clay pots.
Plastic pots, glazed ceramic pots, or even glass jars with drainage holes are ideal. I personally use deep nursery pots sitting in plastic trays. The whole setup is cheap and functional.
And while we’re on the topic of pots — do you have drainage holes? Yes, even with the tray method, you want drainage holes to allow air exchange at the roots. Without them, the soil can become stagnant and anaerobic, which promotes root rot.
How to Diagnose Which Mistake You Made
If you’re not sure which of the three issues is affecting your plant, here’s a quick way to tell:
- Yellow leaves, wet soil, but the plant looks dehydrated → water quality issue. Get distilled water immediately.
- Pale green or yellow leaves, long stretched growth, no dew → insufficient light. Move to a brighter spot.
- Roots rotting, bad smell from soil, leaves turning black at base → too much water + stagnant air. Replant in fresher, airier mix.
Spending two weeks troubleshooting is normal. I honestly spent longer than that on my first plant before I got it right. But once I figured it out, the formula became second nature.
Maintenance Mistakes I Made Along the Way
I want to share a few other small errors that caused yellowing in my plants — just so you don’t repeat them.
I Fed My Sundew Too Much
I thought sundews needed daily food. Wrong. I placed small insects on the leaves every other day, and the plant became stressed. The glands got overloaded, and the leaves started browning.
Sundews catch their own food outdoors. Indoors, they can survive without any feeding at all — I now only feed mine once every two or three weeks. If you want to feed, use small flies (like fruit flies) and only give each leaf a single meal.
I Mist-Fed With Fertilizer
Let me be explicit — do not spray sundews with any liquid fertilizer. It’s lethal. The roots are not adapted to absorbing high-nutrient solutions, and the leaves can’t process synthetic fertilizers either. It will cause yellowing, browning, and eventual death.
I Let the Soil Become Compacted
After many months, peat moss breaks down and compacts. This prevents airflow and blocks root growth. If your plant is yellow around the base and you’ve had it in the same pot for over a year, it might need fresh soil.
I usually repot my sundews every 12–18 months, even if they look okay. It’s a small task that prevents serious problems later.
How Long Until a Sick Sundew Recovers?
Let’s be honest — recovery isn’t instant. The existing yellow leaves won’t turn green again. They are dead tissue. But the plant will focus its energy on new growth from the center.
In my experience:
- Week 1: You see no more new yellowing.
- Week 2: Small new leaves emerge.
- Week 3–4: The new leaves mature, look green, and produce healthy dew.
If after two weeks you still see new leaves turning yellow, you need to re-evaluate. Maybe the light is still too weak, or the water isn’t pure enough, or the plant is in a drafty spot with cold air.
Should You Trim Yellow Leaves?
Yes, but carefully. I trim yellow and crispy leaves with sterilized scissors. I cut them at the base, close to the soil, but I never pull them — pulling can damage the root system.
Trimming helps the plant direct energy to new growth rather than wasting it on dead tissue. However, if a leaf is only partially yellow, I leave it alone. The green part may still photosynthesize and help the plant recover.
A Word on Dormancy — The Silent Confusion
Sundews like Drosera capensis don’t undergo harsh dormancy, but some temperate species do. If you have a temperate sundew (like Drosera filiformis or Drosera rotundifolia), seasonal yellowing is completely normal in autumn. That’s not a problem — that’s a lifecycle.
In those cases, let the leaves die back naturally and reduce watering. Keep the soil slightly moist but not wet. You might also want to move the plant somewhere cooler — a garage or unheated room works well.
Most store-bought sundews are tropical varieties though, so they don’t go dormant. If yours is sold as an indoor plant, chances are it doesn’t need that cold period, and yellowing is a stress response, not seasonal behavior.
Tools and Setup I Recommend for Future Prevention
Here’s what works for me, and I think it will work for you too:
- Distilled water — always on hand. I keep a gallon in my plant room.
- A plastic nursery pot — 3–4 inches in diameter works for most sundews.
- A tray — any shallow container that can hold 1–2 inches of water.
- Sphagnum peat moss + perlite — the standard mix, pre-soaked in distilled water.
- A grow light — if your window space is limited, this is a game changer.
You don’t need expensive or fancy gear. I use simple materials and they’ve kept my collection thriving for years.
What I Wish I Knew Before My First Sundew
Let me share a few truths that would have saved me from so much wasted time and sadness.
- Sundews are not houseplants that you can water once a week. They need constant care and attention to their environment.
- The dew on their leaves is a sign of health. When the dew disappears, something is wrong — usually light or humidity.
- Humidity helps, but it’s not the main issue. People often blame dry air for crisp leaves, but that’s rarely the root cause. Water quality and light are far more important.
- Resilience burns out fast. A sundew can turn yellow in days, but it takes weeks to recover. Prevention really is the best medicine.
I’ve progressed from killing several plants to keeping over twelve thriving sundews. It feels good to watch new leaves unfurl, covered in droplets of sticky dew. That moment makes all the frustration worth it.
Frequently Asked Questions
Can I Use Tap Water for My Sundew Even Once?
I’d strongly advise against it. Even one watering with tap water can introduce enough minerals to cause root stress. If you’ve only done it once, flush the soil with distilled water right away. That can reduce the damage.
My Sundew Has Yellow Leaves But Still Has Dew — What’s Wrong?
This is a classic sign of insufficient light. The dew production continues, but the pigment is fading. Move it to more sunlight or add a grow light. The existing yellow leaves may not recover, but new growth should be green.
Is It Okay to Use Ice Cubes to Water My Sundew?
No. Sundews are tropical or temperate bog plants, and cold water shocks the roots. Always use room-temperature distilled water. I let my water sit in a bottle at room temperature before using it — that small habit helps avoid temperature stress.
Final Thoughts
Yellow and crisp sundew leaves are a cry for help, and usually the help needed is simple — pure water, strong light, and a plastic pot. I’ve watched my plants bounce back from near-death using those three fixes alone. If you’re seeing the same symptoms, start with your water source, then check your light, and finally examine the pot and soil mix.
The recovery won’t be instant. Give it two weeks. Watch for new growth from the middle, not the outer leaves. Once you see fresh green leaves with dew droplets, you know you’ve cracked it.
You’ll gain that experience too. The key is to stay attentive, keep notes, and remember — every sundew keeper has killed more plants than they’d like to count. The ones who learned from it are the ones who keep a beautiful collection in the end.





