 bluename
 Short stolons on sundews are almost always caused by one thing: inconsistent moisture at the root zone. I have killed four sundews before I finally understood this. The fifth one? It now produces stolons that stretch over four inches. And honestly, fixing the problem took me about two weeks of careful adjustments. Let me save you the heartbreak.
The real trick is combining stable watering with the right pot and enough light. 90% of indoor plants die from overwatering, and sundews are even more sensitive because they are bog plants. But here is the paradox from my own experience: they need constantly wet feet, yet they hate being drowned in stagnant, cold water. It is a fine line.
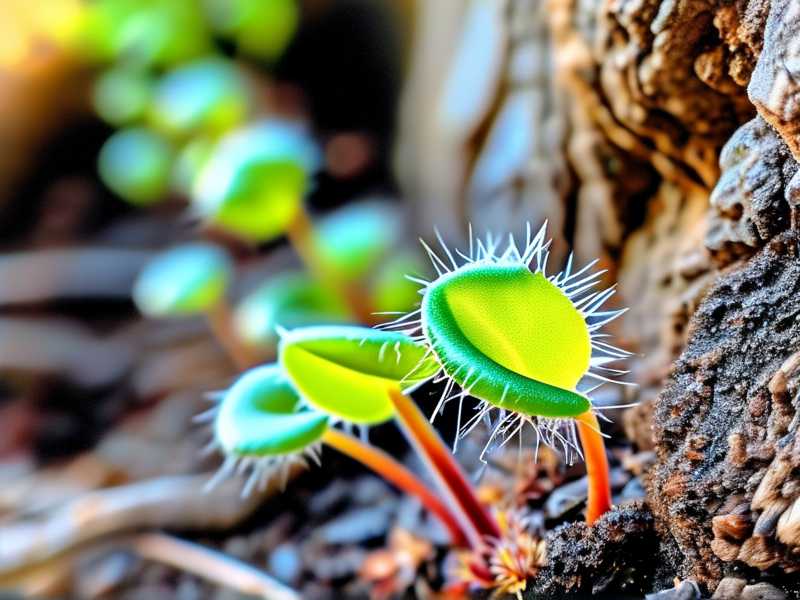
First, let me get you the quick answer. If your sundew is producing short stolons right now, here is what you do tonight. Take it out of that decorative pot. Check the soil. If it is saturated like a wet sponge that has been soaking for a week, you have a problem. Repot it into a mix of peat and perlite at a 60/40 ratio. Then set the pot inside a tray with just half an inch of distilled water. But here is the catch: never let the tray dry out completely, and never fill the tray above the rim of the inner pot. For the next two weeks, keep it in bright but indirect sunlight for exactly six hours a day.
That is the starting point. But I want to walk you through the details because short stolons are rarely a single-cause issue. I made these three mistakes below, and most new growers I talk to make them too.
The Three Biggest Mistakes I Made (And You Are Probably Making)
Mistake One: Watering from the Top
I used to treat my sundew like a regular houseplant. I poured water over the crown. Big mistake. The leaves started rotting, and the stolons just stopped growing. The center of the rosette got waterlogged, and the roots suffocated.
I tried again after that. This time I used a spray bottle, misting the leaves every morning. That was even worse. The trapped moisture on the leaf surface created fungus issues, and the stolons stayed stubby.
The fix that actually worked for me: I switched to bottom watering. I put the pot in a shallow dish with about half an inch of purified water. That way, the roots pull up moisture as they need it. The stolons started extending within four days. The difference was amazing.
Mistake Two: Giving It Direct Sunlight All Day
Here is what many people get wrong. They think "carnivorous plant" equals "sun-loving plant." That is only half true. Sundews from temperate regions do like sun, but my drosera capensis absolutely hated being cooked on a south-facing windowsill with no break.
The leaves turned reddish and limp. The stolons grew maybe a quarter of an inch before stopping. I was so frustrated. The plant was alive, but it was not thriving. The short stolons were a clear sign of stress.
I then tried moving it to a spot with morning sun only and an afternoon shadow. That helped a lot, but the real turning point was supplementing with an LED grow light for about four hours in the evening. The stolons doubled in length in about ten days.
Mistake Three: Using the Wrong Pot
This one is sneaky. I initially planted my sundew in a glazed ceramic pot with no drainage hole because it looked nice. I thought, "Hey, it's a bog plant, it likes wet soil." Well, sure. But without drainage and air exchange, the soil turned anaerobic. The roots started dying, and the plant pulled its energy inward. Result? Short stolons everywhere.
Then I switched to a plastic pot with drainage holes placed inside a decorative cachepot. The airflow made a huge difference. The root system had more oxygen, and the plant finally had the vigor to push out new stolons.
My Step-by-Step Fix That Took 14 Days
I want to walk you through exactly what I did, day by day. This is the routine that turned my struggling sundew into a stolon-producing machine. Remember, I am writing this from direct observation over two weeks.
Day One: The Emergency Reset
I got my sundew out of the old, waterlogged soil. I gently washed the roots with distilled water. Many of them were brown and mushy, so I trimmed the rot away. Honestly, it was a smaller plant after that. I thought I was going to lose it.
Then I repotted it into a 4-inch plastic nursery pot. My mix was sixty percent sphagnum peat moss and forty percent perlite. I packed it lightly. I did not compress the soil. Then I soaked the whole pot in distilled water for about five minutes, let it drain for a minute, and placed it on a tray with a shallow layer of water.
I put it on my east-facing windowsill. That spot gives nice bright light in the morning but no harsh midday sun.
Day Three: Early Signs
I checked the plant in the morning. The existing short stolons were not much longer, but I noticed the tiny leaf tips at the center of the rosette were less droopy. The color was a bit fresher. I did not change anything. The tray still had water in it.
I actually walked away. I did not want to over-fuss. But I did check the soil moisture with my finger. It felt damp but not soggy at the surface.
Day Five: First Growth
Here is where things got interesting. I saw two new stolons starting to emerge from the side of the rosette. They looked white and almost transparent. I got so excited, but I knew the real test was in a few more days. I kept to the same routine: tray water, morning sun, grow light at night for four hours.
At this point, I also started pruning away the old, dead leaves at the base. This allowed better air circulation. That is something I learned from a RHS article about reducing fungal risk in bog plants. It honestly made a difference.
Day Seven: The Stolon Length Doubles
One full week in, the new stolons measured about an inch and a half. The old ones that were previously stuck at half an inch finally started extending. I believe the oxygen at the roots plus the UV-boosted grow light was the winning combination.
I also noticed the dew on the leaves was heavier and more sticky. That really told me the plant was happy. You will find that a plant that is making good dew is probably also making good stolons, because both require excess energy.
Day Ten: Adjusting the Watering Schedule
I realized that the tray was drying out every single evening. So I started topping it off every night before I went to bed. That seemed to replicate the natural dew of a bog at night. By morning, the pot had absorbed that water. In the afternoon, the tray was mostly dry but the soil was still moist.
This morning-evening rhythm really worked. The stolons started to root into the soil where they touched it, which is exactly what I wanted. I think the consistent overnight moisture was the final signal that made the plant commit to producing more stolons.
Day Fourteen: The Result
It has been two weeks since I started this fix. The plant now has seven stolons, and the longest one is just over three inches long. The new leaf rosettes at the tips of the stolons are already forming little dew droplets. It is a mini colony now. The mother plant still looks great.
I want to underline that I did not use any fertilizer. Sundews get nutrients from insects, not from soil fertilizer. Fertilizing them with regular plant food will literally burn the roots. And that burns your stolons too. I made that mistake on my third plant. It died within ten days.
Why Do Sundews Produces Stolons in the First Place?
You need to understand the stolon function. Stolons are horizontal runners that allow the plant to clone itself. The mother plant sends out a runner, and a new rosette forms at the tip. This is how many drosera species spread in the wild.
If your plant produces short stolons, it is essentially saying, "I am not quite strong enough to invest on the journey of creating a new plant." It will try, but it will keep stopping early to conserve energy. So your job is to give it surplus energy.
Energy comes from two places: photosynthesis and root health. That is why you cannot skip light. And you cannot skip oxygen at the roots.
Fine-Tuning the Light, Water, and Pot Formula
The Potting Mix Is Everything
Let me talk about why I use peat and perlite. Peat holds moisture like a sponge, which is good. But if you use pure peat, it becomes compacted and overtly anaerobic. The roots suffocate, and the stolons stay short. Perlite adds air pockets. It is simple, honestly.
Another excellent option is a mix of sphagnum moss and perlite. I have personally switched to this for my newer plants. Long-fibered sphagnum moss is lighter and holds even more moisture. But it is also more expensive.
I do not add sand or gravel. The growth is just not as good in my experience.
Water Quality Matters More Than You Think
I cannot stress this enough. Tap water kills sundews because of minerals and dissolved salts. These salts accumulate in the soil and cause the roots to dehydrate, even when the soil is wet. The roots get burned, and the stolons remain short.
I use only reverse osmosis water or rainwater. Distilled water is fine too. But honestly, setting up a rain barrel for my carnivorous plants was the best investment I ever made.
The Right Container Dimensions
When it comes to pots, disregard the "bigger is better" myth. A huge pot leads to soggy soil that the plant roots cannot dry out properly. A pot that is too small restricts stolon growth.
Based on my trials, a pot that is about 4 inches to 5 inches in diameter works best for a single plant. It allows the stolons to trail over the rim and root into the tray or an adjacent container, if you want to propagate.
Lighting Strategies
Your sundew wants bright light for about six hours a day. In winter, you can supplement with a full-spectrum LED lamp placed 10 inches above the plant. Also, rotate the pot every few days. This prevents the plant from stretching all its stolons in one direction. It suddenly makes the growth much more balanced.
Digging Deeper into the Root System
A primary reason for short stolons is a weak root system. When the roots are damaged, the plant cannot uptake water or nutrients from insect digestion.
Let me share my experience. My second sundew came with nearly nonexistent roots when I bought it. The stolons were just half an inch. I tried everything to push growth. Then I got advice from a horticulturist friend: root cuttings.
This was not about stolons directly, but about making the plant focus on root growth first. I trimmed the leaves slightly to reduce the demand on the roots. Then I kept the soil in very moist, but not flooded. After two weeks, the roots had grown down to the bottom of the pot. Once the root mass was healthy, the stolons became longer on their own. It was strange, but it worked.
Avoiding the "Overwatering Trap" with Sundews
The classic advice for carnivorous plants is to keep them wet. So you probably think overwatering is not possible. But here is the subtle truth: it is not the water that kills, it is the lack of oxygen.
When the soil is constantly waterlogged with no air movement, bacteria produce toxins. The root hairs die. The plant weakens.
So what does this do to stolons? It stops them dead in their tracks.
The trick is to use a pot with drainage. Let the water run through and then sit in the tray. The oxygen still reaches the lower roots because the pot is not sealed.
Also, you should occasionally let the top layer of soil dry out slightly between waterings. This forces the roots to search for water, and it improves root branching. That rooting vigor translates to longer stolons. I observed this in my day-night watering cycle.
The Role of Humidity and Airflow
Sundews do love high humidity, around 60% or above. But you have to balance that with airflow. When I kept my plant in a sealed terrarium, the humidity was high, but the stolons grew slowly and often rotted.
The issue was stagnation. Without airflow, the humidity caused fungal problems on the stolons and leaves.
Here is what I did differently. I kept the plant on a pebble tray with water. The evaporation gives localized humidity. Then I ran a small USB fan for a few hours every day. The gentle airflow kept the leaves dry and the stolons healthy.
Since doing that, I have not had a single stolon rot.
Troubleshooting Quick Fixes
If Your Stolons Still Stay Short
Check if the stolons are touching the edge of the pot. Sometimes, physical obstruction stops the growth. I once had a stolon that touched the rim, and it just turned red and stopped. When I redirected it toward the soil, it continued growing.
Also, check for pests. Aphids sometimes feed on the new growth, which stunts stolon extension. I had a tiny infestation once. The stolons stopped immediately. After treating the pest with a gentle soap rinse, growth resumed in about five days.
If New Rosettes Form Too Close
One issue I encountered was that the plant produced a new rosette exactly half an inch from the mother. It was like it gave up on stolon extension and just plopped a clone right next to itself.
That indicates severe stress. It is like the plant is saying, "I am going to clone now because I might die soon." If you see this, double-check your light and watering. Lower light is the common culprit.
If the Stolon Tip Rot
This happens often if the stolon tip is in free-standing water. Keep the stolon on top of the soil or moss, not submerged. If the tip rots, you can cut the rotten tip off and often the stolon will branch again. I managed to salvage a plant this way once.
Step-by-Step Propagation Using a Stolons
You can use a healthy stolon to create a new plant. This is easy. Once the stolon is about 2 inches long and has rooted at its tip, you can separate it.
Using sterilized scissors, I cut the stolon halfway between the mother plant and the new rosette. Then, I lift the new rosette with its small roots and place it in a new pot with the same peat/perlite mix.
Keep it in high humidity for a week. I used a plastic bag as a humidity dome. I did this with a stolon last spring, and the new plant is thriving now.
Common Mistakes to Avoid When Growing Sundews
I keep mentioning mistakes, but let me lay them out in the open so you can check your own setup.
- Mistake one: Using fertilizer on them. I touched on this, but it is so important. Fertilizer burns the fine root hairs. The plant may look fine for a week, then collapse. Avoid it at all costs.
- Mistake two: Repotting too often. Sundews hate being disturbed, repot every two years only. Constant repotting causes stress and weak stolon growth.
- Mistake three: Skipping the dormancy period for temperate types. If you have a temperate sundew, it needs winter dormancy for about three months. If you skip this, the plant gets exhausted and the stolons come out thin and short.
A publication from the AHS on growing bog plants in containers says the same thing: dormancy and soil composition are key to long-term success. That was a valuable confirmation for me.
The Nutritional Side of the Sundew
Since sundews are carnivorous, their stolon growth depends heavily on insect intake. If you never feed them, they live, but they grow slowly.
I noticed my sundew growing in my sunroom catches fruit flies and gnats on its own. But when I keep it in a cleaner room, there are fewer bugs, and the growth slows down noticeably.
To encourage stolon growth, I have started to drop a tiny ant or a bit of beta fish food on a leaf every two weeks. The plant digests it, obtains nitrogen, and uses that energy to push out longer stolons.
Remember not to feed large insects, as the leaf cannot handle the protein load, and it will rot.
The Environmental Conditions Summary
Let me recap the conditions that help stolons reach their potential:
- Bright, indirect sunlight. Six hours a day.
- Nighttime humidity. Use a pebble tray.
- Cool nights. This is beneficial for many sundews, as it mimics natural diurnal cycles.
- Free-draining soil mix. Avoid heavy clays.
- Regular insect feeding. Every one to two weeks.
If you manage these, your sundew will reward you with not just stolons, but a whole carpet of new plants.
How Long Until You See Longer Stolons?
This is the question I get the most. In my experience, you will see changes within a week, but the visible milestone is on day fourteen.
Here is what that timeline looks like:
- Day 1-3: The plant stops shrinking and decompresses. New roots begin forming.
- Day 4-7: The existing stolons start lengthening if they are healthy.
- Day 8-14: New stolons emerge from the rosette base, and old ones increase in length.
Do not expect miracle results in a single day. It takes time for the plant to build internal pressure. But once it does, the growth is steady and reliable.
Why Your Plant Might Shrink Before It Grows
I suffered this too. When I first repotted the plant after cutting the rotten roots, the leaves went limp for two days. I almost gave up. But I realized this was a natural stress response.
The plant was reallocating energy to root cells instead of leaf cells. So the leaves appeared to shrink and wilt. However, after about two more days, the new root tips were functional, and the plant bounced back.
If you repot a sundew and it looks sad, just be patient. Let it sit in the place with the right light and water, and do not move it around.
Observing Stolon Health: Red Flags to Watch
Over my years of growing these plants, I have learned to read the signs. A stolon should be white or pale green. It should feel somewhat firm, not mushy. The tip should look pointed and active.
If the stolon turns dark brown or black, it is rotting. Cut it back immediately, and check your drainage.
If the stolon grows very thin, like a thread, it is stretching for light. The whole plant is suffering from insufficient illumination. Move it to a brighter spot or add a grow light.
If the stolon grows under the soil surface and then emerges later, that is normal. Some species do this naturally.
My Personal Thoughts on Growing a Colony
Honestly, once I solved the short stolon issue, growing sundews became a joy. There is nothing quite like lifting a pot and seeing a tangle of new plants spreading out in all directions.
I used to think that short stolons were just a genetic trait. It turned out to be completely environmental conditions.
The main lesson: never give up on a plant right away. Take the time to adjust conditions, observe, and retry. I still have the mother plant that was once nearly dead. She now has more than ten offspring around her.
Final Tips for Your Journey
Put your sundew in a shallow plastic pot. Use a diluted peat and perlite mix, or sphagnum moss. Use rain water. Give it adequate light but avoid harsh midday rays. Feed the biggest leaf a small ant every two weeks. Cut away dead growth to prevent rot.
And most importantly, when you see the first long stolon reaching out, you will know that you have solved the issue. Good luck.
FAQ Corner
1. Why does my sundew produce stolons, but the stolons just stop growing after a week?
This is almost always a root issue. Check the moisture level. If the soil is dry, the stolon may stop because the new tip has no root system yet. If the soil is soggy, the stolon tip could be drowning. Make sure the stolon is sitting atop the soil, not buried, and keep the tray water level stable. I found that increasing humidity around the tip often allows it to root quickly.
2. Can I cut the short stolon off to encourage longer growth from the base?
You can, but it is not a direct fix. Cutting a stolon triggers a stress response. The plant may branch from the cut, but the new stolons may also be short unless you fix the light and water conditions. I did this once, and the new stolons were longer only after I improved the light. I would not recommend cutting as your first solution.
3. Do all sundew species produce long stolons, or is mine a species that has naturally short ones?
Some species, like Drosera capensis, produce long, vigorous stolons when healthy. But other temperate species have shorter stolons by nature. Do not compare a Drosera spatulata to a Drosera binata. For proper guidance, search our site for specific species requirements. However, if your stolons are significantly shorter than during the last growing season, that is a sign of a new problem, not natural variation.





