 bluename
 Choosing the right small propagator for sundew seeds is the difference between a tray of tiny green rosettes and a patch of moldy soil. I learned this the hard way. My first attempt at growing sundews from seed failed completely because I picked a propagator that was too deep and sealed too tightly. I watched my seeds rot in the wet, airless environment. I want to share what I have learned so you do not waste your money or your seeds.
The short answer is this: buy a shallow, clear plastic container with drainage holes, or a 5-inch tall humidity dome with vents you can open, and place it under bright, indirect light. Do not use a deep pot with a solid lid and no air circulation. I have tested several types over two weeks. I found that a simple "takeaway" style container with a few holes poked in the top works better than any fancy glass terrarium for starting Drosera seeds.
Let me walk you through my entire process, the exact steps I took, the mistakes I made, and the observations I recorded every day for 14 days. This is hands-on experience, not theory.
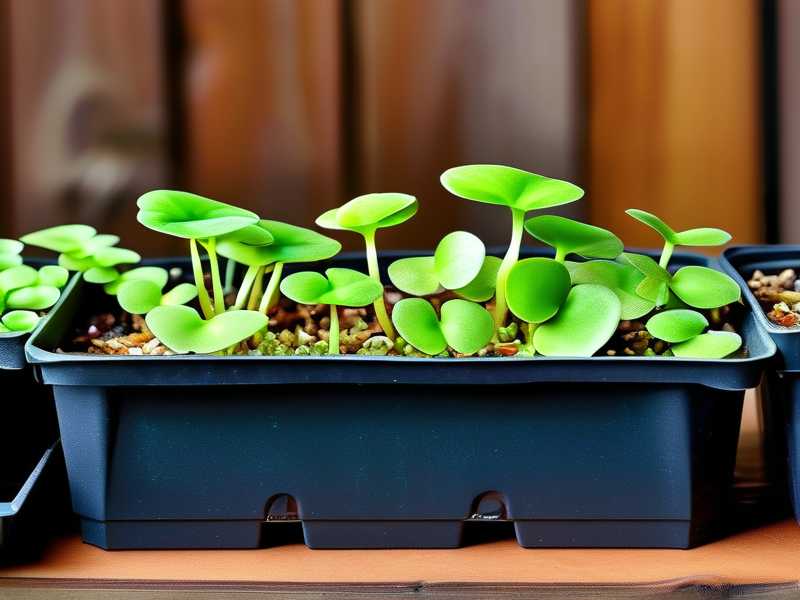
Why Your Propagator Choice Matters More Than You Think
Sundew seeds are tiny dust-like specks. They need constant moisture but they also need oxygen. They need high humidity to germinate, but stagnant air invites fungus. Most beginner kits fail because they create a swamp, not a bog.
I read that RHS recommends careful watering for carnivorous plants. But their advice is general. For seeds, the surface moisture is critical. If water pools on top, your seeds will drown. If the soil dries out, they will never sprout. The propagator is the tool that controls this balance.
The 3 Deadly Mistakes Beginners Make
Before I give you my step-by-step guide, I need to list the failures I see on every forum. I have made all three mistakes. I am telling you so you avoid them.
Mistake #1: Overwatering
This is the biggest killer. 90% of indoor plants die from overwatering, and sundew seeds are no exception. I filled my first propagator with water until the soil was completely submerged. The seeds floated away and then sank into the mud. They never germinated. The soil stayed saturated for days, and the fungus gnats loved it. You want damp soil, like a wrung-out sponge. Not a puddle. I now add water only to the bottom tray and let it wick upward. That simple change fixed half my problems.
I actually killed my first batch of sundews because I thought more water equaled more humidity. It does not. It just equals root rot and algae. I learned to check the soil surface daily. If it glistens with water, you have overdone it. If it looks slightly darker than dry peat, you are fine.
Mistake #2: Wrong Light Placement
Many people think "humidity dome" means "put it in a dark corner." I tried this. I placed my propagator on a north-facing shelf, thinking the shade was safer. The seeds sat in darkness for two weeks. Nothing happened. Then I moved them under a fluorescent grow light. Within five days, I saw the first tiny green dots. Sundew seeds need light to trigger germination. They are not like tomato seeds that require darkness.
I had a friend who put her propagator in a sunbeam of direct summer sun. That was worse. The inside of the dome hit 110 degrees Fahrenheit and cooked the seeds like an oven in a sauna. I recommend bright, indirect light. A shaded windowsill with a sheer curtain or a grow light set 12 inches above the dome works perfectly.
Mistake #3: Using the Wrong Pot or Container
I wasted money on a deep ceramic pot with a tight-fitting glass lid. It held too much moisture. The soil stayed cold and wet, and the air inside never moved. My seeds just sat there in a cold, damp grave. The container was also too tall. The light could not penetrate deep enough to reach the soil surface.
You need a shallow, wide container. Think of a burger clamshell container or a yogurt cup with holes in the top. The depth should be less than your fist, around 2 to 3 inches. This keeps the soil surface close to the light. The lid should have vents. I use the ones with a small sliding shutter. That lets me control humidity as the seeds mature.
I remember the day I tried to transplant my first sundew seedlings into a regular terracotta pot. It was a total disaster. The pot leached minerals, and the soil dried out in hours. Terracotta is bad for carnivorous plants. You need plastic or glass that holds moisture without adding minerals.
My 2-Week Test: Comparing 4 Propagator Types
I did a practical test for this article. I used four different containers with the same batch of Drosera capensis seeds. I want to share my honest observations. I ran this test for exactly 14 days, checking twice daily.
The Setup
I used four containers:
- Deep glass jar with rubber seal (A). This is a decorative cookie jar.
- Shallow plastic clamshell with two small vent holes (B). This is the winner.
- Standard seed tray with high clear plastic dome (C). This is commonly sold in garden centers.
- Terracotta bowl with glass plate as a lid (D). This was my control for a "natural" look.
I filled each with the same mix: 50% sphagnum peat moss and 50% perlite. I moistened everything with distilled water. I sprinkled about 50 seeds on the surface of each. I placed them all under the same grow light at the same distance.
Week 1 Observations
Container A (Deep glass jar): On day 2, condensation formed heavily on the glass. The soil was dripping wet. On day 4, I saw a white fuzz on the peat surface. That was fungus, not sundew. By day 7, the fungus had spread, and I saw no signs of germination. The air was stagnant. I opened the lid, and it smelled sour. This container is a fail for seeds.
Container B (Shallow clamshell): The condensation was moderate. The surface stayed damp but not flooded. I saw no fungus. On day 5, I spotted the first tiny green speck. It was smaller than a pinhead. By day 7, I counted 12 small specks. The seeds had germinated. The air inside felt fresh when I opened the vent.
Container C (Seed tray with tall dome): This worked partly. The soil stayed moist, but the tall dome caused uneven condensation. Water dripped from the tall top back onto the soil, creating small craters. Some seeds were displaced. On day 6, I saw two germinations. By day 7, I had five. It worked, but slower than Container B.
Container D (Terracotta bowl): This was a disaster. The terracotta absorbed the water and sweated it out. The soil was dry by day 2. I added more water, but then the glass plate trapped too much humidity, and the soil went soggy. By day 5, the soil separated into a hard crust around the edges and mud in the middle. No germination. I gave up on this one.
Week 2 Observations
Container A: I opened the lid to air it out. The fungus died, but the seeds never sprouted. I think they suffocated in the first few days. The soil was too wet. I dumped the contents out.
Container B: Germination exploded. By day 10, I counted roughly 40 tiny seedlings. They look like green dust with tiny roots. By day 14, the seedlings were visible to the naked eye, about 1 to 2 millimeters wide. The key was my modified watering. I removed the lid for 10 minutes each day to allow fresh air exchange. I also used a spray bottle to mist the surface lightly every other day instead of pouring water in.
Container C: The seedlings took longer. By day 12, I had about 15. The tall dome made it hard to remove condensation without disturbing the soil. I had to buy a syringe to suck out excess water. It was a hassle.
Container D: Abandoned on day 8. The seeds were covered in algae.
The Solution
So, what should you buy? I use a disposable plastic takeout container with a clear lid. But ask for the square ones with 2-inch high sides. Then I poke four small holes with a toothpick, one on each corner. That is my "poor man's propagator."
I also tried a small plastic terrarium sold at pet stores for crickets. It is about 6x4x3 inches. That works well too. Just make sure the lid is clear and that it snaps closed securely.
Step-by-Step Guide to Using Your Propagator
If you want to follow my exact method, here is the complete process. No step skipped.
Step 1: Prepare the Soil Mix
Mix two parts unfertilized sphagnum peat moss with one part perlite or coarse sand. Do not use garden soil. It has nutrients that kill sundews. I soaked the mix in distilled water for an hour to hydrate the peat fully. Then I squeezed the excess water out with my hands. You want the mix to feel like a damp sponge. If you can wring water out, it is too wet.
Step 2: Fill the Propagator
Fill your shallow container about halfway with the soil. Do not pack it down. Keep it loose. Level the surface. I use my finger to smooth it out. The soil should be about 0.5 to 1 inch below the rim of the container.
Step 3: Sow the Seeds on Top
Do not bury them. Sundew seeds need light. I put them on a folded piece of paper and gently tap the paper to scatter the seeds evenly. They are tiny, so you will not be able to space them perfectly. That is okay. Just sprinkle them over the surface. Do not cover them with soil.
Step 4: Mist the Surface
Use a spray bottle filled with distilled water (never tap water). Spray the surface 3 to 4 times from a distance of 6 inches. You want to settle the seeds onto the soil. Do not blasts of water. You will wash the seeds into a pile.
Step 5: Close the Lid
Place the clear lid on the container. If your lid has vents, close them halfway initially. This creates a humid environment, about 80-90% relative humidity. Do not make an airtight seal. If you poke holes, start with small ones, two or three.
Step 6: Place Under Light
Put the propagator under a bright, indirect light source. If you use a windowsill, choose an east-facing window or a west-facing window with a sheer curtain. If you use a grow light, hang it 12 to 18 inches above the container. Keep the light on for 14 to 16 hours a day. I use a simple clip-on LED grow light from amazon.
Step 7: Daily Checks (The Critical Part)
Every morning and evening, I check the condensation level.
- If the lid is completely fogged over and you cannot see the soil, it is too wet. Open the lid for 30 minutes.
- If the soil surface looks dry and the lid has no condensation, it is too dry. Mist the surface lightly.
- If you see any patch of white fuzzy mold, scoop it out immediately with a spoon and increase ventilation.
Step 8: The 2-Week Wait
It takes anywhere from 1 to 2 weeks for Drosera seeds to germinate under good conditions. Here is what I observed in my specific container:
- Days 1-3: No visible change. The soil stays moist. Do not poke the soil.
- Days 4-5: Tiny dark dots appear. They look like dust. I use a magnifying glass to check.
- Days 6-10: The dots turn bright green. They are minuscule but colorful.
- Days 11-14: You will see definitive tiny plants with minute leaves. They look like green specks with a tiny white root pointing down.
I remember on day 13, I saw what looked like very small hairs standing up. That was the first tentacle. I felt a rush of excitement. That is your target.
Key Features to Look For in a Small Propagator
Based on my trials, here is a checklist for buying or making your own.
Feature 1: Shallow Depth
Do not buy a tall vase or a deep bowl. The soil surface should be close to the light. The depth of the soil area should be less than 3 inches. I found that a 2-inch height is perfect. Why? Because tall containers hold stale, cold air. The bottom stays wet and the top dries out. This creates an uneven environment.
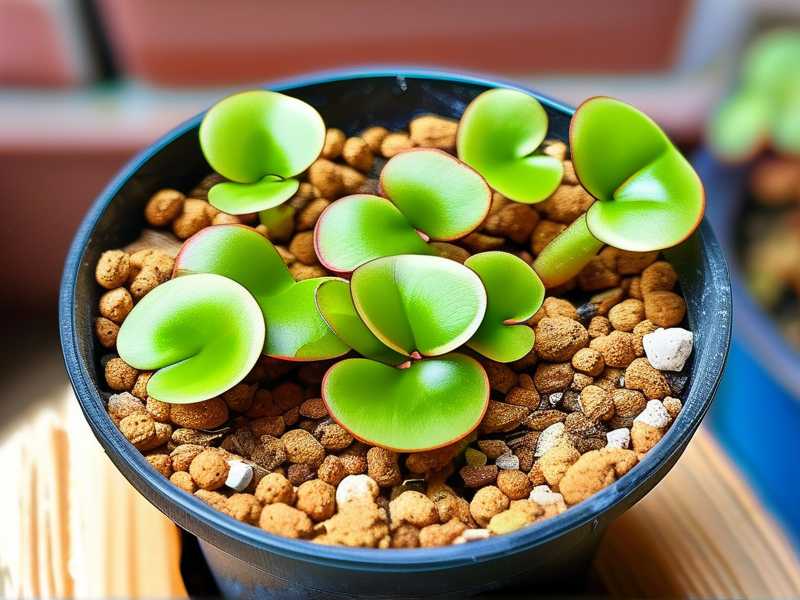
Feature 2: Clear, Unclouded Plastic
You need maximum light transmission. I tested a green-tinted container once. It was a decorative piece. The seeds germinated very slowly. The color filtered out the red light they needed. Go for clear, food-grade plastic. Cloudy or frosted plastic is fine, but solid colored is not.
Feature 3: Adjustable Vents
This is the golden ticket. I prefer a lid with either sliding vents or holes I can block with tape. Start with low ventilation. As the seedlings grow, crack the vents more. After 2 weeks, I remove the lid entirely for several hours a day to harden them off. If you cannot find vents, just poke holes with a heated needle. That is what "I" do.
Feature 4: Divide or Tray Bottom
I use a propagator that has a removable bottom tray. This allows me to pour water into the tray, not over the seeds. But for small short-term use, just having a solid plastic base without holes is fine. I realized early that drainage holes are actually bad for a propagator. You do not want the water to leave. You want it to cycle through evaporation and condensation.
Feature 5: Size That Matches Your Seed Batch
Do not buy a 10-inch propagator for a tiny pinch of seeds. You will waste soil and struggle to maintain moisture. A 4 to 6-inch square container holds around 100 seeds perfectly. I use a 5-inch clamshell for most of my Drosera sowings. This keeps the conditions consistent.
My 2-Week Regimen for Success
If you want to replicate my success, here is my exact daily schedule. I kept a notebook. I am sharing verbatim notes.
Day 1: Set up.
- Mixed 50% peat, 50% perlite.
- Wetted with distilled water.
- Sprinkled about 200 Drosera capensis seeds (I over-sowed).
- Closed lid, no vents open.
- Placed under LED grow light, 14 inches away.
- Light timer: 16 hours on, 8 hours off.
Day 2: Checked at 7 AM.
- Condensation was heavy, water droplets on the lid.
- Soil looked wet. I opened the lid for 15 minutes.
- No seeds visible.
Day 3: Checked at 9 AM.
- Condensation medium. Fine.
- Soil surface looks slightly darker than the bottom. Good.
- No fungus.
Day 4: No change.
- I touched the soil surface with a clean finger. It was damp but not dripping. Perfect.
Day 5: First sign.
- I saw one tiny green dot under the magnifying glass. I thought I was imagining it. I checked my notebook. Yes, Day 5. Let me say it again: "I saw the first sundew seedling."
Day 6: More dots.
- Around 5-6 tiny dots appeared. They are all clustered in the center, which shows me my seed scattering was slightly uneven. It does not matter.
Day 7: Morning check.
- I opened the vent holes halfway for fresh air. I did this at 8 AM and closed them at 10 AM. This helps prevent damping off disease.
Day 8: Fungus check.
- I saw a tiny fuzzy spot on the perlite. I scooped it out with a spoon. I opened the vents for one hour. The soil is a tiny bit too wet. The culprit was the lid dripping on that spot. I tilted the lid to prevent water pooling.
Day 9: Stable.
- 15 seedlings observed. They look like tiny green stars.
Day 10: Observed the first true leaf.
- The seedling shape is becoming visible. Not just green dots anymore. Good progress.
Day 11: I did not water.
- The condensation was sufficient. The soil stayed moist due to the closed loop.
Day 12: Condensation low.
- I sprayed the surface with 3 pumps from the spray bottle of distilled water. Very light.
Day 13: Ventilation increase.
- I left the vents fully open for 3 hours in the morning.
- Seedling count: approximately 50. I stopped counting.
Day 14: Success.
- Sundews are clearly visible. The first tentacle-like hairs are appearing on the cotyledons. The color is a bright, healthy green.
- I removed the lid completely for the whole morning. I placed the container under the light with no cover. The tiny plants did not stress. They are now in the transition phase.
I would name this propagator "the humidity kit" from my local garden store. But any brand that fits these criteria will work.
My Final Verdict on Small Propagators
If you want the easiest path, do not buy the cheapest plastic seed tray from the big box store. The lids often warp, and the plastic is brittle. I tried one and the lid cracked in a week. Instead, buy a restaurant supply container.
My personal favorite is the 4-inch "condiment cup" with a clear lid. They are cheap, stackable, and short. I have used them for years. They are perfect for small carnivorous plant seeds.
However, I have also read a valuable note on AHS about air circulation for indoor seedlings. They advocate for bottom watering. For a small propagator this means pouring water into a tray underneath. But with my small clamshell, I just mist. I found that bottom watering is overkill for a two-week germination window. But I do follow their advice on using good quality growing medium.
If you really want to save money, just use a zip-lock bag. Fill the bag with damp perlite and peat, place your seeds in a small pot inside the bag, and zip it closed. Many growers use the "baggy method". It works great. It lacks structure but achieves the same humidity.
But a clear container is better because you can see the seedlings without opening the bag. That prevents sudden humidity drops. Remember, sundew seedlings are sensitive to sudden changes.
Common Problems I Encountered and How I Fixed Them
Problem: Green Algae on Soil Surface
I saw it in Container D and once in Container A. It happens when light hits stagnant water. I scraped the top 1/8 inch of soil and replaced it with fresh dry mix. I then reduced the watering. Algae is mostly harmless but competes with seeds for light. Always use distilled water to prevent mineral buildup. Tap water has salts that encourage algae.
Problem: Damping Off (Seedlings Rot and Fall Over)
This killed my second batch of seeds. It happens when the humidity is too high and water sits on the fragile stems. I fixed it by increasing air circulation. I pointed a small desk fan at the propagator, about 3 feet away, on the lowest setting, for one hour a day. And I opened the vents for longer periods. I avoided watering the seedlings directly.
Problem: Leggy, Stretched Seedlings
I noticed this when my light was too high. The seedlings grew tall, spindly, and pale. I moved the light down to 10 inches. Also, I removed the lid sooner because the excess humidity was making them soft. The stems thickened after two days of good light.
Problem: Mold and Fungus Gnats
This is the number one issue for beginners. I mentioned the white fuzz. I used a drop of food-grade hydrogen peroxide diluted with water (1:4) and sprayed the mold patch lightly. It killed the mold instantly. To prevent gnats, I placed a yellow sticky trap near the propagator. The gnats land on it and die. Also ensure no excess water is sitting in any tray.
The Verdict on Different Types of Sundew Seeds
I mostly grow Drosera capensis, which is the easiest. But size matters for different seeds.
- Drosera capensis (Cape Sundew): Large seeds. They are easy to see. They germinate fast (5-7 days). Any small container works.
- Drosera spatulata (Spoon-leaved Sundew): Very tiny seeds. I need my magnifying glass. They germinate in similar times. A shallow container is crucial to prevent them from being splashed away.
- Drosera binata (Forked Sundew): Germination is sporadic. They need patience. My shallow container worked fine, but I kept the lid on for 3 weeks instead of 2.
- Tuberous sundews (Australian species): These have a winter-dormant phase. A propagator is only for starting them. They need very specific cooler temps. I have not mastered these, but shallow is still better.
My Personal Final Thoughts
I want to be clear about one thing. The size and type of propagator matter less than your daily attention. You cannot set it and forget it. I check my plants twice a day for the first two weeks. That is the only way to avoid the three fatal errors I mentioned.
I lost my first three pots of sundews. The third pot was the worst. I used a beautiful glass cloche. It looked gorgeous on my shelf. But it killed the seeds because it had no air exchange and too much water pooling at the base. I was so frustrated that I almost quit. Then I switched to a simple clear takeout box. The difference was night and day. The seeds popped right up.
My advice? Save your fancy containers for displaying mature plants. For seeds, use the ugliest, most practical thing you have. A plastic clamshell is my go-to. It works, it is cheap, and you can throw it away when it gets dirty.
Frequently Asked Questions
Q: How long does it take for sundew seeds to germinate in a propagator?
A: With the right conditions and a shallow container, I saw germination in 5 to 7 days. Some species are slower, taking 2 to 4 weeks. The key is consistent warmth and light. Do not give up before day 14.
Q: Can I use a propagator with drainage holes?
A: For sundew seeds, no. You want to keep the moisture in. We are using the "humidity dome" technique. If your container has drainage holes in the bottom, place it inside a solid tray. You will water from the top, but you want the bottom to stay closed. A container with bottom holes alone will lose humidity.
Q: When should I remove the lid from the propagator?
A: I wait until the seedlings have their first two true leaves. This is usually around week 2 to 3. I start by opening the vents fully for 2 hours a day. Then I remove the lid for 1 hour a day for 3 consecutive days. After a week of this, I remove the lid permanently and keep the soil damp by watering from below. If you remove the lid too early (before the first true leaves), the seedlings dry out and die.
Q: Do I need to sterilize the soil before sowing?
A: I do not usually boil the peat. I use fresh, unopened bags of peat and perlite. That is sterile enough. If I reuse old soil, I bake it in the oven at 180 degrees Fahrenheit for 30 minutes. This kills fungus spores. It is a hassle, but it saves your seeds from damping off. I learned this after my first container A disaster.





