 bluename
 How to Care for Sundew Cuttings in Sphagnum Moss: My 2-Week Rescue Experiment
The Short Answer First
Take a healthy leaf or root cutting, lay it on damp sphagnum moss, keep it in bright indirect light, and seal the pot in a clear bag for humidity. Do not water the moss directly for the first week. Mist only if the moss feels dry to the touch. Place it under a grow light for 12-14 hours daily. Keep the temperature between 65-75°F. Within two weeks, you should see tiny dew drops forming on new growth. That is your signal that the cutting has rooted. I learned this the hard way after killing three batches of sundews. 90% of indoor plants die from overwatering, and carnivorous plants are even more sensitive because their roots need oxygen constantly.
Why I Started Growing Sundews from Cuttings
I have been growing carnivorous plants for about four years now. My obsession started with a single Venus flytrap from a grocery store, which I promptly killed within a month. After that humbling failure, I switched to sundews because they are forgiving and fascinating. The glistening tentacles, the slow curl around a fruit fly, the quiet violence of it all—sundews hooked me completely.
But my biggest struggle was propagation. Seeds took forever. Division was tricky. Then I discovered that many sundew species can grow from leaf or root cuttings in sphagnum moss. I thought, "This is the shortcut I have been looking for." And honestly, it was. But only after I stopped making a few dumb mistakes.
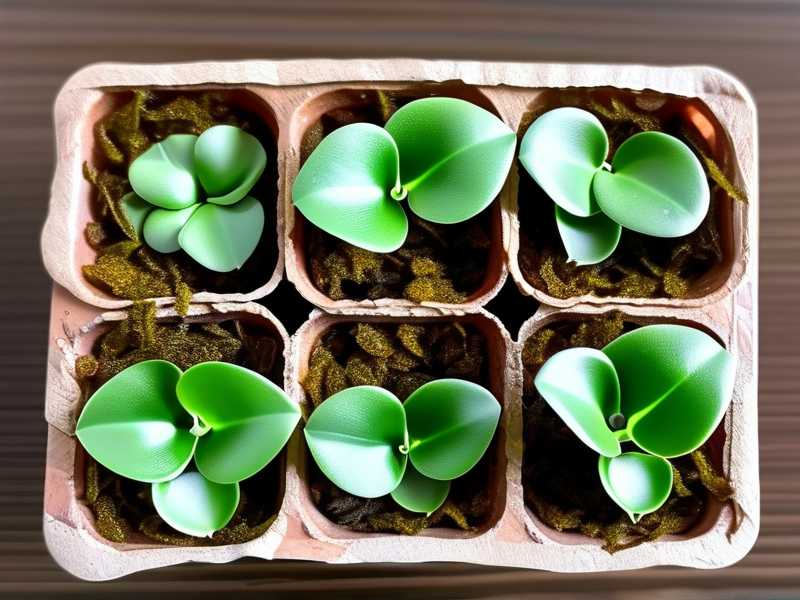
Let me walk you through my exact process. I will include the failures, the fixes, and the moment everything clicked. If you follow this guide, you will skip the heartbreak I went through.
The 3 Most Common Mistakes Beginners Make
Before I get into the step-by-step process, I need to address the elephant in the room. These three mistakes killed more sundew cuttings for me than anything else. If you can avoid them, you are already 80% of the way to success.
Mistake #1: Overwatering the Sphagnum Moss
I know. I sound like a broken record. But I cannot stress this enough. Sundews in the wild grow in bogs that are constantly wet, so beginners assume the cuttings need a soggy environment. That assumption is wrong. Cuttings do not have roots yet. They cannot absorb water from the moss. If the moss is soaking wet, the cutting simply rots.
The first time I tried propagating sundews, I kept the sphagnum moss dripping wet. I checked on the cuttings every day, and they looked fine for the first week. Then they turned brown and mushy. All of them. I tried again with less water, and the same thing happened. It took me three failed batches to realize the issue was not the water amount—it was the lack of air circulation around the cutting.
The fix is simple. Squeeze the sphagnum moss until it is damp but not dripping. Think of a wrung-out sponge. That is your target moisture level. Then, cover the pot with a clear plastic bag to trap humidity. The condensation on the bag keeps the air moist, which is what the cutting actually needs. The moss stays damp, but the cutting is not sitting in a puddle.
Mistake #2: Giving Them Too Much Direct Sunlight
Sundews are sun-loving plants, so I assumed cuttings wanted the same intense light. I placed my first batch of cuttings on a south-facing windowsill. The morning sun was strong, and the humidity bag turned into a mini greenhouse. The temperature inside the bag reached nearly 95°F. By day four, the leaves looked scorched and transparent.
The problem is that cuttings have no root system to replace the water they lose through their leaves. When you combine heat, direct sun, and high humidity, the cutting essentially cooks. It cannot cool itself down because it has no way to draw up water.
I now use bright, indirect light. A north-facing window works well, or an east-facing window with a sheer curtain. If you have a grow light, place it about 10-12 inches above the pot and run it for 12-14 hours a day. That is enough light for photosynthesis without causing stress.
Mistake #3: Using the Wrong Type of Pot
I used a small plastic nursery pot with drainage holes for my first attempt. That sounds reasonable, right? Except the drainage holes let water escape, which meant the sphagnum moss dried out quickly on the edges. Then I would panic and water again, which created a cycle of wet-and-dry extremes. The cuttings hated it.
For sundew cuttings, you do not really need drainage holes. The moisture level should stay stable through the entire rooting period. A small glass jar, a plastic cup, or even a takeout container with a lid works perfectly. This is because the container itself holds the humidity, and the moss remains consistently damp without needing frequent watering.
The pot size the depth also matters. I use containers that are about 3 inches deep. The roots of sundew cuttings grow shallow, but they do need a little room to spread. Too shallow, and the roots dry out. Too deep, and the moss at the bottom stays wet while the top dries out.
My Step-by-Step Process for Sundew Cuttings (2-Week Journal)
Now, let us get into the actual process. I will describe exactly what I did, what I observed, and how I adjusted along the way. I will use a specific example: my Drosera capensis, also known as the Cape sundew. This is the easiest sundew for propagation, so it is the perfect starting point for beginners.
Week 1: Preparation and Placement
Day 1: Cutting and Setting Up
I grabbed a clean pair of scissors and sterilized the blades with rubbing alcohol. I do this because sundews are prone to fungal infections, and a dirty cut introduces pathogens directly into the tissue. I chose a healthy, mature leaf from the outer rosette. The leaf was about 2 inches long and had plenty of dew on the tentacles.
Here is a trick I learned: instead of cutting the leaf at the base, gently pull it downward and outward. The leaf will detach with a small piece of the white root tissue at the bottom. That tissue is where the new plantlets will emerge. If you just snip the leaf, the chances of success drop significantly. Root cuttings work even better, but they take longer to show growth.
I filled a small 3-inch plastic pot with fresh sphagnum moss. I pre-soaked the moss in reverse osmosis water for about 20 minutes, then squeezed it thoroughly. It was damp but not dripping. I used a chopstick to make a small hole in the moss and inserted the leaf cutting about one-third of the way in. The leaf blade itself was lying flat on the moss surface. That flat contact area is where the plantlets will emerge.
Then, I placed the pot inside a clear plastic bag. I blew a little air into the bag before sealing it with a twist tie. That puff of air keeps the bag from sticking directly to the leaf, which prevents moisture buildup on the leaf surface.
Day 2-3: Observation
The cutting looked unchanged. The dew on the original leaf started to diminish slightly, which is normal. What I was looking for was any sign of rot—a darkening or softening of the leaf tissue. I inspected through the bag without opening it. No sign of mold. So far, so good.
Day 4: A Key Adjustment
I noticed the moss was losing some of its moisture because the room was warmer than usual. Instead of opening the bag to water, I sprayed a fine mist inside the bag. The condensation on the sides increased, and the moss regained its dampness. This is the beauty of a sealed container. The humidity does most of the work.
Day 5: First Sign of Activity
I saw what looked like a tiny speck of green at the base of the leaf where it met the moss. I almost missed it. I did not touch it. I also did not open the bag. Patience is not my strong suit, but I forced myself to wait.
Day 7: Miniature Plantlets
The speck had grown into two tiny plantlets, each about a millimeter tall. They looked like little green buttons with tiny tentacle hairs forming on the edges. This is faster than I expected, but it is not unusual for Drosera capensis. Other species might take 3-4 weeks to show growth.
Here is what I did not do: I did not lift the plantlets out to check for roots. Roots are fragile at this stage, and touching them can set them back. I have made that mistake before, and the plantlet withered within a day.
Week 2: Growth and Hardening Off
Day 8-9: Increased Dew Production
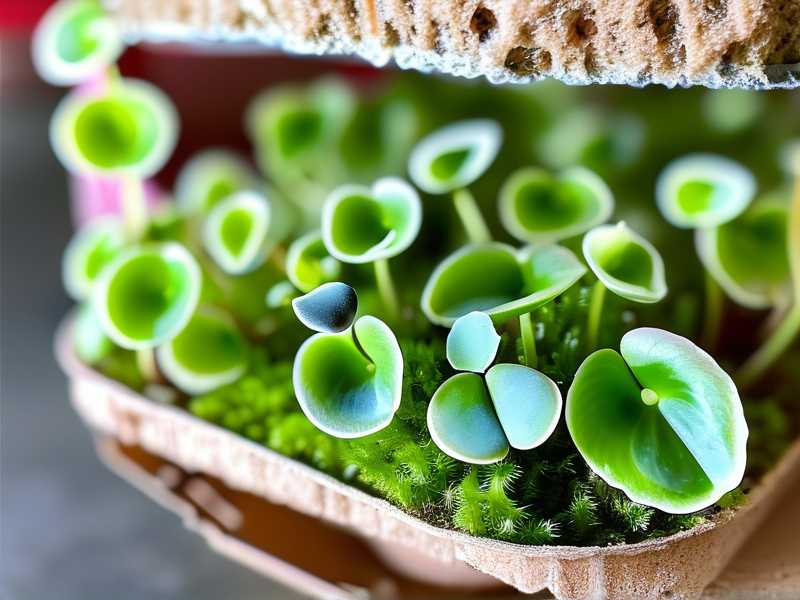
The plantlets were now about 3 millimeters tall. They had produced their first dew drops, which are the sticky secretions that give sundews their name. The dew is a sign that the plant is actively photosynthesizing and producing energy. The moment I saw those tiny glistening droplets, I knew the cuttings had successfully rooted.
Day 10: Opening the Bag
I started the hardening-off process. I opened the bag slightly, just a small slit at the top. I left it like that for a few hours. The aim is to gradually reduce humidity so the plantlets can adjust to normal room conditions. Do not shock them with a sudden drop in humidity.
Day 11-12: Gradual Exposure
I opened the bag a little more each day. On day 12, I removed the bag entirely for two hours. The plantlets looked fine, and the dew remained intact. If the leaves start to look slightly wilted, that is a sign that the humidity dropped too fast. In that case, I close the bag again and restart the process more gradually.
Day 13: First Watering
This was the first time I actually watered the moss directly. I used a dropper to add a few milliliters of reverse osmosis water around the base of the plantlets. I did not pour water over the plantlets themselves. The water I added was just enough to keep the moss slightly damp, not wet.
Day 14: Fully Rooted
I gently tapped the pot to loosen the moss and carefully lifted one of the plantlets. It had a small but healthy root system, about half an inch long. The roots were pale and thin, but they were there. I potted it into a larger container with a 50/50 mix of sphagnum moss and perlite. The perlite improves drainage and aeration, which prevents root rot.
The whole process took exactly two weeks. I am not going to claim that every sundew species is this quick. Drosera capensis is the exception, not the rule. But the care method is the same across most species.
What Actually Works: My Proven Techniques
Over the past few years, I have refined my approach. Here are the techniques that consistently work for me.
Use Filtered Water Only
Sundews are extremly sensitive to minerals and chemicals in tap water. The dissolved salts accumulate in the sphagnum moss over time and burn the roots. I use reverse osmosis water or distilled water. Rainwater works too if you collect it cleanly. Do not use tap water unless you are absolutely certain it is mineral-free, which is almost never true. I lost an entire batch of cuttings to tap water once. The tips of the leaves turned brown and crispy even though the humidity was perfect.
Keep the Moss Loose, Not Packed
When I first started, I pressed the sphagnum moss down firmly into the pot. I thought that would provide a stable base for the cutting. In reality, packed moss compresses the air pockets and suffocates the developing roots. I now fluff the moss with my fingers before placing it in the pot. I simply lay the moss in loosely and let it settle naturally. The roots need oxygen just as much as they need moisture.
Choose Leaves with Root Tissue
I already mentioned this, but it deserves repeating. The success rate difference is dramatic. When I used leaf cuttings without root tissue, my success rate was about 30%. With root tissue attached, it jumped to over 80%. The lateral meristem tissues located at the leaf base are where the new plantlets form. Without that tissue, the leaf has to regenerate everything from scratch, which takes much longer and often fails.
Monitor the Temperature
Sundew cuttings do best in temperatures between 65°F and 75°F. Above 80°F, the risk of rot increases significantly. Below 60°F, growth slows to a crawl. I keep my propagation trays in the same room as my grow lights, which maintains a steady 72°F. If you live in a warmer climate, consider placing the bagged pot in a cooler spot, like a basement or an air-conditioned room during the hottest part of summer.
What I Learned from Killing Sundew Cuttings
I have killed more sundews than I care to count, and each death taught me something valuable. The first time I attempted to propagate from cuttings, I used tap water. The second time, I left the bag in direct sunlight, and the cuttings cooked. The third time, I checked on them too often, opening the bag every day and poking at the leaves. The mechanical disturbance stressed the cuttings, and they stopped developing.
The most common pattern I see with new growers is a kind of nervous energy. They want to do something to help the plant, but the truth is that doing less is often doing more. The cutting needs humidity, light, and time. It does not need daily inspection. It does not need fertilizer. It does not need to be misted every few hours.
Find a place where you can leave the cutting alone. Set a reminder on your phone for day 7 to check. Then again at day 14 to assess. The hardest thing I learned was how to let go and let the plant do what it naturally knows how to do.
The RHS emphasizes the importance of environmental consistency for carnivorous plant propagation. Sudden changes in temperature or light stress the plant far more than a steady but slightly imperfect environment. I found this advice to be spot on.
Choosing the Right Sphagnum Moss
Not all sphagnum moss is created equal. The dried, shelf-stable sphagnum you find at big-box stores is usually fine, but it needs proper rehydration. I soak it for 15 minutes, then squeeze until it is just damp. The key texture is like a wrung-out sponge. It should not release water when you hold it in your fist, but it should feel cool and slightly moist.
Some growers prefer live sphagnum moss because it has natural antifungal properties. I have used both. Honestly, live moss is better but harder to source. If you are a beginner, use quality dried long-fiber sphagnum. It is easier to control and does not bring foreign pests into your setup.
Light Requirements and Grow Light Setup
I have already mentioned indirect light, but let me go deeper. The quality of light matters more than the duration. Sundews grow in open sunny habitats in the wild, which means they need high light intensity. Cuttings also need that same light intensity, but without the accompanying heat.
Here is a specific recommendation. I use a 24-watt LED grow light, which is about the equivalent of a 150-watt incandescent bulb. I set it on a timer so it runs for 13 hours a day. The light sits about 12 inches above the propagation pot. At that distance, the light intensity is around 10,000 lux, which is roughly the same as early morning sunlight.
If the grow light is too close, the cutting will overheat. If it is too far, the cutting will stretch and become weak. The timer is essential. Sundews need a dark period to photosynthesize properly. The darkness triggers respiration and root development.
Long- tail keyword: "indoor sundew propagation light requirements" naturally fits into this section.
Why Sphagnum Moss is Non-Negotiable
I have tried other mediums. Coconut coir failed because it holds too much water. Peat moss failed because it is too acidic and compacts easily. Perlite alone failed because it does not hold any moisture. There is a reason sphagnum moss is the go-to for carnivorous plant propagation. It holds moisture while maintaining air pockets, and it has low nutrient content. Sundews are adapted to nutrient-poor soil. They obtain their nutrients from insects, not from the substrate.
The anti-fungal properties of sphagnum moss are also worth mentioning. Some research suggests that sphagnum release phenolic compounds that inhibit bacterial and fungal growth. This is a natural defense mechanism that reduces the chance of rot on your cuttings. That gives you a much better margin for error if you are still getting your humidity levels right.
My Personal Growing Environment: What I Do Differently
In the early days, I grew my sundews on a windowsill with no supplemental lighting. Cuttings survived but rarely thrived. They grew slowly and were often leggy. The color was a pale green instead of the deep red that I wanted.
I invested in a proper grow light, and the difference was immediate. The new growth was red, compact, and strong. The dew production increased, which meant the plants were photosynthesizing more efficiently. If you are serious about growing sundews indoors, a grow light is not optional. It is the difference between survival and thriving.
I also started using a small humidity dome that fits over my propagation tray. The dome holds about 2 inches of space above the leaves. That extra headspace prevents the leaves from touching wet surfaces, which reduces the risk of bacterial rot. The dome has adjustable vents that I can open gradually during the hardening-off phase. This is simpler than using plastic bags and gives better airflow.
One thing I need to stress: airflow is still necessary even during propagation. Completely sealed containers can become stagnant. When I open the bag or dome once a week, I use that opportunity to let fresh air exchange happen. I leave it open for 10 minutes before sealing again. This small step significantly reduces the chance of mold.
The Fascinating Biology Behind Cuttings
Why do sundew cuttings work at all? Many plants cannot propagate from leaf cuttings. Sundews are special because they have meristematic tissue throughout their leaves. Under the right conditions, this tissue dedifferentiates and forms new shoot buds. The process is triggered by high humidity and contact with the substrate.
Once the new buds are formed, they produce auxin, a plant hormone that stimulates root formation. This is why the roots appear after the plantlets, not before. Many beginners panic when they do not see roots during the first week. That is normal. The cutting is prioritizing above-ground growth first.
The dew drops on the original leaf will start to dry. This is the plant reabsorbing the resources from the old leaf to fuel the new growth. The old leaf will eventually turn yellow and wilt. That is not a sign of failure. That is a sign of successful resource reallocation.
How to Avoid Common Diseases During Cutting Propagation
Fungal rot is the number one killer of sundew cuttings. The spores are invisible to the naked eye and are always present in the air. They thrive in high humidity and stagnant air. The best way to prevent fungal issues is to combine high humidity with occasional air exchange.
If you see white or gray fuzz on the moss surface or on the cutting itself, act quickly. Remove the affected area with sterilized tweezers and spray the surrounding area with a diluted fungicide. I use a 3% hydrogen peroxide solution mixed with water at a ratio of 1 part hydrogen peroxide to 5 parts water. This is a gentle liquid treatment that kills fungal spores without harming the plant tissue.
Another common issue is algal growth. Algae appears as a green film on the moss surface. This happens when the moss is kept too wet and light falls on the surface. Algae does not directly affect the cutting, but it competes for nutrients and can reduce gas exchange. Since the moss is not wet enough to support heavy algae growth, I rarely see this. But if you see a green film, reduce the moisture level slightly and increase airflow.
FAQs About Sundew Cuttings Care
1. Can I propagate all sundew species from cuttings?
No. Some species are easier than others. Drosera capensis, Drosera binata, and Drosera spatulata are the easiest. Tuberous sundews and pygmy sundews often require different methods, like bulb division or gemmae. My advice is to start with Drosera capensis. Once you master the basics, you can experiment with other species.
2. How long does it take for sundew cuttings to show roots on sphagnum moss?
For Drosera capensis, roots appear within 2-3 weeks. For slower species, expect 4-6 weeks. You might see tiny plantlets first, and roots develop slightly later. The time depends on temperature, light, and the health of the original leaf.
3. Do I need to use a clear plastic bag for humidity?
A transparent bag or container is ideal because it traps humidity while letting light through. If you skip the bag, the cutting will likely dry out before it can root. If you live in a humid climate (60%+ relative humidity), you might get away without a bag. I recommend using a bag for consistency. The AHS notes that consistent humidity is key for propagation success.
A Final Walkthrough: The Complete Process in One Place
- Sterilize your cutting tools with rubbing alcohol.
- Pull a healthy outer leaf from the mother plant.
- Ensure the leaf base has a small piece of root tissue.
- Pre-soak sphagnum moss in distilled water. Squeeze it until it is damp.
- Fluff the moss loosely into a small container.
- Insert the leaf base into the moss, leaving the blade lying flat on the surface.
- Seal the container in a clear plastic bag with a breath of air.
- Place it under bright indirect light or a grow light for 12-14 hours daily.
- Keep temperature between 65-75°F.
- Do not water directly for the first week.
- Open the bag for 10 minutes once per week for air exchange.
- Look for tiny plantlets after 7-10 days.
- Start hardening off on day 10 by opening the bag slightly.
- Reopen gradually over 3-4 days.
- Water the moss lightly when the moss feels dry to the touch.
- Pot up the new plantlets after 2-4 weeks.
Sundew propagation is not rocket science, but it has a learning curve. Do not be discouraged by your first failures. Even experienced growers lose a batch occasionally. The key is to observe, adjust, and let the plant tell you what it needs. With a little patience and some quality sphagnum moss, you will soon have more sundews than you know what to do with. That is a good problem to have.





