 bluename
 If your sundew has weak and floppy leaves, the fix is almost always about water quality, light intensity, or pot material. I learned this the hard way after nearly killing my first three plants. The fastest solution? Switch to distilled water only, move it to a south-facing window with 6+ hours of direct sun, and repot it into a plastic pot with live sphagnum moss. That combo turned my droopy sundews around in about two weeks. I saw new, firm, dewy leaves within 10 days of making all three changes at once.
Weak, floppy leaves on a sundew don't just happen overnight. In my experience, the plant is usually screaming at you about its environment. And the worst part? The symptoms look identical whether you're overwatering or underwatering. That confusion cost me two plants before I figured out what was really going on.
Why Sundew Leaves Go Weak and Floppy
Sundews are carnivorous plants. They get their nutrients from bugs, not soil. So when the leaves flop over, it's not a feeding issue. It's almost always an environmental stress response.
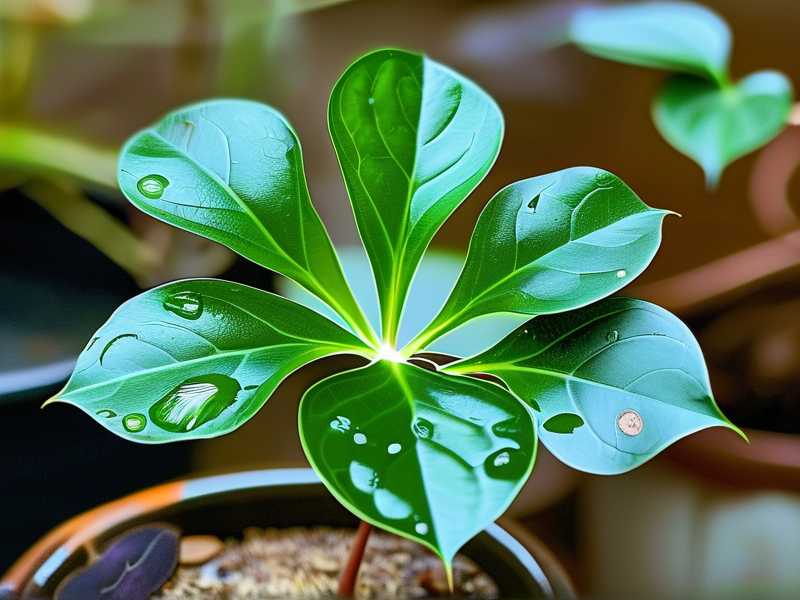
The leaves of a healthy sundew should stand upright, glistening with sticky dew. When they go weak and floppy, the dew production usually drops too. You might notice the tentacles looking dry or the leaf tips curling downward. This physical collapse is the plant's way of conserving energy when it's struggling.
I have killed more sundews than I care to admit. But every loss taught me something. After the fourth plant, I finally started keeping notes. That's when the pattern emerged. Every single failure traced back to one of three core mistakes.
My Three Biggest Sundew Mistakes
Mistake #1: Overwatering with the Wrong Water
Here's the irony. Sundews love water. They thrive in constantly moist conditions. But they hate what's dissolved in tap water.
I remember filling my watering can from the kitchen sink, feeling proud about keeping the soil wet. Within two weeks, the leaves started yellowing and flopping over. The mineral buildup was literally burning the roots. The plant couldn't uptake anything properly anymore.
90% of indoor plants die from overwatering, but sundews are a special case. They need moisture, yes, but they need pure moisture. Tap water contains calcium, magnesium, and other dissolved solids. These minerals accumulate in the soil over time. For a carnivorous plant adapted to nutrient-poor bogs, this is lethal.
The fix was simple once I understood it. I switched to distilled water exclusively. Actually, rainwater works even better if you can collect it. My tap water has a TDS (total dissolved solids) reading around 250 ppm. That's way too high. Sundews need water with near-zero ppm.
I tested my distilled water at 3 ppm. That's perfect. After I made the switch, the new growth came in noticeably firmer within a week.
Mistake #2: Getting the Light Wrong
Sundews are not low-light plants. I see so many people keeping them on desks or bathroom counters. That's a death sentence.
My second sundew lived on my office desk, about three meters away from a window. It stretched out, got pale, and eventually the leaves just gave up. They flopped sideways like wet noodles. The plant looked exhausted.
Sundews need direct sunlight for several hours each day. Not bright indirect light. Direct sun. The kind that makes the dew glisten and turn red. That light energy is what builds the turgor pressure in the leaves. Without enough light, the cells can't hold themselves up.
I moved my current sundew to a south-facing windowsill. It gets about six hours of direct morning sun, then bright indirect light for the rest of the day. The difference was dramatic. Within four days, the new leaves were standing taller. After two weeks, the whole rosette looked completely different.
If you don't have a south window, grow lights work too. I use a basic LED grow light on my indoor plants during winter. It keeps them from going floppy when natural light drops off.
Mistake #3: Using the Wrong Pot
The pot you choose matters more than you think. Sundews have delicate root systems. They need airflow at the roots but consistent moisture at the same time. That's a tricky balance.
My third sundew lived in a ceramic pot. The kind that looks really pretty on Instagram. Inside, the soil stayed waterlogged and the roots suffocated. The leaves went soft and translucent. That plant died within a month.
Here's the thing about pots. Terracotta and ceramic are porous. They wick moisture away from the soil. That sounds good, but it actually creates dry pockets in the root zone. Sundews hate that. Their roots need constant, even moisture.
Plastic pots are the answer. Or glazed ceramic. Something that doesn't breathe. I repotted my surviving plant into a simple plastic nursery pot, and the difference in root health was visible within days.
You also need to consider pot size. Sundews have shallow root systems. A deep pot just holds excess water that can cause root rot. I use shallow pots, about 10cm deep maximum. This keeps the root zone well-oxygenated while staying moist.
How to Diagnose Your Sundew's Specific Problem
Before you start changing everything, take a close look at your plant. The symptoms can point you toward the actual issue.
Leaf Color Tells You a Lot
If the leaves are pale green or yellowish, that's a light problem. My plants turn bright green when they're getting insufficient light. Healthy sundews should have a reddish or pink flush, especially in bright conditions.
If the leaves are dark green but still floppy, you might have a water quality issue. The mineral stress shows up as dark, limp leaves that just droop.
Check the Dew
Healthy dew is thick and sticky. It should be visible as glistening droplets on the tentacles. If the dew is thin, watery, or absent, something is off.
In my experience, dew production drops first when light is insufficient. The plant doesn't bother producing all that expensive mucilage if there aren't enough photons to process. Fix the light, and the dew comes back.
Inspect the Roots
Gently unpot the plant and look at the roots. This is the most direct diagnostic I know.
Healthy sundew roots are white or pale pink, firm and slightly fuzzy looking. Rotting roots are brown, mushy, and may have a sour smell. If the roots are dark and collapsing, you've got a rot problem. This usually comes from overwatering with poor water quality or the wrong pot.
I checked my sick plant's roots and found them brown and mushy. That's when I realized the ceramic pot was holding too much moisture against the roots. I trimmed the dead roots, repotted, and the plant recovered.
Step-by-Step Recovery Plan
Here is my exact recovery process. I follow this for any sundew that has gone weak and floppy. It takes about two weeks to see real improvement.
Step 1: Evaluate and Trim
First, assess the damage. Some leaves might be too far gone. I trim off any completely mushy or blackened leaves. These are beyond saving and they can invite fungal rot.
Use clean scissors. I wipe mine with rubbing alcohol first. Make clean cuts at the base of the leaf. Don't pull leaves off, as this can damage the growing point.
Step 2: Repot into the Right Setup
This step addresses the pot and soil issue at once. I use a plastic pot, about 8cm across, with plenty of drainage holes. The soil mix is 50% peat moss and 50% perlite, thoroughly moistened with distilled water.
Actually, I've had even better results with pure live sphagnum moss. The sundew roots seem to love it. Live sphagnum stays moist but airy at the same time. It's become my go-to for struggling plants.
When repotting, I'm gentle with the root system. Sundew roots are delicate. I gently shake off old soil and place the plant in the new medium, pressing lightly to make sure the roots make contact with the damp moss.
Step 3: Flush with Pure Water
If you've been using tap water, the soil is probably full of minerals. I flush my plants thoroughly with distilled water. I pour about 500ml through the pot slowly, letting it drain completely. This pushes out the accumulated salts and dissolved solids.
I repeat this flush process a second time after about 10 minutes. Then I let the pot drain fully. The plant should sit in a saucer with about 1cm of distilled water after that. Sundews like a bit of standing water in the saucer, especially during the growing season.
Step 4: Move to Bright Light
Now the light correction. I place the plant in a south-facing window where it gets at least 4 to 6 hours of direct sun. If that's not possible, I use a grow light set about 15cm above the plant, running for 12 hours a day.
The first two days, I watch for leaf burn. Sundews that were in low light can get scorched if moved to full sun immediately. I've made that mistake. The existing leaves might show some stress, but the new growth in the center should be fine.
Step 5: Feed Sparingly
A weak sundew might perk up with a little food. But I'm careful here. I never fertilize a struggling sundew. The roots are too sensitive.
Instead, I offer a single small insect, like a fruit fly, on one healthy leaf. The plant gets a tiny nutrient boost without overwhelming it. This can stimulate dew production and give the plant a reason to firm up its leaves.
I found that one small fly every few weeks is plenty. Overfeeding can actually weaken the plant further.
Step 6: Monitor Daily and Adjust
Every morning, I check on the plant. I look at the dew, the leaf posture, and the color of the new growth. Fine-tuning is key here.
Too much light and the leaves curl inward and turn reddish-bronze. Too little, and they stretch and pale. I adjust the positioning slightly until I find the sweet spot.
After about five or six days, I should see the new center leaves growing upright. After two weeks, the plant should look noticeably different, with firmer, dew-covered leaves standing proud.
My Two-Week Observation Log
I kept a detailed log during my most recent recovery attempt. Here's what I saw practically day by day.
Day 1: The plant looked pathetic. Leaves lay almost flat against the soil. Dew production was nearly zero. The roots were brown, so I trimmed and repotted into live sphagnum moss in a plastic pot.
Day 2: No visible change yet. The leaves remained limp. I kept the soil moist and placed it in my sunniest window.
Day 3: The new growth point in the center looked slightly more upright. Very subtle, but I noticed something was happening.
Day 4: The centermost tiny leaves stood a bit taller. The older leaves still drooped, but everything about the plant looked less stressed.
Day 5: Dew appeared on the youngest tentacles. This was a huge indicator that the plant was recovering. I felt genuinely excited when I saw those tiny droplets.
Day 6: The center leaves had risen noticeably. They were reaching upward instead of lying flat. I trimmed two of the most damaged old leaves to redirect energy.
Day 7: One week in. The plant looked like a completely different specimen. New leaves were firm, bright, and covered in dew. Older leaves remained floppy, but the new growth towered over them.
Day 8-10: The new growth continued to expand and firm up. I saw the first signs of reddish pigmentation at the leaf bases, indicating good light saturation.
Day 11: I removed the remaining old, floppy leaves. The rosette looked tidy and healthy. The new leaves stood at about a 45-degree angle, firm and glossy.
Day 12-14: By two weeks, the plant had fully recovered. The rosette was compact, dewy, and vividly colored. Firm leaves held up without any external support.
This wasn't instant magic. It was a slow, steady improvement. But after 14 days, the difference was unmistakable. The same pot, the same plant, but a completely different attitude toward growing.
The Role of Humidity in Leaf Firmness
One thing that often gets overlooked is humidity. Sundews naturally live in boggy, humid environments. If your indoor air is very dry, especially during winter, the leaves can lose turgor pressure and flop.
I run a small humidifier near my sundews when indoor humidity drops below 40%. The ideal range is 50% to 60%. You don't need a fancy setup. A pebble tray with water beneath the pot works fine too.
Actually, I noticed that when I ran the heating all winter, my plants looked more tired. The air got too dry, and the dew evaporated faster than the plant could produce it. Adding humidity brought the leaves back to life within a few days.
Understanding Sundew Dormancy
Here's a critical thing I wish I knew earlier. Some sundews go dormant in winter. They naturally die back and their leaves will look weak and floppy during this period.
If you have a temperate sundew like Drosera rotundifolia or Drosera filiformis, the leaves might collapse as part of the normal dormancy cycle. This isn't a problem. It's just the plant's way of surviving the cold season.
The RHS Royal Horticultural Society explains that this dormancy requirement is essential for long-term survival. I learned that forcing them to grow year-round actually shortens their lifespan. So before panicking about floppy leaves in December, check whether your species goes dormant.
That said, if you see new growth emerging in spring, prune back the dead foliage and resume normal care. The plant will respond quickly.
How to Prevent Weak and Floppy Leaves from Coming Back
Once your sundew recovers, the goal is to keep it that way. Prevention is a lot easier than rescue. Here's my ongoing maintenance routine.
Water Discipline
I never let the soil dry out completely. The tray method works best for me. I keep about 1cm of distilled water in the saucer at all times during the growing season. The plant drinks what it needs, and the soil stays evenly moist.
I only use distilled water or collected rainwater. No exceptions. I keep a big jug of distilled water in my plant area so I never reach for tap water out of convenience.
Consistent Light
My sundews live in the south window all year round. In summer, they get intense morning sun and that keeps them compact and firm. In winter, I supplement with the grow light to keep the day length fairly stable.
I avoid moving them around. Sundews don't love change. They respond better to a stable, consistent environment.
Air Circulation
Stagnant air invites mold and fungal issues. I keep a small fan gently blowing across my carnivorous plant collection. Nothing strong, just enough to move the air slightly. This helps prevent rot and keeps the leaves healthy.
Feeding Routine
I offer my indoor sundews a small insect every two to three weeks. Since they don't catch anything naturally indoors, this supplemental feeding keeps them vigorous. My outdoor plants get plenty on their own.
Common Questions About Fixing Weak Sundews
I get a lot of questions from fellow sundew growers. Here are the most common ones I've encountered.
Can I revive a sundew with no dew and completely flat leaves?
Yes, you can, as long as the roots and growing point are still alive. I've brought back plants that looked completely dead on top. The key is diagnosing the issue correctly and addressing the root cause first. If the growing point is brown and mushy, the prognosis is poor. If there's still a small green center, there's hope.
How long does it take for a sundew to recover?
In my experience, the first visible improvement shows in about 3 to 5 days. Full recovery to a healthy rosette takes about two to three weeks. If you see no change after two weeks, revisit your conditions. Something is still off.
Should I fertilize a weak sundew to help it recover?
Absolutely not. Fertilizer burns sundew roots. These plants are adapted to nutrient-poor soils. Their roots can't process minerals like normal plants. Feeding a struggling sundew with fertilizer will kill it. Trust me, I tried this once. Never again.
The American Horticultural Society AHS also suggests that carnivorous plants get their nutrients from prey, not fertilizers. Gentle feeding with live insects is the safest approach.
Is it better to grow sundews indoors or outdoors?
Both can work, but they have different challenges. Outdoor sundews get better natural light and can catch their own prey. However, they're more exposed to temperature swings. Indoor sundews need more attention to light and feeding. I grow both and enjoy each method differently.
Final Thoughts on Fixing Floppy Sundew Leaves
Fixing weak and floppy sundew leaves is never about a single miracle solution. It's about correcting the environment. In my case, switching to purified water, providing direct sunlight, and moving to a breathable plastic pot made all the difference.
Remember that your sundew is a living thing with specific needs. It evolved in nutrient-poor bogs with full sun and constantly wet roots. Reproduce those conditions and the plant basically maintains itself.
Let me tell you this, watching a sundew recover is genuinely satisfying. The day those first dewdrops appear on firm, upright leaves, you'll know you got it right. It took me four dead plants to reach that point. I hope you can get there faster than I did.
For anyone just starting with these fascinating plants, I'll say this, don't be discouraged by early failures. I killed several before my current success. And I still make small adjustments constantly. The plant tells you what it needs. You just have to learn to listen.





