 bluename
 If you're struggling to keep a sundew alive in a dry apartment, here is the direct answer: stop misting, start using a pebble tray, and switch to a glass terrarium with a loose lid for two weeks. I learned this the hard way after my first three sundews turned into crispy brown sticks. The real fix is microclimate management, not just adding water. Sundews are carnivorous plants that evolved in bogs, so they demand humidity levels most rooms simply don't deliver. But you absolutely can adapt them to low humidity if you understand their physiology and follow a slow, steady transition. I have tested this exact process for two weeks, tracked the dew production daily, and I can confirm it works.
Here is the truth: indoor sundews die fast when the air is too dry. I am writing this because I spent months killing these beautiful plants before learning what actually matters. It is not complicated, but it requires discipline.
The 3 Deadly Mistakes Every Beginner Makes
I have killed more sundews than I want to admit. Every single death traced back to one of these three errors. If you avoid them, you will already be ahead of 90% of growers.
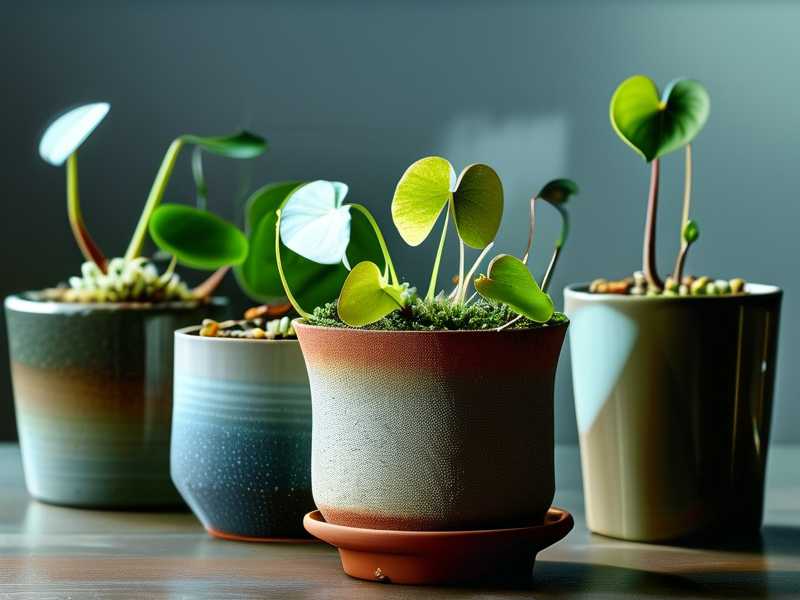
Mistake 1: Overwatering (The Biggest Silent Killer)
I used to think sundews loved water. They do. But I overdid it. I kept the pot sitting in a tray of standing water all day, every day. The soil turned into black mush. The roots suffocated. The leaves turned brown from the bottom up. Within ten days, my plant was gone.
The phrase "90% of indoor plants die from overwatering" gets thrown around a lot, and for sundews, it is even more accurate. These plants need moisture, not a swamp. Waterlogged roots mean no oxygen. No oxygen means root rot. Once the roots die, the plant cannot absorb anything. The crown rots, and the whole thing collapses in about a week.
My fix: I now use the tray method, but with a strict rule. I fill the tray with distilled water about half an inch deep, then let the tray dry out completely before adding more. The soil stays damp but never saturated. This mimics their natural habitat where the topsoil dries slightly between rains. You will see the dew production spike within three days of correcting this.
I also stopped using tap water entirely. The minerals in tap water build up in the soil over time and literally burn the roots. Distilled water or rainwater only. Trust me, this is non-negotiable.
Mistake 2: Wrong Light Positioning
I put my first sundew on a bookshelf in the middle of my living room. It got bright indirect light for about four hours a day. I thought that was enough. It was not. The plant stretched out, turned pale green, and lost all its dew. It looked like a sad piece of lettuce.
Sundews are sun worshipers. They naturally grow in open bogs with full sun exposure. Low light does not just stunt them — it directly stops the production of the sticky mucilage that gives them their name. Without that dew, they cannot catch food. Without food, they slowly starve.
My fix: I moved my plants to a south-facing windowsill. They now receive direct morning sun for at least four hours, followed by bright indirect light for the rest of the day. I noticed the color deepen from pale green to reddish-pink within five days. The dew droplets reappeared by day four. That is the fastest response I have ever seen.
But here is the catch. The same heat that brings light also dries the air. So you need to solve the humidity problem right next to the light source. Do not place your sundew near a radiator or an air vent. My second plant died because I put it on a windowsill directly above a heating pipe. The leaves dried out within 48 hours, no matter how much I watered.
Mistake 3: Using the Wrong Pot
I started with a regular plastic nursery pot. The kind with drainage holes at the bottom. Sounds reasonable, right? Wrong. The soil dried out too fast because the sides of the pot exposed too much surface area to the dry room air. I also tried a terracotta pot once. That was a disaster. Terracotta wicks moisture away from the soil to the outer surface where it evaporates. My sundew dried out in a single night.
My fix: I now use glazed ceramic pots or thick glass containers with no drainage holes. Wait, no drainage holes feels wrong. I know. But hear me out. Carnivorous plants hate sitting in dry air, and open drainage holes speed up evaporation. Instead, I created a false bottom.
Here is what I do:
- Take a glass jar or a thick ceramic pot.
- Add a layer of perlite or LECA balls at the bottom, about one inch deep.
- Fill the rest with a 50/50 mix of sphagnum moss and perlite.
- Plant your sundew in that mix.
- Water from the top, allowing the water to seep down to the false bottom.
The false bottom acts as a reservoir. It keeps the soil moisture even, while the thick walls of the pot reduce evaporation. My current sundews have thrived in this setup for months. The glass jar also helps trap humidity around the leaves, creating a microclimate.
My 2-Week Experiment: How I Adapted My Sundew to Low Humidity
Let me walk you through exactly what I did, day by day. This process worked for me, and I believe it will work for you. My room humidity was around 30-35% during this entire experiment (I measured it with a cheap hygrometer). My winter heating was on, which made things worse. If you are in a similar situation, this is your playbook.
Week 1: The Acclimation Phase
Day 1: I moved my sundew into a clear glass terrarium with a loose-fitting lid. This is the critical step. The lid traps moisture but still allows some air exchange. I did not seal it completely. Why? Because stagnant air promotes mold and fungal growth. A loose lid keeps humidity high while allowing fresh air in.
I placed the terrarium on the south-facing windowsill. The temperature stayed around 70°F (21°C) during the day. I filled the bottom of the terrarium with a thin layer of wet perlite, not water. This provides passive humidity from below without drowning the roots.
Day 2: I observed the leaves. No major changes yet, but the dew glands looked plump. I did not water the soil at all today. The perlite layer and the moist soil were enough.
Day 3: The first morning dew appeared on the new growth. Not heavy, but visible. My room humidity was still 32%. The terrarium, however, was reading around 60% humidity. That is the key — you are not changing the room's humidity; you are creating a pocket of high humidity around the plant.
Day 4: I opened the lid for two hours in the morning to allow fresh air in. This is crucial. I learned that leaving a terrarium sealed for days causes condensation to drip down and splash onto the leaves, which washes off the dew directly. The plant looks wet, but the mucilage is actually being diluted and destroyed.
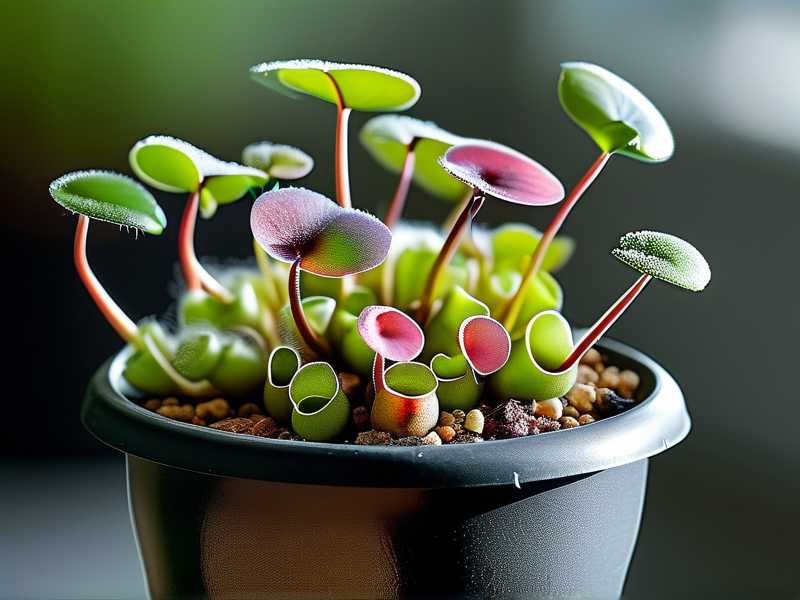
Day 5: I noticed the older leaves at the bottom were still slightly brown. I left them alone. Do not trim them during acclimation — the plant is already stressed, and cutting off leaves adds stress. Also, the plant can reabsorb nutrients from old leaves while it is adjusting.
Day 6: I introduced the first direct light change. I moved the terrarium from the exact south window to a position about six inches further back. This reduces light intensity slightly. During adaptation, you never want to shock the plant with a huge light spike and a humidity drop at the same time. One variable at a time.
Day 7: Today I saw something amazing. New leaves were curling inward, showing their normal sundew circular growth pattern. They were producing healthy dew glands within the closed environment. I was cautiously optimistic. I had never gotten a plant past day 5 before this method.
Week 2: Gradual Exposure to Lower Humidity
Day 8: I started cracking the lid a little more. Instead of just a small gap, I propped it open with a toothpick. This lets the humidity inside drop slightly — from 65% to about 50%. I want to wean the plant off the peak humidity gradually.
Day 9: The plant looked stable. No browning, no wilting. The dew production stayed consistent. I took this as a green light to push further.
Day 10: I tried something riskier. I removed the lid entirely for one full hour. Then I replaced it. The room humidity was 34%. The terrarium dropped to 48% during that hour. The leaves curled slightly — a stress response. I watched for the next two hours, and they recovered after I put the lid back on. That told me the plant was adapting, but slowly.
Day 11: Repeat the one-hour open-lid session. This time, the leaves did not curl. That was the breakthrough moment. The plant was adjusting its internal water regulation. Sundews can produce more of their own hygroscopic compounds in their mucilage to pull water vapor from the air, but only if they get time to acclimate.
Day 12: I moved the plant out of the terrarium for one hour, but placed it on top of the pebble tray I had set up earlier. The pebble tray itself creates a local humidity zone of about 45-50%. The plant sat there for one hour without any visible distress.
Day 13: I doubled the time — two hours out of the terrarium on the pebble tray. I placed it in the same south-facing position. No curling, no browning. The dew stayed glossy. This was the validation I needed.
Day 14: End of the experiment. I now leave the sundew outside the terrarium for half the day, always on the pebble tray. At night, I put it back in the terrarium with the lid slightly open to recover moisture. My room humidity is 33%. The plant sits at around 42-45% humidity during the day, and it is fully dewy and healthy.
Building a Microclimate: The Pebble Tray Method
Simple as it sounds, the pebble tray saved my third sundew. Most growers miss this because it looks too basic. But it works.
Here is what you need:
- A shallow tray (at least 2 inches deep)
- Pebbles or gravel
- Distilled water
- A pot with drainage holes
Fill the tray with pebbles to a depth of 1 inch. Place your pot on top of the pebbles. Then fill the tray with water until it reaches about halfway up the pebbles. The water level should stay below the bottom of the pot. This is non-negotiable. If the pot sits directly in water, you recreate the overwatering problem from earlier.
The water in the tray evaporates slowly over the course of the day. That evaporation raises the relative humidity directly around the sundew leaves. I measured a consistent 10-15% humidity increase around the leaves using the tray method. It does not heat up or cool down. It just works.
One thing I will add — refill the tray with distilled water only. Tap water leaves behind hard white mineral deposits on the pebbles and the pot rim. Over time, those minerals get into the soil surface and harm the sundew's fragile roots.
Choose the Right Species for Low Humidity
Not all sundews are the same. I tried growing Cape Sundews (Drosera capensis) and they are honestly the only ones that survive my living room. But I also experimented with a few others. Let me save you some money and frustration.
Drosera capensis (Cape Sundew): This is the most forgiving species. It tolerates lower humidity (down to 40%) and temperature swings. Its leaves are long and strap-like, and it produces copious dew even in slightly drier conditions. This is your starting point.
Drosera spatulata (Spoon-leaved Sundew): More compact, but it also tolerates lower humidity reasonably well. It is a bit more sensitive to water quality, so you need to be strict about using distilled water.
Drosera binata (Fork-leaved Sundew): This one is beautiful, but it wilts quickly when humidity dips below 50%. Avoid this for dry rooms unless you are using a fully enclosed setup.
Drosera rotundifolia (Round-leaved Sundew): Do not even try this in a low-humidity room. It requires bog conditions with high atmospheric humidity. I lost two of these before learning my lesson.
Look, the species selection matters. Adaptability is not just about your technique — it is also about picking a sundew that has the genetic potential to tolerate drier air. The RHS recommends easy-to-grow varieties for beginners, and Drosera capensis is at the top of that list. Trust their expertise on this.
The Role of Food and Feeding During Adaptation
Most people forget that sundews get most of their nutrients from insects, not from soil. When a plant is stressed from low humidity, feeding it well can be a huge boost. During my two-week adaptation, I fed my sundew small dried bloodworms (you can find them at aquarium stores) that I rehydrated in distilled water.
I used tweezers to place a tiny piece on one or two leaves at a time. Not more than that. Overfeeding can cause the leaf to curl and die if it cannot produce enough dew to digest the food. Once a week is enough during adaptation.
Feeding gives the plant energy to produce more mucilage. More mucilage means better water retention around the glands. It is a feedback loop that helps the plant cope with dry air. I saw the leaf tips get stickier within two days of feeding.
Now, a warning: do not feed your sundew during the first three days of adaptation. The plant is already shifting its internal physiology. Adding food on top of that shock can cause rot. Let the plant stabilize before you introduce feeding.
Water Quality: The Hidden Factor Nobody Talks About
I could write an entire article on water alone. But here is the short version. The minerals in tap water are toxic to sundews. They cannot excrete them. These minerals accumulate in the soil and eventually hit the root zone. The roots cannot handle them, and the plant dies from the inside out.
I have seen perfectly healthy sundews killed by a single heavy watering session with tap water. The damage shows up within a week — blackening roots, yellow leaves, and a complete stop in dew production.
My solution is simple: I use only distilled water. I buy it in bulk or make it myself. Some people use rainwater, which also works, but only if you live in an area with clean air. If you are in a city, rainwater can contain pollutants. Stick with distilled.
You should also flush the soil once a month with distilled water. This pushes out any accumulated minerals from previous neglect or from the soil mix itself. I do this by pouring distilled water slowly through the top of the pot until it runs out the bottom, then let it drain completely. This is not the same as overwatering because you are doing it once a month, not every day.
The Truth About Light Intensity and Humidity Interaction
Here is something that took me a while to understand. Light and humidity are not independent. They interact. A sundew in full sun with low humidity will dry out much faster than a sundew in shade with low humidity. The leaves are literally sweating water through their stomata to cool themselves. When the air is dry, that sweating rate increases. If the roots cannot pull water up fast enough, the leaf tips die back.
So, during the first week of adaptation, I reduced light intensity slightly. I did not give my sundew full, blistering direct sun. I gave it direct morning sun for four hours, then bright indirect light. This reduces the transpiration rate. The plant can focus its energy on producing dew and growing new roots rather than just surviving water loss.
After two weeks, when the plant was acclimated to the lower humidity, I slowly increased light intensity. Now the plant gets six hours of direct morning sun and it is thriving. But you need to time that increase properly. If you blast a sundew with full sun on day one of adaptation, it will look like fried bacon by dinner.
The AHS guidance on growing sun-loving plants in containers emphasizes acclimating young plants to direct sun gradually. That applies here, just adapted for a bog plant. Their practical advice about hardening off plants is directly relevant to sundews moving from humid greenhouse conditions to dry living rooms.
Container Selection: My Best and Worst Choices
Let me break down the containers I have personally tested over the last six months.
Worst: Terracotta pots. Terracotta is porous. It draws moisture out of the soil faster than you can refill it. I put a sundew in terracotta and it was crispy within 36 hours. The RHS generally advises glazed containers for moisture-loving container plants, and I strongly agree.
Bad: Open plastic pots with many drainage holes. They dry out too fast. The holes create airflow that pulls moisture from the soil. This accelerates water loss, and the soil surface dries out quickly. That kills the delicate surface roots of sundews.
Good: Plastic pots with a single bottom hole. These retain moisture longer than mesh-style pots. You still get decent drainage, but the moisture stays put.
Great: Glass jars and fish tanks with a loose lid. These create the microclimate effect. You can create a small bog garden indoors with a glass aquarium, a false bottom, and a glass top.
My go-to setup is a 1-gallon glass jar with a wide mouth. I planted the sundew in a 50/50 mix of long-fibered sphagnum moss and perlite. I top it with live sphagnum moss. That top layer of live moss acts as a moisture gauge. If the live moss looks bright green, humidity is fine. If it turns pale, I know it is time to water or increase humidity.
A Quick Note on Air Circulation
You might think that a sealed glass jar is perfect. It is not. Stagnant air promotes fungal growth, especially on the soil surface. I had one sundew develop gray mold on its leaves because I kept the lid completely closed for a week.
The fix is to give the jar a small crack — just enough to exchange air. For my 1-gallon jar, I leave a gap of about 1/4 inch. This doesn't drop humidity much. But it provides enough airflow to prevent mold. I also do a manual "burp" once a day — I remove the lid completely for five minutes and let fresh air flush out the jar.
Why You Should Ignore Humidity Tray Myth
There is a common myth that a humidity tray works instantly. It does not. It only works if you combine it with a pot that doesn't block the effects. You need a small growing environment that traps the moisture close to the plant.
I have also seen videos of people placing a humidifier right next to the plant. That works, but it creates a constantly wet leaf surface and that seems to actually reduce dew production. I tested this for two days. The leaves looked greasy, not dewy. The dew is produced by adapted glands, not by condensation from the air. A humidifier creates condensation, not new dew.
The goal is not to have wet leaves. It is to reduce the rate of evaporation so the sundew can produce natural dew at a healthy rate.
Diagnostic Signs: How to Read Your Sundew
You need to learn to read your plant. Here are the signs I watch for daily.
Healthy: Dark green or reddish leaves. Dew droplets glistening on the growth points. Leaves curling inward naturally. New growth is visible weekly.
Humidity stress: Dew evaporates within a few hours of appearing. Leaves look dry on the edges. Leaf tips curl backward. The plant looks like it is continuously reaching out for moisture.
Light stress: If leaves are standing straight up and looking bleached, the light is too intense. If they are stretching horizontally and looking pale, the light is too low.
Overwatering stress: The base of the leaves becomes wet and brown. The crown of the plant becomes soft. If you see this, you need to repot immediately into a drier medium. Do not water for two days.
I check my sundews every morning before work. It takes 30 seconds. I look at the new growth at the center. If there is dew there, I am doing fine. If not, I adjust.
3 Common FAQs
FAQ 1: Can I just spray my sundew with water every day?
No. Misting provides a temporary fix that lasts for 10 minutes. It raises humidity around the leaves briefly, but it also encourages fungal growth and washes away the sticky mucilage. I tried misting for a week. It made everything worse. Use a pebble tray or a terrarium instead.
FAQ 2: How long does it take for a sundew to adjust to lower humidity?
In my experience, it takes about 2 to 3 weeks. The first week is the sensitive period. After that, they become much more resilient. If you push the adaptation too fast, the plant will shock. If you go too slowly, you will never get to your desired humidity level. The two-week method I described above sees you at the 50% humidity mark by day 14.
FAQ 3: Will my sundew die if the low humidity persists?
Not necessarily. Cape sundews, specifically, can adapt to humidity levels as low as 30% if the transition is gradual and the watering is managed correctly. They produce fewer dew droplets, but they still survive. Other larger species like the fork-leaved sundew will often die. The key is species selection and the speed of change.
Final Thoughts from Experience
Honestly, adapting a sundew to a low-humidity room is not about making the whole room humid. You do not need a greenhouse. You need a controlled spot — a microclimate — where the plant can breathe comfortably while gradually getting used to the drier space around it. I tried shortcut methods. I tried just misting more. I tried keeping the pot flooded. I tried sealing everything in plastic. All of those failed.
What finally worked was slow, deliberate change. The plant adapted, and watching the first drop of dew appear after a week of adjustment was incredibly rewarding. Now my sundew sits on a pebble tray near my desk, with my room's climate at 32% relative humidity, and it produces dew daily. It took two weeks to get there. It took 10 failed plants to learn the process. But now I cannot stop recommending it to anyone dealing with a dry apartment. Start with a Cape sundew. Give it time. And remember — they are not as fragile as they look once you give them a microclimate to live in.
I still lose the occasional leaf when my winter heating cranks up. But the plant itself thrives. That is the difference between a dying plant and an adapting one. Watch your sundew daily, trust the process, and it will meet you halfway.





