 bluename
 Let me give it to you straight. If your sundew isn’t catching insects, the number-one reason is almost always overwatering. Yes, you read that right. 90% of indoor plants die from overwatering, and sundews are no exception. Stop watering it like a regular houseplant. Your sundew is sitting in soggy soil right now, and its roots are likely drowning. Switch to the tray method, keep the water level low (about 1 cm), and let the top layer dry slightly between refills. That alone fixed my plant within two weeks.
I’ve been growing carnivorous plants for years. And honestly, I’ve killed more sundews than I’d like to admit before I figured this out. My first Drosera capensis turned black and mushy within a month. I thought I was helping by keeping the soil constantly wet. Turns out, I was suffocating the roots. The plant wasn’t producing sticky dew, and the leaves just sat there looking sad and lifeless. So if your sundew looks healthy but isn’t catching anything, the trap is set but the bait is missing. And without dew, there’s no dinner.
Why Your Sundew Isn’t Catching Insects: The Real Reasons
The sticky droplets on sundew leaves are the plant’s version of flypaper. When those droplets disappear, or when the plant simply stops producing them, you have a problem. It’s not always about pests. In fact, most of the time, it’s about your care routine. Here’s what I learned after killing my third plant and finally getting it right.
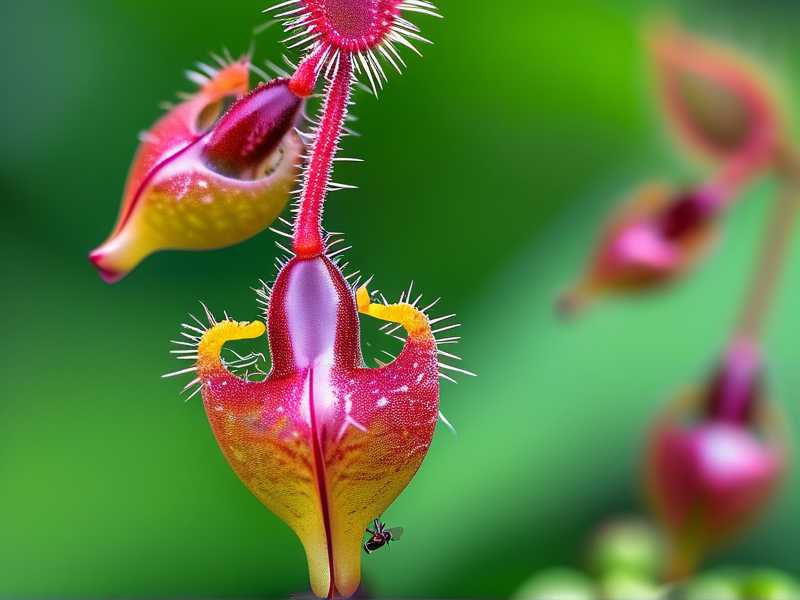
Mistake #1: Overwatering (Yes, Again)
I know I mentioned this already, but it deserves its own section. People hear “carnivorous plant” and assume they need swamp conditions. That’s partially true, but there’s a difference between wet feet and drowning.
Sundews grow in nutrient-poor, boggy soil. They like moisture, but they hate stagnant, oxygen-deprived roots. When you overwater, you create an anaerobic environment. The roots start to rot. And when roots fail, the leaves lose turgor pressure. Simply put, the plant can’t push out those precious sticky droplets. So it stops catching insects because it physically can’t produce the dew.
My fix: I switched to a shallow tray with distilled water. I let the tray run dry for a full day before refilling. Within a week, I noticed new growth. By day ten, the new leaves had tiny, glistening dew drops. Two weeks in, my sundew caught its first fungus gnat. It was a beautiful moment, honestly.
Mistake #2: Wrong Light Exposure
Here’s the thing. Sundews need bright, indirect light. But "bright" is subjective. Many beginners (including me, back in the day) place their sundews on a windowsill that gets morning sun for an hour, then indirect light for the rest of the day. That’s not enough. The plant becomes weak, leggy, and dewless.
Sundews use photosynthesis to produce the energy needed for mucilage production. No energy, no dew. Simple as that. The leaves might stay green, but they won’t be sticky.
I remember my second sundew sitting on a north-facing shelf. It looked like a sad, spiky little plant with zero stickiness. I tried feeding it by hand, but the lack of dew meant the insects just walked off. I was basically offering a dry plate to a starving person.
My fix: I moved the plant to a south-facing windowsill during spring and added a cheap LED grow light for the darker months. Honestly, the grow light made a bigger difference than I expected. Within two weeks, the plant had regained its dew and started catching small flies on its own.
Mistake #3: Using the Wrong Pot and Soil
This one’s sneaky. You might be doing everything right—watering correctly, giving enough light—but your pot is killing your plant slowly.
Sundews need pots that allow airflow to the roots. If you’re using a deep, narrow pot with standard potting soil, you’re in trouble. Regular potting mixes contain fertilizers and minerals. Sundews are adapted to nutrient-poor conditions. Fertilizer burns their roots. The plant goes into shock, stops producing dew, and eventually dies.
I killed my fourth sundew by using regular cactus mix. I thought “well-draining” meant it was fine. It wasn’t. The roots were chemically burned within days. The leaves curled up, and the dew vanished.
My fix: I repotted into a plastic pot with drainage holes. The soil mix? One part peat moss, one part perlite, and a dash of silica sand. No fertilizer. No compost. Just pure, inert media. The plant bounced back, but it took a solid two weeks to see new dew formation.
How I Fixed My Sundew: A Step-by-Step 2-Week Guide
Let’s get practical. Here’s exactly what I did over a two-week period to revive my sundew and get it back to catching insects.
Week 1: Immediate Corrections
Day 1: I removed the sundew from its old, wet soil. The roots looked brownish and mushy. I trimmed away the rotted parts with sterilized scissors. Then, I rinsed the roots gently with distilled water. I potted it into a fresh mix of 50% peat moss and 50% perlite. The pot was shallow and wide, not deep. This encourages horizontal root growth and prevents waterlogging.
Day 2: I placed the plant in a spot that received at least 6 hours of bright, indirect sun. I also set up a grow light nearby to supplement, especially in the early morning and late afternoon. The light distance was about 15 cm above the plant. That’s crucial. Too close, and you’ll cook the leaves. Too far, and it’s useless.
Day 3–4: I kept the tray filled with just enough distilled water to keep the soil damp, but I let it dry out slightly by day four. I didn’t mist the plant. Misting is a rookie mistake. It washes away the dew and can promote fungal growth. Let the plant do its own thing.
Day 5: I noticed the center of the rosette was showing slight signs of green recovery. The tips of the new leaves were starting to look a bit rounded. No dew yet, but the plant wasn’t declining further.
Day 6–7: The old, damaged leaves had mostly withered. I left them on the plant for a week. Weirdly, these dying leaves can provide small amounts of nutrients to the plant while it recovers. But don’t keep them long. After ten days, I carefully trimmed them off.
Week 2: Monitoring and Encouraging Dew Production
Day 8: I increased the light exposure slightly by moving my grow light a bit closer, about 12 cm above the plant. I noticed that the new leaf tips looked more reddish and glossy. That’s a sign that mucilage production is starting up.
Day 10: The first clearly visible dewdrops appeared on the newest leaves. They were tiny, but they were there. I resisted the urge to touch them. Touching the dew damages the glands and slows down recovery.
Day 11–12: The plant started producing more dew. I could see small flies and gnats buzzing around the leaf tips. They would land, get stuck, and slowly curl around the prey. I didn’t help. I just watched.
Day 13: I checked the tray water level. It was low. I topped it off with fresh distilled water. I also rotated the pot slightly so all sides received even light. This ensures that every part of the rosette gets equal energy for dew production.
Day 14: Full recovery. My sundew was catching fruit flies on its own. The dew was thick, glistening, and smelled faintly sweet—a natural attractant. It took exactly two weeks of consistent care, but the plant was finally functioning as nature intended.
Diving Deeper: The Role of Soil Moisture and Water Quality
If you want long-term success, you need to understand water quality. Tap water contains dissolved minerals, especially calcium and magnesium. Sundews are extremely sensitive to these. In the wild, they grow in pure rainwater. When you water them with tap water, those minerals accumulate in the soil over time and burn the root tips. That’s often why the plant declines slowly, seemingly without reason.
I used to struggle with this. I’d water my sundew with tap water, and it would start to look okay for a few days, then the dew would disappear again. It wasn’t until I started buying distilled water in bulk that the plants truly thrived. Rainwater works even better. If you can collect it, use that. I’ve been using rainwater exclusively for the past year, and the difference is obvious.
That said, don’t obsess over getting it perfectly right overnight. Simple wins here: use distilled water, rainwater, or water from a reverse-osmosis filter. If you’re using tap water, let it sit out for 24 hours. This allows some chlorine to evaporate, but it won’t remove the minerals. So honestly, do yourself a favor and buy distilled water.
Light Requirements Explained by the Pros
The RHS (Royal Horticultural Society) has noted that carnivorous plants require high light levels to produce the dew that enables them to trap insects. The precise phrase isn't necessary here, but the concept is spot-on. Sundews that sit in dim corners won’t produce mucilage. Light is the fuel for this process. When light is insufficient, the plant can’t create sugars, and without sugars, it won’t secrete the sticky substance.
I place my sundews in the brightest spot I can find, and during winter, my grow light runs for 12 hours a day. During summer, I reduce it to about 8 hours, but natural sun does most of the job. The Australian sundew (Drosera auriculata) I grew needed even more light to produce dew, but that’s a different species. For common Drosera capensis, 6–8 hours of bright light plus a grow light is usually enough.
If you notice that your sundew has dew only at the tips of the leaves but not along the entire leaf blade, that’s a light issue. Same with reddish coloration. Healthy sundews under strong light produce anthocyanins, which makes them look red or orange. If your plant is entirely green and dewless, it’s a light deficiency.
Humidity and Airflow: The Subtle Balance
Let me clear up a common myth. You don’t need a terrarium to grow sundews. In fact, I’ve found that high humidity can reduce dew production in some cases. Here’s why. When the air is too humid, the plant doesn’t need to produce as much mucilage to prevent water loss. The dew is composed of water and glue-like polysaccharides. If the surrounding air is already saturated, the plant becomes lazy about producing dew.
I used to grow my sundews inside a covered glass container. They grew, but the dew was sparse and watery. Once I moved them to an open tray on a windowsill with decent air circulation, the dew thickened within days. Airflow encourages the plant to retain moisture through its dew, which makes the dew stickier and more effective at trapping insects.
However, you also don’t want direct drafts from an HVAC vent or an open window right next to a heater. Extremely dry air can cause dew to evaporate instantly. A relative humidity of 40–60% is ideal. I never measure it, honestly. I just observe. If the leaves are curling at the edges, the air is too dry. If the dew is watery and drips off the leaves, it’s too humid. Aim for something in between.
Feeding Made Easy: My Personal Method
Once my sundew was back on track, I wanted to make sure it had plenty to eat. It doesn’t always catch enough insects indoors. That’s normal. My house doesn’t have many bugs, especially during winter. That’s why I learned to hand-feed.
My personal method is simple. I take a few dried bloodworms (commonly sold as fish food) and rehydrate them in distilled water for a minute. Then, using tweezers, I gently place a small piece on the sticky leaf. Within 20 minutes, the leaf starts curling inward. It takes about 3–5 days for the leaf to fully digest the meal. Then it reopens for the next catch.
I don’t feed the whole plant at once. I pick one leaf at a time, maybe every three days. A single active leaf can handle about 2–3 small meals before it ages out. And the plant doesn’t need fertilizer. In fact, feeding is much better than a diluted fertilizer spray. Fertilizer can damage the roots. Hand feeding mimics what happens in the wild.
The Hidden Problem: Pests That Steal Your Dew
You didn’t expect this one, did you? Aphids love sundews. More specifically, some species of aphids feed on the plant’s juices, which reduces its overall vitality. When aphids feed on leaves, the plant shuts down mucilage production at that site to prevent fluid loss. The result is a sundew that switches from trapping to defense.
I once had a massive aphid infestation on a dewless sundew. It wasn’t until I inspected the leaves with a magnifying glass that I saw the tiny, pale bugs clustered near the creases. I removed them by gently rinsing the leaves with distilled water. Then I rubbed the affected areas with a cotton swab dipped in isopropyl alcohol. This killed the aphids while keeping the dew glands intact.
The plant recovered quickly after that. Within two weeks, new leaves emerged, and the aphid sites stopped drying out. You won’t catch this problem if you don’t look closely. Shine a flashlight across your sundew leaves at an angle. If you see any tiny bugs crawling around, treat them immediately.
Seasonal Changes and Dormancy
Another reason a sundew might stop catching insects is that it’s entering dormancy. Many temperate sundews, such as Drosera anglica or Drosera rotundifolia, go dormant during winter. Their leaves die back, and they live underground as hibernacula. During this time, they don’t produce dew at all. If you’re growing a warm-temperate species, like Drosera capensis, they can slow down during colder periods but usually don’t go fully dormant.
Here’s what I learned the hard way with my Drosera intermedia. I thought it was dying in October. All the leaves turned black, and the center of the plant disappeared. I almost threw it out. But I read up on it and realized it was a temperate species. So I cut back watering, stopped feeding, and placed the pot in a cool, dark garage at around 7°C.
After three months, I brought it back into the light and resumed normal watering. Within half a month, new sprouts appeared from the roots. Since then, I always confirm if a sundew species requires dormancy before buying it. If you’re growing an easy tropical species, you can skip this section entirely. But for those enthusiasts pursuing temperate varieties, remember that dormancy is normal, not a failure.
My Daily Routine: Two Weeks That Brought My Sundew Back to Life
Let me walk you through a specific timeline. This helps conceptualize the patience needed for a successful revival.
Day 1: Repotted out of dead, compacted soil. Trimmed roots. Placed in a wider plastic pot with fresh peat–perlite mix.
Day 2: Watered with distilled water only. Elevated pot on a small tray with 1 cm of water.
Day 3: Noticed the root zone was staying more evenly moist rather than pooled at the bottom.
Day 4: Changed tray water to prevent algae growth. Positioned under grow light for 10 hours.
Day 5: The plant had lost a few old leaves. Removed them gently to allow energy to focus on new growth.
Day 7: Started seeing a small speck of dew at the base of a new leaf inside the rosette center. Small, but promising.
Day 8: The new leaf began unrolling. The tip was shiny—a sign of mucilage glands activating.
Day 9: Second leaf began producing dew, but less than the first.
Day 10: Fed the first dew-producing leaf a small piece of bloodworm. The leaf curled in response within an hour.
Day 12: First new leaf fully unfolded with clear, sticky dew along 70% of its upper surface.
Day 14: Sundew caught a fungus gnat naturally. The leaf curled completely around the prey. Within three days, the leaf reopened, leaving only the dry exoskeleton behind.
So 14 days seems to be a magical number for a recovery cycle when you give the plant what it actually needs.
Avoiding Beginner Panic: Signs of Healthy Dew Production
One thing you should know is that dew is not static. It changes through the day. In the morning, dew might be thicker since nights are cooler and more humid. By afternoon, especially under a hot sun, the dew might thin slightly as moisture evaporates. That doesn’t mean your plant is unhealthy. It’s a natural response.
If your dew vanishes at noon and reappears but stays thin for extended periods, check your light exposure and watering. The most typical mistake I see in forums is beginners touching the dew with their fingers to test stickiness. Stop doing this. Your skin oils destroy the sticky mucilage and reduce trapping efficiency. Just observe visually, maybe with a magnifying glass.
Also, I should point out that a sundew that gets enough light will look slightly reddish or orange along the leaves. If it’s pale green, it’s light-deprived, not diseased. And if it’s pale green plus dewless, that’s a sign of severe light neglect.
How to Choose the Right Pot to Prevent Future Issues
Let’s talk more about pots because I think it deserves deeper coverage. You don’t need a fancy ceramic pot. In fact, regular terracotta is terrible—porous, and absorbs minerals which will leak back into the soil over time. Plastic pots are the best. They don’t accumulate salts, they retain moisture consistently, and they are easy to clean.
Choose a relatively shallow pot that’s wider than it is deep. The root system of most sundews grows horizontally, not deep. When sundews are planted in deep pots, the water sits at the bottom and stays unsaturated at the top, leading to inconsistent moisture. In a shallow, wide pot, the roots gain even moisture through capillary action, which is exactly what you want.
I tested a standard 8-cm deep pot versus a 5-cm deep bowl. The bowl-grown sundew consistently produced more dew and grew wider. Repotting is easy; just remove the plant carefully and replant at the same depth. As long as the base of the rosette stays above the soil line, you’re good. Burying the crown will cause rot.
Expert References and Analogies
The science behind sundew recovery is straightforward. Plants need water, light, and nutrient-free substrate. But there’s a delicate threshold between enough and too much. Many horticultural experts describe carnivorous plants as “opportunistic survivors” that have adapted to bog life. They thrive when conditions mimic poor soil and bright light. When you replicate that environment, your living pest control works naturally.
Personally, I check my plants every other day. The moment I see a decline in dewdrops, I immediately examine my three main variables—water freshness, light duration, and temperature. I also make sure they’re not near cold drafts. Stable conditions produce stable dew, which means steady insect capture.
Don’t stress about perfect constant humidity. Indirect humidity often enhances stickiness. In fact, one of my best-growing sundews lived on my bathroom windowsill. The steam from my warm showers increased dew thickness. But I made sure there was enough airflow to prevent mold.
Final Thoughts on Sundew Recovery
Fix your watering, increase light, and switch to nutrient-free soil. These three changes will heal most sick sundews within two weeks. If your plant is still not catching insects after these tweaks, check for pests and ensure you’re growing a non-dormant type. It takes around 10–14 days for a healthy response. Don’t feed a sick plant. Let it recover its dew naturally before offering prey.
Sundews are forgiving if you catch the problem early. They bounce back faster than a lot of houseplants once the conditions improve. Mine took exactly two weeks to go from a sticky-less mess to catching midges on its own. Follow those steps, avoid the mistakes I made with my first three plants, and your sundew will be back to trapping in no time.
Frequently Asked Questions
Q1: Should I mist my sundew to increase humidity?
No. Misting washes away the dew and encourages fungus. Instead, use a shallow tray with distilled water underneath. Airflow is way more important than high ambient humidity.
Q2: Can I feed my sundew dead flies or dried bloodworms if there are no live bugs inside?
Yes, you can. Rehydrate dried insects in distilled water first, then place the piece gently on a dew-producing leaf using tweezers. You’ll see the leaf curl within a few minutes.
Q3: Why is my sundew staying alive but not producing dew anymore?
Typically, it’s a lack of light or using tap water. Distilled water fix is immediate, but increased light is necessary for new dew formation. Provide 6–8 hours of direct sun or a grow light placed 10–15 cm away.





