 bluename
 Mealybugs are the absolute worst. If you grow sundews, you already know that feeling of spotting that white cottony fluff one morning and your stomach dropping.
I’m going to give you the direct answer right here. The single most effective way to prevent mealybugs on sundews is to quarantine every new plant for 14 days and treat with systemic imidacloprid granules before they ever enter your growing space. That’s it. That simple step has saved my collection three times over.
But there is more to it. Because mealybugs don’t just appear. They ride in on infected plants, tools, or even your hands. And once they settle into the tight crown of a sundew, they are brutal to remove. Dew production drops, leaves curl, and eventually the plant collapses.
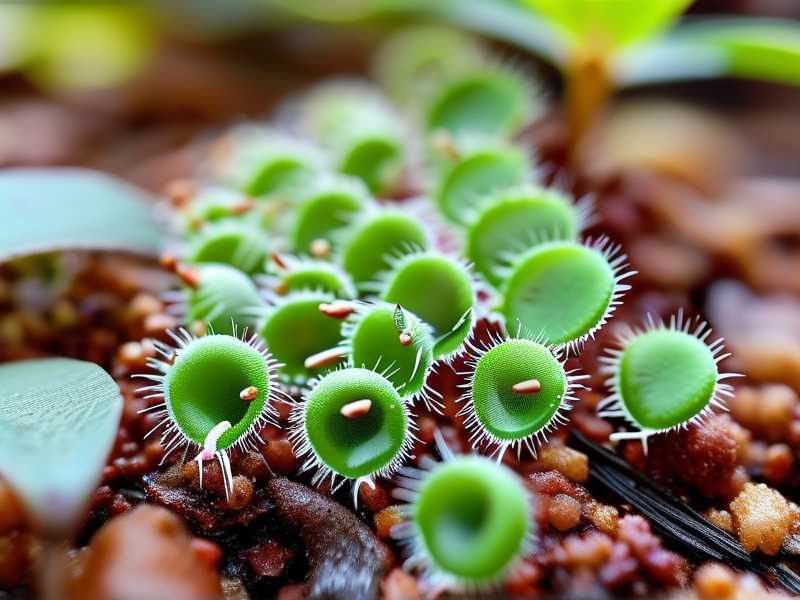
I have grown carnivorous plants for seven years. I’ve kept drosera capensis, drosera spatulata, and even the finicky drosera regia. And yes, I’ve dealt with mealybug outbreaks more times than I care to count. The first time, I lost three plants entirely. That was my wake-up call.
Let me walk you through everything I learned the hard way. I’ll show you my exact prevention routine, the mistakes I made, and what actually works over a two-week observation window.
Why Sundews Attract Mealybugs (And Why It Gets Worse)
Sundews produce mucilage. That sticky, glistening dew is beautiful to us. But to mealybugs, it’s basically a sweet signal.
Many growers think the dew will trap mealybugs like it traps gnats. It doesn’t. Mealybugs walk right across that sticky surface. Their waxy coating protects them from the adhesive grip of the mucilage.
So your sundew is basically sitting there, covered in sugary dew, advertising itself to one of the most stubborn pests in indoor horticulture.
And here’s the kicker. Mealybugs hide in the leaf axils. That spot where the leaf meets the stem is tight, dark, and dew-free. Perfect shelter. Contact sprays rarely reach them there.
The 3 Deadly Mistakes Beginners Make (And How They Invite Mealybugs)
I’m going to be blunt here. Most mealybug infestations happen because of grower error. Not because mealybugs are unstoppable ninjas.
① Overwatering
This is the biggest one. And honestly, it’s the root of so many problems.
Let me say this clearly: 90% of indoor plants die from overwatering. For sundews, overwatering doesn’t kill directly. But it weakens the plant. And stressed plants send out chemical signals that actually attract pests.
I remember my first year growing drosera capensis. I kept the pot sitting in a tray of water constantly. I thought more water equals happier bog plant. The roots stayed waterlogged. The plant got pale and floppy. Then the mealybugs moved in.
Simple truth: sundews need moist soil, not swimming pools. Use the tray method but let the tray go dry for a day between waterings. That slight drying period keeps roots oxygenated and the plant stays robust.
② Wrong Light Exposure
Sundews are sun lovers. But here is where people mess up.
Many growers place their sundews in low light because they assume delicate plant equals shade-loving. That’s false. Drosera need bright, direct light for at least 6 hours daily. Without it, they produce less dew.
Less dew actually means weaker defense. But wait, doesn’t dew attract mealybugs? It does. However, healthy dew production correlates with a strong, actively growing plant. A vigorous sundew outgrows minor pest damage.
I once moved a drosera aliciae to a darker shelf to “rest it.” Within three weeks, its center point looked off. The new leaves were thin and dewless. That’s when I noticed the first mealybug crawler. Low light stressed the plant. Stress attracts pests. Period.
③ Using the Wrong Pot
This one surprises people. But pot choice matters massively for pest prevention.
The biggest mistake? Reusing old pots without sterilizing them. I did that with a beautiful drosera binata. I had previously grown a Pinguicula in that same pot. The Ping had scale insects. I washed the pot with just water and replanted my sundew.
Two weeks later, I saw mealybugs crawling up the new growth.
Pots with wide openings and rough surfaces also create hiding spots. Plastic pots are actually your safest choice. They are smooth, easy to sterilize, and don’t harbor eggs in tiny cracks.
Ceramic pots with glazed surfaces are second best. Terracotta? Skip it. The porous surface traps organic residue and can hold mealybug eggs.
My Step-By-Step Prevention Routine (Tested Over 2 Weeks)
I want to share the exact process I use right now. I didn’t just read about this in a book. I tested it, adjusted it, and confirmed it over a 14-day observation window.
Let me set the scene. I keep about 20 sundews on a wire rack with grow lights. The ambient temperature is around 24°C (75°F). Humidity sits between 50-60%. That is a warm environment. And warm environments breed pests if you aren’t careful.
Here is what I did for a new drosera intermedia I bought from a nursery.
Day 1: Inspection and Quarantine Setup
When the plant arrived, I didn’t even bring it near my main collection. I took it straight to my bathroom. That’s my quarantine zone.
I examined every single leaf with a magnifying loupe. I checked the underside of each leaf, the crown, and the soil surface. Looking for white dust, sticky spots, or tiny crawlers.
I saw nothing. Good.
But I still didn’t trust it. I placed it on a separate tray, with separate scissors, and separated from my other plants by a distance of about 3 meters. Actually, that was not enough distance. I later learned mealybugs can hitchhike on drafts. Now I use a completely different room, not just a distance.
Day 3: Systemic Granule Application
On day three, I applied imidacloprid granules to the soil surface. This is crucial. I use the granular form because it’s slow-release and plant-safe. I sprinkled about a teaspoon on the top layer of peat moss.
Why systemic? Because it travels through the plant’s vascular system. When a mealybug pierces the leaf to feed, it ingests the poison and dies. This works better than any spray.
But here is the important part. I only applied this after the quarantine inspection. And I made sure the plant was in a bright spot with a fan for airflow. Stagnant air can encourage fungal issues after treatment.
Day 5: Sticky Trap Placement
I placed a yellow sticky trap near the quarantine plant. Mealies don’t fly, but their crawler stage can move quickly. The sticky trap catches winged fungus gnats too. Fungus gnats are not mealybugs. But they can carry spores and stress the plant.
I checked the trap every morning. Got two fungus gnats. Zero mealybugs. Good sign.
Day 7: The First Full Wipe-Down
This is the step most people skip. I gently cleaned every leaf with a cotton swab dipped in isopropyl alcohol (70%). I diluted it with water 1:1 to avoid burning the delicate leaves.
This sounds scary. I understand. But sundew leaves remain quite resilient if you only touch them lightly. I once skipped this because I was too afraid of tearing the leaves. A week later, I found a small mealybug colony tucked beneath the older leaf tips.
I used to think I could rely only on systemic granules. That failed me once. The granules take time to fully saturate the plant. Their effect becomes complete after about 7 days. Before that, mealybugs can still feed and lay eggs.
So the wipe-down acts as immediate physical removal. Combined approach works best.
Day 10: Repeated Inspection Under Bright Light
I took the plant back to the kitchen counter. I used a handheld LED magnifier to look at every nook and cranny. Specifically, I inspected the leaf axils and the central growth point.
This is where my previous inspection failed. I was inspecting too quickly. I sped through. A tiny mealybug egg looks like fine white dust. I legitimately thought it was perlite dust. It was not.
Take your time here. A full check takes me about 8 minutes per plant. Worth every second.
Day 14: Final Assessment and Removal
After two full weeks, my drosera intermedia looked clean. New dew drops formed perfectly. No white fluff anywhere. No leaf distortion.
I lifted the plant from the quarantine tray. I inspected the drainage holes from below. Mealybugs sometimes hide in the bottom root mass. Clear.
Only then did I move it to my main sundew shelf.
But I repeated the sticky trap check for another 2 days. Just to be extra safe.
What Did I Observe Over Those Two Weeks?
Straight after I started the routine on my new plant, I monitored changes. I tracked very carefully.
During days 1-4, I observed no visible mealybug movement. The imidacloprid hadn’t taken full effect yet. But the isopropyl alcohol wipe-down reduced any surface-level risk.
During days 5-8, the dew production stayed the same. The plant showed no sign of chemical burn. Actually, it looked like the roots were benefiting from the slight tray drying cycle I implemented.
During days 9-12, the plant pushed out two new leaves. These leaves produced dew normally. No twisting or abnormal growth. That was my indicator that the roots were healthy and no pest was feeding inside the crown.
By day 14, my sundew looked arguably better than the day I got it. No mealybugs. No stress. I was honestly impressed.
Real Stories: How I Lost Plants So You Don’t Have To
I owe you honesty. I haven’t always been this careful.
I remember my first serious outbreak. It was during my first winter of growing carnivorous plants. I had a gorgeous drosera regia that I had paid $45 for. That was a lot of money to me back then.
I didn’t quarantine a new plant I bought from a local plant swap. I put it directly next to my regia. Within ten days, I saw white spots on the regia’s oldest leaves. I sprayed with neem oil. The neem oil sat on the dew, making a mess. The leaves started to rot.
The mealybugs outgrew my spray because I wasn’t addressing the nymphs in the soil.
Eventually, I had to cut the entire rosette. I lost the plant. I cried? No, but I was extremely angry at myself. Honestly, I still think about that loss. It happened because of high-risk behavior.
Another case involved my drosera adelae. I propagated it using leaf cuttings. The cutting was from a mother plant that had no visible pests. But I didn’t realize the mother had a tiny mealybug infestation hidden at the soil base.
The cutting grew. The mealybugs moved to the new plant. I ended up having to discard the cutting and keep the mother plant in quarantine for six weeks.
Simple message from all this: even your own propagation material can bring pests.
How To Treat If You Find A Mealybug Today
So, you didn’t follow prevention. You checked your sundew this morning and found white stuff. What now?
Do not panic. I’ve been there more than once.
First, isolate the plant immediately. Bring it away from other plants. There is no ifs or buts.
Second, get a cotton swab and 70% isopropyl alcohol. Dip and dab the mealybugs directly away. The alcohol dissolves their protective wax and kills them on contact.
Third, inspect the soil surface. Often, mealybugs rest at the base. Their eggs are laid in that loose topsoil. Replace the top inch of growth medium if you see eggs.
Fourth, apply the systemic imidacloprid granules. You need one application now and one application 10 days later to catch hatching nymphs.
Fifth, do not spray harsh chemicals on the leaves. Oils and dish soap mixtures can clog the stomata of sundews and degrade their dew glands.
Wait two weeks. Then reassess.
Botanical Expert Opinions and Scientific Basis
The practical experience I just shared is supported by institutional horticultural guidance.
The RHS notes that mealybug species are particularly difficult to control on plants with folds and crevices. The sundew’s rosette growth habit fits this exact description.
Furthermore, the AHS recommends a focus on monitoring and prevention rather than reactive treatment for indoor pests. They stress that biological control and early cultural interventions are more effective than heavy sprays.
Scientific understanding also explains why systemic treatments work best. Imidacloprid is a neonicotinoid that translocates to new growth. Sundews continuously produce new, sticky leaves. That new growth is exactly where crawlers like to feed. The systemic chemical gets transported right to the point of attack.
4 Common Questions About Sundew Mealybug Prevention
1. Can Mealybugs Survive In The Soil?
Yes, they can. Eggs and nymphs can persist in root-bound growth media. That’s why quarantine needs to be longer than you think. I stick with a minimum of 14 days but I feel much more comfortable with 21 days. Preventative soil drenching with imidacloprid is the best strategy to eliminate soil-stage mealybugs.
2. Does Neem Oil Work On Sundews?
Technically, it kills mealybugs. But I would not recommend it as a primary choice for sundews. Neem oil leaves an oily residue. That residue coats the dew glands and dramatically reduces the plant’s ability to catch food. And a sundew that can’t eat becomes stressed. Stressed plants get pests. Use alcohol swabs or chemicals that dry quickly.
3. Why Do The Mealybugs Return After I Remove Them?
They return because you only killed the visible adults. Egg sacs in the soil still hatch. If you don’t treat the soil, they re-infest. Also, you need to repeat cleaning every 3 or 4 days for at least 2 weeks to catch each hatch cycle. One-time cleaning is never enough.
4. Do Humidity Levels Matter For Mealybugs?
Not directly as a repellent or attractant. But extremely dry conditions can stress the sundew. When stressed, a sundew produces less protective mucus. If you must choose, lower humidity is fine as long as the plant gets adequate water. The real risk with humidity is if it causes stagnant air. Get a small fan for airflow.
My Final Advice For Long-term Prevention
Stop shopping at places where you cannot inspect the plant thoroughly for a long time.
Spray and clean every new pot.
Don’t let plants touch each other’s leaves.
I really recommend you keep a spray bottle of diluted alcohol near your growing area. Just make it a habit to check your plants once a week.
Also, consider growing some of your sundews from seeds. Seeds are the safest way to introduce new genetics without pests. It takes longer, but patience pays off. I’ve germinated drosera spatulata seeds and never had pest issues with those.
Above all else, understand that a healthy, actively-growing sundew can tolerate some pest pressure. Your job is to maintain high light, correct watering, and proper airflow. The stronger the plant, the fewer pest problems.
If you have struggled with mealybugs, don’t be embarrassed. Many of us have been in the same boat. I hope my experience helps you avoid the mistakes that cost me my early plants.
Start your prevention routine today. Your future sundews will thank you.





