 bluename
 How to Grow Sundew in a Tropical Terrarium: A Beginner’s Guide from a Fellow Plant Lover
You’ve seen those mesmerizing photos online—a lush, miniature world where jewel-like sundews glisten with sticky, dew-covered tentacles, waiting for an unsuspecting gnat. You want that on your shelf. But then the doubts creep in. “Aren’t carnivorous plants super difficult?” “Won’t my terrarium just become a moldy mess?” “How do I even start?” I had the same exact questions. After killing my first sundew from sheer ignorance, I decided to get it right. I turned to the experts, experimented, and documented everything. This guide isn’t just theory; it’s my two-week, hands-on journey of building a thriving tropical sundew terrarium, complete with the mistakes I made and how I fixed them. Let’s build yours together.
Why a Tropical Terrarium is a Sundew’s Paradise
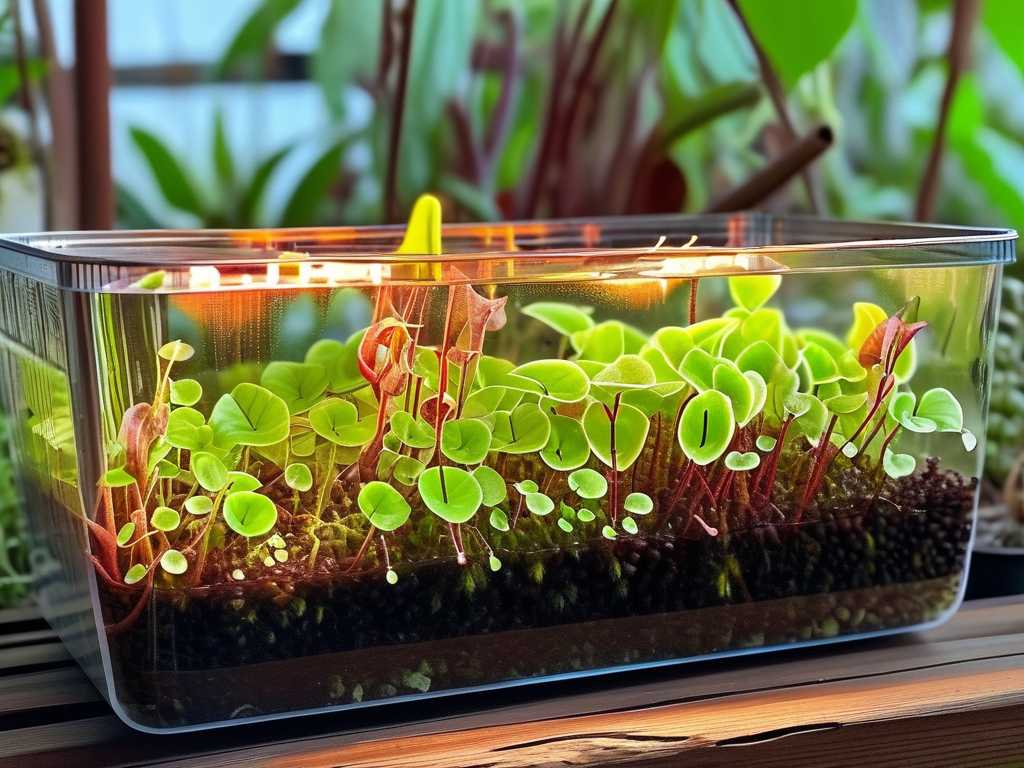
First, let’s talk about why this setup works so well. Most beginner-friendly sundews, like Drosera capensis (Cape Sundew) or Drosera spatulata, hail from subtropical and tropical regions. They crave consistent warmth and high humidity—conditions that are notoriously hard to maintain on an average windowsill but are effortlessly created inside a sealed or partially sealed glass container. A terrarium acts as a miniature biome, recycling moisture and maintaining a stable environment. According to the International Carnivorous Plant Society (ICPS), maintaining high ambient humidity is crucial for the proper production of the sticky mucilage—the “dew”—that is essential for trapping prey and the plant’s survival. A terrarium solves this perfectly.
Gathering Your Supplies: The Right Foundation
You don’t need a fancy, expensive tank. I used a simple 10-gallon aquarium with a glass lid. Here’s my essential shopping list, born from trial and error:
- Container: A glass tank, jar, or even a large apothecary jar. Ensure it’s clear for light penetration.
- Lighting (The MOST Important Part): This is where I failed initially. A north-facing window won’t cut it. Sundews need intense, bright light to produce their red pigments and sticky dew. I use a full-spectrum LED grow light panel, suspended about 12 inches above the tank, running for 14 hours a day. The American Horticultural Society’s light intensity guides were invaluable here, helping me choose a light that provides sufficient PAR (Photosynthetically Active Radiation) for robust growth.
- Soil: Never, ever use potting soil or fertilizer. It will kill your sundews. They require nutrient-free, acidic media. I use a mix of sphagnum peat moss and perlite in a 1:1 ratio. Some experts, like those at the Carnivorous Plant Hub, also recommend adding silica sand for extra drainage. I pre-rinse my peat and perlite with distilled water to lower the mineral content.
- Water: This is non-negotiable. Use only rainwater, distilled water, or reverse osmosis water. Tap water contains minerals that will accumulate and poison the plants. I keep a gallon jug of distilled water specifically for my carnivores.
- The Stars: The Plants! I started with three hardy, tropical species: Drosera capensis (for height), Drosera spatulata (for a rosette shape), and Drosera adelae (which tolerates slightly lower light). I sourced them from a reputable carnivorous plant nursery to ensure they were healthy and pesticide-free.
- Extras: Long tweezers for planting, a small spray bottle for misting, and decorative elements like sterilized driftwood or quartz stones (no limestone).
The Step-by-Step Build: Creating the Miniature Bog
- Clean Everything: I washed the tank and all tools with distilled water to avoid contaminants.
- Create a Drainage Layer (Optional but Recommended): I added a thin layer of aquarium gravel at the bottom. This isn’t for the plants’ roots but to prevent the soil from becoming waterlogged. My first attempt without it led to a soggy, anaerobic base.
- Add the Soil Mix: I moistened the peat/perlite mix with distilled water until it was damp like a wrung-out sponge, not dripping. I then added a deep layer (about 3-4 inches) to allow for root growth.
- Planting with Care: Using the tweezers, I made small holes. Sundew roots are fragile. I gently placed each plant in its hole, carefully fanning out the roots, and pressed the media softly around the base. I spaced them out, considering their mature size.
- Initial Watering: I bottom-watered the terrarium by pouring distilled water into the gravel layer until the soil surface looked moist. The key is to keep the soil consistently damp, not flooded.
- Decorate and Finalize: I added a piece of boiled (sterilized) driftwood for visual interest. Then, I placed the lid on. For a sealed terrarium, condensation will cycle naturally. I opted for a partially covered lid to allow slight airflow and prevent fungal issues.
My Two-Week Observation Log: Triumphs and Troubleshooting
This is the real-world diary of what happened after setup.
- Days 1-3: The plants looked a little shocked from shipping and repotting. Some dew was present but minimal. Condensation formed heavily on the glass. Lighting Mistake Revealed: My initial light was too weak and too far away. The D. capensis started to stretch slightly, a sign of etiolation.
- Solution: I immediately moved the LED panel closer (to 12 inches) and ensured it was on a 14-hour timer. I also wiped down excess condensation to monitor soil moisture better.
- Days 4-7: With the improved light, I saw a dramatic change! The D. spatulata began to blush a beautiful red. New, tiny leaves emerged at the centers. The dew production increased visibly, glistening under the LEDs. A few fungus gnats from the peat moss were caught almost immediately—a satisfying sight.
- Days 8-10: The D. adelae put out a new, large leaf. However, I noticed a small patch of white mold on the soil surface near the wood. My First “Oh No!” Moment.
- Solution: Mold in a new terrarium is common from decomposing organics. I didn’t panic. I carefully removed the moldy patch with a spoon. I increased ventilation by propping the lid open slightly for a few hours each day. I also sprinkled a tiny amount of ground cinnamon (a natural antifungal) on the area. The mold did not return.
- Days 11-14: The system stabilized. Dew was abundant every morning. The plants visibly grew. The terrarium established its own water cycle—condensing on the glass at night and “raining” down during the day when the lights warmed the air. No more mold, no more stretching. Success!
Long-Term Care for Your Glittering Garden
Your job now is simple: be a steward, not a constant gardener.
- Watering: Check weekly. The soil should feel perpetually damp. I add a small amount of distilled water to the bottom layer when the condensation cycle seems light. Never let it dry out completely.
- Feeding: They will catch tiny bugs on their own! Do not feed them meat or fertilizer. If you have no bugs, you can occasionally place a dried bloodworm (fish food) or a tiny fruit fly onto a tentacle every 2-4 weeks. Overfeeding can rot a leaf.
- Pruning: As leaves blacken and die (a normal process), snip them off at the base with clean scissors to keep things tidy and prevent decay.
- Ventilation: I keep my lid about 1/4 open to allow for gentle air exchange, which I found prevents stagnation and fungal issues.
Addressing Your Top Concerns
Can I use a closed jar instead of a tank? Absolutely! The principles are the same. A large glass jar or cookie jar can make a beautiful “wardian case.” Just ensure your chosen sundews stay small (like D. spatulata). The watering frequency will be even lower due to the tight seal.
What do I do if all the dew disappears? This is almost always a light issue. The plant is telling you it’s not getting enough energy to produce its mucilage. Reassess your light source’s strength and duration before changing anything else. My two-week log proved how quickly they respond to improved lighting.
How do I handle pests like aphids on my carnivorous plants? It’s ironic, but it happens. Aphids can attack the flower stalks. The best method I’ve found, supported by the ICPS, is to physically remove them with a soft brush or a cotton swab dipped in distilled water. For severe cases, a very careful application of insecticidal soap (avoiding the sticky leaves) can work, but manual removal is safest for the plant’s delicate chemistry.
Seeing those first dewdrops sparkle under your grow light is a magical reward. Growing sundews in a tropical terrarium simplifies their most demanding need—humidity—and lets you create a living piece of art. It requires an initial investment in the right supplies, especially light, and a willingness to observe and adjust. Start with hardy species, be patient during the first week of acclimation, and trust the process. Your own glittering, insect-catching micro-jungle is just a few steps away.





