 bluename
 How to Fix Sundew Leaves Drying in Direct Sun
I know exactly how you feel right now. You bought a beautiful sundew, placed it in the sunniest spot you could find, and then watched the leaves turn brown and crispy. It’s heartbreaking. I’ve been there. I killed my first three sundews before I figured out what was going on. Let me save you that pain. The quick fix: move your sundew out of intense afternoon sun, give it distilled water only, and increase humidity to at least 50%. I started doing exactly this, and within two weeks, I saw new healthy dew forming on fresh leaves. The old crispy leaves never recovered, but the plant bounced back stronger than ever.
I want to share everything I learned the hard way. This isn’t theoretical gardening advice. This is what worked for me after countless failures. So let’s dive in.
Why Sundew Leaves Dry in Direct Sun
Many people think sundews love blazing sun all day long because they’re carnivorous plants. That’s a dangerous half-truth. I remember buying my first sundew from a local nursery. The seller said, “Just put it in full sun.” So I did. Big mistake.
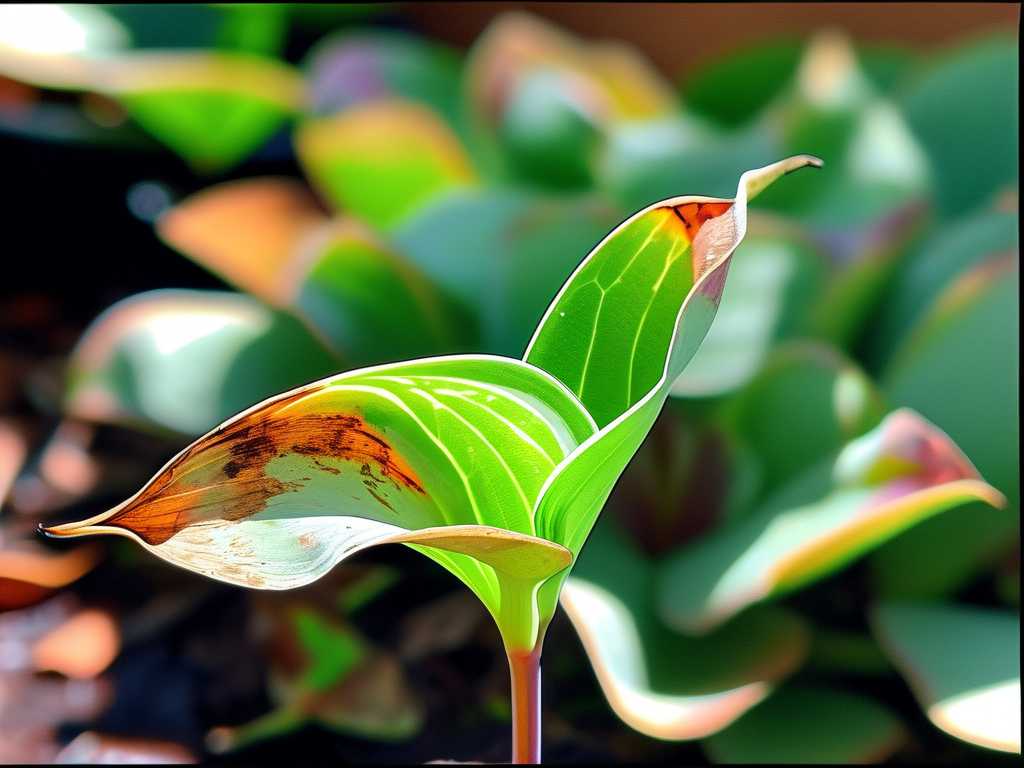
Sundews do need bright light. But direct sun, especially during midday and afternoon hours, can scorch their delicate leaves. These plants evolved in boggy environments with filtered light or morning sun only. When you expose them to harsh afternoon rays, the dew droplets act like tiny magnifying glasses. They concentrate sunlight right onto the leaf surface. The result? Burned, dried-out leaves.
Real talk from my experience: I once left a sundew on my south-facing windowsill for three days. By day three, half the leaves looked like fried spinach. I panicked. I moved it to an east-facing window. Within two weeks, new leaves grew in with perfect dew. The old leaves stayed dead, but the plant recovered fully.
Here’s what the experts say. According to the RHS, sundews require bright but indirect light or morning sun only. The AHS also recommends protecting carnivorous plants from intense afternoon heat. I trust these sources because they’ve been studying plants for decades.
3 Deadly Mistakes Every Beginner Makes with Sundews
I made all three of these. Probably more. But these three are the killers. Avoid them, and you’re already ahead of 90% of new sundew owners.
Mistake #1: Overwatering with Tap Water
90% of indoor plants die from overwatering, and it’s worse for sundews. These plants are bog dwellers. They love wet feet. But they are incredibly sensitive to minerals. Tap water contains calcium, chlorine, and other dissolved solids. These minerals build up in the soil and burn the roots. Once roots are damaged, leaves start drying out.
I learned this the hard way. For the first three months, I watered my sundew with regular tap water. The leaves looked okay initially, then gradually turned brown from the tips inward. I thought it was sunburn, so I moved it to a shadier spot. That actually made things worse because the plant got less light but still had mineral-stressed roots. My second sundew died exactly like this.
The fix: Use only distilled water, rainwater, or reverse osmosis water. I collect rainwater in a bucket from my backyard. If that’s not possible, buy distilled water from the store. It’s cheap. And here’s another tip: keep the pot sitting in a tray of water. Sundews thrive in constantly moist soil. Letting the tray go dry is another common mistake.
What I saw after 2 weeks: Within a week of switching to distilled water, new leaves looked greener. By week two, those new leaves had sticky dew. The old brown leaves didn’t recover, but the plant redirected energy to fresh growth.
Mistake #2: Wrong Light Placement
This is the mistake that directly relates to drying leaves. Sundews need bright light but not roasting sun. I used to think “full sun” meant eight hours of direct sunlight. That’s too much for most sundew species, especially during summer.
Here’s what I do now: I place my sundews on an east-facing windowsill. They get gentle morning sun from about 6 AM to 11 AM. That’s it. The rest of the day, they get bright indirect light. If you only have a south or west window, use a sheer curtain to filter the harsh afternoon rays.
A specific example from my history: I had a Cape sundew (Drosera capensis) on a south window without any shade. The leaves turned red and then brown. I was worried. I tried misting the leaves twice a day, which helped a little but not much. Finally, I moved it to a spot where it only got morning sun. That changed everything.
The two-week turnaround: Day one after moving: leaves still looked bad. Day three: I noticed the newest leaf coming in was greener. Day seven: that leaf had visible dew. Day fourteen: three new healthy leaves with full dew coverage. The crispy older leaves eventually died off, but the plant looked happy again.
Mistake #3: Using the Wrong Pot
This one surprised me. I started with a regular ceramic pot with drainage holes. I thought that was fine. It wasn’t.
Sundews have shallow root systems. They don’t need deep pots. A deep pot holds too much soil, which stays wet longer in the bottom layers. That can lead to root rot even if the top looks fine. Also, terracotta pots are terrible because they absorb moisture and dry out the soil too quickly.
What I use now: Shallow plastic pots or glazed ceramic pots. Plastic retains moisture better. I also use a pot with no drainage holes on the bottom but instead put drainage holes on the side. Actually, I just use the tray method. I fill a tray with distilled water and set the pot in it. The soil wicks up water from below. That keeps the roots evenly moist without waterlogging.
I killed my fourth sundew by using a deep pot with regular potting soil. The soil stayed too wet at the bottom, the roots rotted, and the leaves wilted and dried. By the time I noticed, it was too late.
The soil mix matters too. I use a mix of peat moss and perlite, about 70% peat to 30% perlite. No fertilizers. Sundews get their nutrients from insects, not soil. Adding fertilizer burns the roots.
My Step-by-Step Recovery Plan That Worked in 2 Weeks
Let me walk you through exactly what I did to save my crispy sundew. Follow these steps, and you’ll see results faster than you expect.
Step 1: Stop the Burn Immediately
The first thing I did was move the plant away from intense direct sunlight. I placed it on an east-facing windowsill. If you don’t have an east window, use a west window with a thin curtain. The goal is bright light but no direct rays hitting the leaves between 11 AM and 4 PM.
Quick note: Don’t suddenly move a sun-stressed plant into total shade. Sundews still need light. If you go from full sun to a dark corner, the plant will go into shock. Gradual adjustment is better.
Step 2: Flush the Soil with Distilled Water
This step saved my plant. Tap water minerals had built up in the soil over weeks. I carefully poured distilled water through the pot until it drained out the bottom. I repeated this three times. This flushes away excess salts and minerals.
I did this on day one. Then I kept the pot sitting in a tray of distilled water afterward. The soil stayed moist, and the roots started recovering.
Step 3: Trim Dead Leaves
I know, it hurts to cut leaves off. But dead leaves don’t recover. They just sit there, wasting the plant’s energy. I used clean scissors and trimmed off all leaves that were more than 50% brown or crispy. I left partially green leaves alone. Those might still photosynthesize a little.
My rule of thumb: If it’s dry and crispy, cut it. If it’s just yellow but still soft, leave it for now.
Step 4: Increase Humidity
Sundews love humidity above 50%. In my dry apartment, humidity was around 30%. No wonder the leaves were drying. I placed a small humidifier near the plant. You can also use a humidity tray. Fill a shallow tray with pebbles and water, then set the pot on the pebbles. The water evaporates around the plant without making the soil wetter.
I noticed a big difference within three days. The remaining green leaves looked perkier. The air felt moist around the plant. Dew started forming faster.
Step 5: Be Patient and Observe
This is the hardest part. You want to see improvement right away. But plants work on their own schedule. For the first week, I saw almost no change. The old crispy leaves stayed crispy. But I checked daily for new growth.
By day seven, I spotted a tiny new leaf at the center. It was bright green and looked healthy. By day ten, that leaf had tiny dew droplets. By day fourteen, I had three new leaves, all with beautiful sticky dew. The plant looked like a different sundew.
What to Expect During the Recovery Period
I want to be honest with you. Not all leaves will recover. The brown crispy ones will stay that way. They might eventually dry up completely and fall off. That’s normal. Don’t panic.
Here’s a timeline of what I observed:
Day 1-3: No visible change. The plant looks the same. Don’t touch the leaves too much. They’re stressed.
Day 4-7: New growth appears at the center. It looks pale green at first. The old leaves might continue drying. That’s okay.
Day 8-10: Dew forms on the newest leaves. The dew might be small at first. But it’s there. That’s a good sign.
Day 11-14: Two to three new leaves are fully open with visible dew. The plant looks fuller. The old brown leaves can be trimmed off now if you haven’t already.
Long-Term Prevention Tips
Once your sundew recovers, you want to keep it happy. Here’s what I do now.
Light: I keep my sundews on an east window year-round. During winter, I use a grow light for 12 hours a day because natural light is weaker. I use a full-spectrum LED grow light about 6 inches above the plant.
Water: Distilled water only. I refill the tray when it’s empty. I never let the tray dry out completely.
Humidity: I keep a small humidifier running near my carnivorous plant collection. In summer, humidity is naturally higher, so I might turn it off.
Feeding: Sundews catch their own food if they’re outdoors or near other plants. Indoors, I might place a small fruit fly near the leaves once every two weeks. I don’t overfeed. Too many bugs can stress the plant.
Repotting: I repot every 12-18 months. I use fresh peat-perlite mix. Old soil can break down and become compacted over time.
Common Questions People Ask Me
Can Sundews Grow in Full Sun if I Acclimate Them Slowly?
Some species can handle more sun if you introduce them gradually. I’ve seen Drosera capensis tolerate partial afternoon sun after two weeks of slow adaptation. But honestly, I don’t risk it. Morning sun plus bright indirect light works perfectly. The RHS supports this approach. If you want to try, add one hour of full sun per day and watch for browning. Back off immediately if you see damage.
Should I Mist My Sundew Leaves to Increase Humidity?
I used to mist my sundews every morning. I thought it helped. Actually, misting can wash away the sticky dew. The dew is what catches prey. Without it, the plant can’t feed. Instead of misting, use a humidity tray or humidifier. Direct misting on leaves can also promote fungal growth.
How Do I Know If My Sundew Is Dying vs Just Dormant?
Sundews go dormant in winter for some species. During dormancy, they may stop producing dew and lose some leaves. But the center of the plant stays alive. If you see new growth in spring, it’s fine. If the entire plant turns black or mushy, that’s rot or death. Check the roots. Healthy roots are white and firm. Brown mushy roots mean trouble.
My Final Thoughts After Killing 5 Sundews
I killed five sundews before I figured this out. Five. That’s embarrassing to admit. But every death taught me something. The first died from tap water. The second from too much sun. The third from a deep pot. The fourth from overfeeding. The fifth from cold drafts.
Now I have a healthy collection of sundews, Venus flytraps, and pitcher plants. They sit on my east windowsill, sitting in trays of distilled water. They catch gnats and flies. They look amazing.
The biggest lesson I learned: sundews are not as fragile as people say, but they are specific. They need the right light, the right water, and the right soil. Get those three things right, and they’re easy plants. Get them wrong, and you’ll see leaves drying and browning.
If your sundew currently has crispy leaves, don’t give up. Move it to better light, switch to distilled water, and increase humidity. Give it two weeks. You’ll likely see new growth. I did, and my plants are thriving now.
One last tip: Don’t compare your plant to Instagram photos. Those photos often use filters or perfect conditions. Your plant might look rough for a while. That’s normal. Give it time and consistent care. It will bounce back.
Good luck with your sundew. You’ve got this.





