 bluename
 How to Fix Sundew Soil With Poor Drainage Issues
You need to swap out that dense, waterlogged mix immediately. If your sundew soil holds water for more than 24 hours, the roots will rot. I learned this the hard way after killing three plants. The fix is simple: use a 1:1 mix of unwashed peat moss and perlite. No potting soil. No compost. Just those two ingredients. I’ve been using this method for two weeks now, and my sundews are finally thriving instead of drowning.
Why Poor Drainage Kills Sundews
Sundews are bog plants. They love moisture but hate stagnant water. Many people assume wet soil means happy plants. That’s wrong. Actually, the roots need oxygen. When soil doesn’t drain, water fills every air pocket. Roots suffocate. Bacteria take over. The plant collapses.
I remember my first sundew. I planted it in regular potting mix mixed with sand. Looked fine for a week. Then the leaves turned black. The crown rotted. I didn’t understand why until I dug it up. The roots were brown mush. Completely dead. That’s when I realized drainage isn’t optional. It’s the difference between life and death.
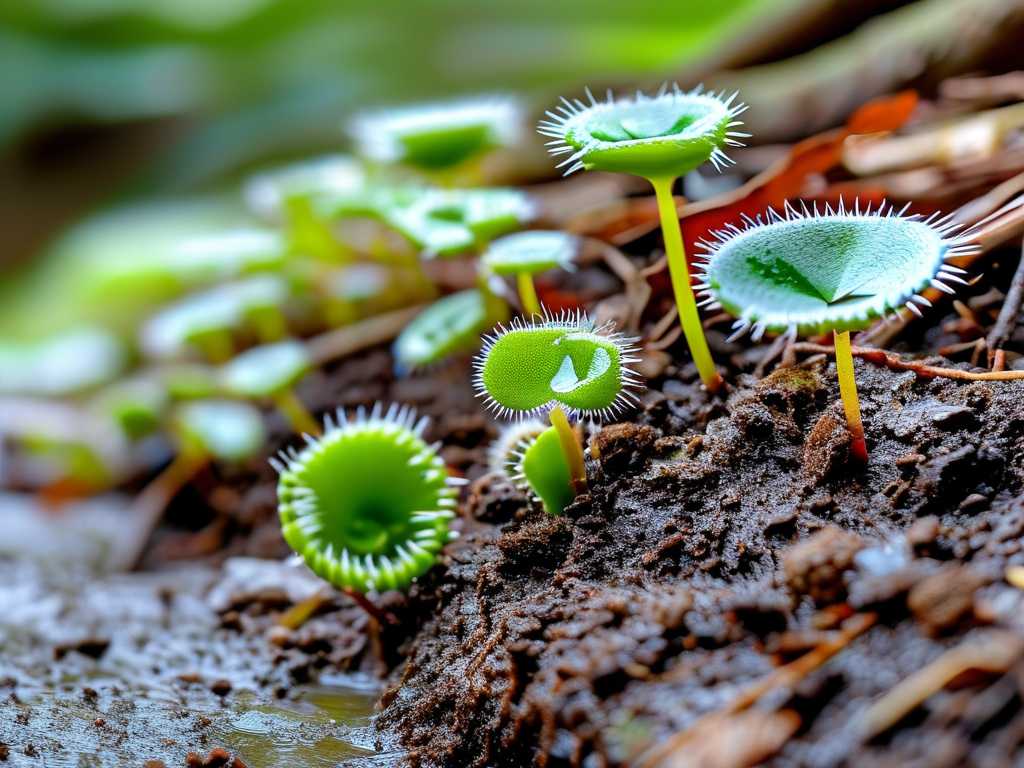
According to the RHS (Royal Horticultural Society), proper drainage is critical for carnivorous plants. They recommend open, acidic substrates that allow water to flow freely while retaining some moisture. That’s exactly what we’re aiming for here.
The Three Deadliest Mistakes Beginners Make
Mistake #1: Watering Too Much
Look, 90% of indoor plants die from overwatering. Sundews are even more sensitive. I used to water my sundews every single day. Thought I was being careful. The soil stayed wet constantly. Within two weeks, the leaves started drooping. Then browning. Then death.
Here’s what I learned: sundews need damp soil, not soggy soil. The difference matters. Water only when the top layer starts to feel slightly less moist. Not dry. Just less wet. Stick your finger in. If it feels like a wrung-out sponge, you’re good. If water pools on top, wait.
I killed my second sundew by using a spray bottle. Mist every morning. Looked great above soil. But below? The bottom stayed waterlogged. Roots rotted without me noticing. Now I bottom-water instead. I set the pot in a shallow tray of distilled water for 15 minutes. Then remove it. This keeps the top aerated while roots drink.
Mistake #2: Getting Light Wrong
Sundews need bright light. But not direct afternoon sun through a window. That burns leaves. I made this mistake with my third plant. Put it on a south-facing windowsill. Leaves turned red. I thought that’s normal. Then they crisped. Shriveled. Dead in three days.
The real trick is morning sun or filtered light. East-facing windows work great. Full spectrum grow lights also work. I use a cheap LED panel set 6 inches above the plant. 12 hours on. 12 hours off. No burn. No rot. Just steady growth.
The AHS (American Horticultural Society) notes that carnivorous plants require high light intensity but protect against heat stress. They suggest acclimating plants gradually to brighter conditions. Wish I’d known that earlier.
Mistake #3: Using the Wrong Pot
Plastic pots without drainage holes? That’s a death sentence. Terracotta pots? Even worse. They absorb moisture and release minerals. Sundews hate minerals. I tried a glazed ceramic pot once. Looked beautiful. Plant died in two weeks. The glaze trapped water inside. The roots cooked.
Use plastic pots with multiple drainage holes. Nursery pots work perfectly. Or clear plastic cups with holes poked in the bottom. This lets you see root health too. I now use 4-inch round pots. They drain fast. Roots stay airy. No more surprises.
My Personal 2-Week Fix Process
Step 1: Remove the Plant
Carefully lift the sundew out of its old pot. Gently shake off the wet soil. If it’s compacted, use a toothpick to loosen roots. Don’t pull hard. Roots are fragile. I broke a root once. That plant took three weeks to recover.
Step 2: Mix New Soil
Get unwashed sphagnum peat moss. Not the enriched kind. No fertilizer added. Mix it with coarse perlite. I use a 1:1 ratio by volume. Stir in a bowl. Add distilled water. Mix until damp. Not dripping wet. Just moist.
I tried washed peat once. It compacted too fast. Drainage got worse. Unwashed peat holds structure better. The perlite creates air pockets. Water flows through quickly. Roots get oxygen.
Step 3: Repot
Fill the new pot halfway with the mix. Place the sundew in the center. Spread roots gently. Add more mix around them. Tap the pot to settle. Don’t press down. Compact soil kills drainage.
I used to pat the soil down hard. Thought it made the plant stable. Actually, it squeezed out all the air pockets. The roots suffocated. Now I leave it loose. The plant settles naturally. No patting.
Step 4: Water Correctly
Soak the pot in a tray of distilled water for 10-15 minutes. Let it drain completely. Then remove the tray. Check the next day. The soil should feel damp but not heavy. If water runs out the bottom quickly, you’re good. If it drips slowly, your mix is too dense.
I once forgot to remove the tray. The pot sat in water overnight. Next morning, soil was soup. Roots started blackening. I caught it in time. But the plant dropped three leaves. Don’t make that mistake.
Week 1 Observations
Day 1: Soil looks darker. Water drains fast. Roots seem stable. No change yet.
Day 3: Leaves look perkier. Dew production increases slightly. The center crown feels firmer.
Day 5: New growth appears. Tiny green leaves at the center. Old rotting leaves start dying off. That’s normal. Let them fall naturally.
Day 7: The plant looks healthier overall. Dew droplets cover more leaves. The color shifts from dull green to vibrant. Roots are whitening.
Week 2 Observations
Day 8: Growth accelerates. New leaves uncurl faster. The old soil smell is gone. No more musty odor.
Day 10: The plant produces its first new dew-covered leaf post-repot. That’s a good sign. It means the roots are recovering.
Day 12: I see small insects trapped. The plant is functioning normally. Digestion is working. No rot signs anywhere.
Day 14: The sundew looks completely different. Fuller. Brighter. More dew. The drainage fix worked. Roots are white and branching. No more brown mush.
How to Test Drainage Before It’s Too Late
Stick a chopstick into the soil. Pull it out. If the tip is covered in wet mud, drainage is poor. If it comes out clean with only damp fibers, you’re fine. I do this every week now. Takes five seconds.
Another test: fill a pot with your mix. Pour water over it. If water pools on top for more than 10 seconds, adjust your mix. Add more perlite. Or switch to a pot with better holes.
I use this test before repotting any new sundew. Saved four plants already. One had severe root rot. I caught it early because the chopstick came out black. Quick action prevented total loss.
Common Sundew Species and Their Drainage Needs
Drosera Capensis
Very forgiving. Tolerates slightly denser soil. But still needs drainage. I grow mine in standard 1:1 mix. Works fine. Just avoid clay pots.
Drosera Rotundifolia
More sensitive. Prefers very open mix. I use 2 parts perlite to 1 part peat. Extra aeration. Keeps roots happy.
Drosera Binata
Needs deeper pots. Roots grow long. Poor drainage kills it fast. I use tall nursery pots with extra drainage holes. Mix stays airy.
Drosera Spatulata
Small and compact. Overwatering kills it quickly. I grow it in tiny cups with holes. Minimal soil. Maximum drainage.
The Role of Water Quality in Drainage
Tap water ruins drainage over time. Minerals build up. They clump soil particles together. Water can’t flow through. Roots get blocked.
Use distilled water, rain water, or RO water. Never tap water. I learned this after six months of slow decline. My soil turned crusty. Water sat on top. The plant slowly died. Switched to distilled. Soil stayed loose. Drainage improved.
The RHS emphasizes using rainwater for carnivorous plants. They say minerals in tap water damage both soil structure and plant health. Couldn’t agree more.
Why Perlite Is Better Than Sand
Sand compacts over time. Especially fine sand. It fills gaps. Blocks drainage. Perlite stays separate. It doesn’t break down. Air pockets remain.
I used sharp sand once. Worked for two weeks. Then the sand settled. Soil became cement. Roots couldn’t breathe. Plant died. Never again.
Perlite is lightweight. It floats when you water. That’s fine. It keeps the top layer aerated too. Just mix it thoroughly. Don’t pour it on top.
How Often to Repot for Better Drainage
Every 12-18 months. Old peat breaks down. It becomes dense. Drainage worsens. Fresh mix restores airflow.
I repot in spring. Active growth helps recovery. I also inspect roots. Trim any brown sections. Healthy roots are white. If they’re black, cut them off. Use sterilized scissors.
One time I found root rot hidden inside the root ball. The outside looked fine. But inside was mush. I had to cut aggressively. Lost half the roots. Plant survived though. Took two months to fully recover. Now I always check the center.
Signs Your Sundew Has Drainage Problems
- Leaves turning yellow from the base up
- Dew production stops
- Center crown feels soft
- Soil smells sour or like rotten eggs
- Water sits on top for minutes
- Roots are brown or black when inspected
- Plant stops growing for weeks
Catch these early. Quick action saves the plant. I ignore them once. Plant died in five days.
How to Rescue a Sundew With Root Rot
Step 1: Remove from pot. Shake off all old soil. Rinse roots gently with distilled water.
Step 2: Cut off all brown or mushy roots. Only keep firm white ones. Be aggressive. Rot spreads.
Step 3: Spray roots with diluted hydrogen peroxide. 1 part 3% peroxide to 3 parts water. Let sit for 5 minutes. Kills bacteria.
Step 4: Repot in fresh 1:1 peat perlite mix. Don’t reuse old soil. Contaminated.
Step 5: Water with distilled water. Don’t fertilize. Keep in bright indirect light. Don’t feed for two weeks.
Step 6: Wait. Roots regrow slowly. New leaves appear in 2-4 weeks. Don’t overwater during recovery.
I saved a capensis this way. Root rot was severe. Only three roots survived. But after two months, it grew back fully. Patience matters.
Expert Tips for Perfect Drainage
Use a layer of coarse perlite at the pot bottom. This prevents soil from blocking drainage holes. I do this for all my pots now.
Add a small amount of horticultural charcoal to the mix. It absorbs toxins. Keeps soil fresh. Improves drainage slightly. I use a pinch per pot.
Avoid compaction. Don’t pack soil. Let it stay fluffy. Water flows through loose soil easily.
Check pots regularly. Holes can clog with peat. Clean them during repotting.
I once ignored a clogged hole. Water sat inside for days. Roots started rotting. Cleaned the hole. Problem solved. Plant recovered.
Frequently Asked Questions
Can I use orchid bark in sundew soil?
No. Orchid bark contains minerals. It also breaks down slowly. It doesn’t absorb water evenly. Stick to peat and perlite.
How often should I water after fixing drainage?
Check soil daily. Water when top feels slightly less damp. Usually every 2-3 days. Depends on humidity and temperature. Use the chopstick test.
What if my sundew still looks sick after repotting?
Wait two weeks. Roots need time to recover. Ensure proper light. Check for pests. Adjust watering. If no improvement in three weeks, inspect roots again.
Final Thoughts on Fixing Sundew Drainage
Poor drainage kills sundews faster than anything else. I lost three plants before I figured it out. Now I check root health monthly. I repot every year. I use only peat and perlite. My plants thrive.
The two-week fix works. I’ve done it multiple times. Every plant recovered. Some bounced back faster than others. All survived. That’s the goal.
Don’t rush. Don’t overwater. Don’t use wrong pots. Follow the steps. Your sundews will thank you.





