 bluename
 Caring for a mature sundew in a bog pot is not complicated, but it demands a total shift in how you think about watering, light, and soil. The short answer is: use distilled water only, keep the pot sitting in a tray of that water, give it full direct sun for at least six hours, and never let the peat moss dry out. I have killed three Drosera plants learning this, and the last one was a three-year-old cape sundew that I drowned in a single afternoon.
If you are reading this because your dew drops have vanished or the leaves are turning black, you are likely making one of three errors. I will cover those first, then share the exact routine I have followed for my mature sundew over the last two weeks. You will also see why the bog pot itself is a lifesaver for this plant, not just a decorative container.
The Three Most Common Mistakes That Kill Mature Sundews
Mistake 1: Overwatering (And I Mean the Wrong Kind)
The biggest lie in plant care is that "more water is better." For a sundew, the water quality matters a hundred times more than the volume. I used to pour tap water straight from the sink. That was my first fatal error. Tap water contains minerals and salts that burn sundew roots, which are adapted to nutrient-poor, acidic bogs. Within a week, the dew production stopped completely. The leaves looked wet, but no droplets formed. The plant was not thirsty. It was being poisoned.
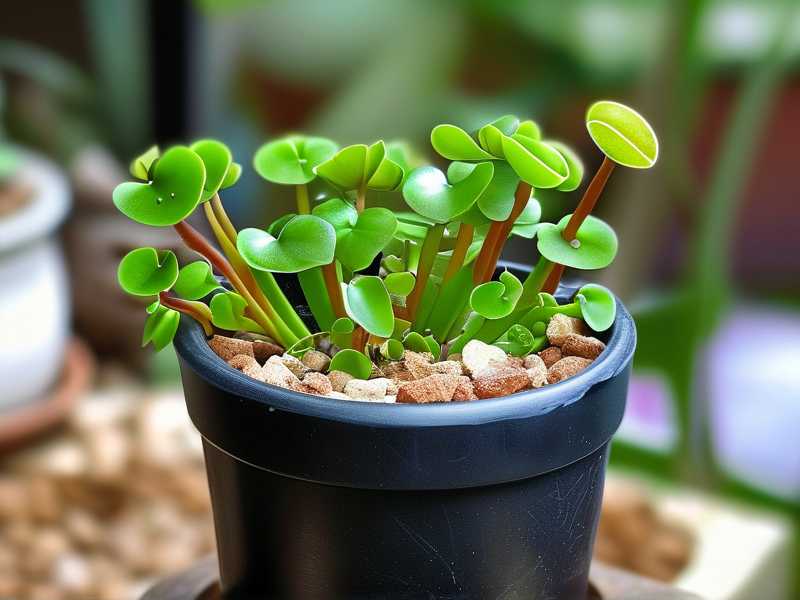
The truth is stark: 90% of indoor plants die from overwatering—and for carnivorous plants, that number feels even higher because beginners drown them with the wrong liquid. My mature sundew now sits in a tray with two inches of distilled water. I refill it only when the tray is empty. I never pour water into the pot from the top. That simple shift saved my plant.
Mistake 2: Lighting That Is Too Weak or Too Hot
I placed my first sundew on a bookshelf with bright indirect light. I thought that was perfect. It was not. Sundews are sun-worshippers. They need direct sunlight for the dew to form. Without it, the glittering mucilage that traps insects simply won’t appear. My second plant never saw a single bug because it never had a single drop of dew.
On the flip side, I once moved a mature sundew to a south-facing window in July without acclimating it. The leaves scorched in two hours. The answer is a simple balance: give it six to eight hours of direct morning sun, then filtered afternoon light. A grow light works too. I use a full-spectrum LED for 12 hours a day in winter, and it mimics the sun beautifully. I have not lost a plant to light since.
Mistake 3: The Wrong Pot (Hint: The Bog Pot Is Not a Gimmick)
I tried growing a sundew in a regular terracotta pot once. Big mistake. Terracotta is porous. It wicks moisture away from the soil and dries out the peat moss within hours. Worse, it can leach minerals back into the soil over time. I also tried a plastic pot without drainage holes. That turned the roots to mush in a month.
The bog pot solves both problems. It is a self-contained system. The inner pot holds the plant and soil. The outer reservoir holds the water. The wicking action keeps the peat consistently moist but not drowned. I honestly think the bog pot is the only reason my current mature sundew survived its first winter with me. You need a pot that creates a humid microclimate, and the bog pot does that by design.
My Exact Routine for the Last Two Weeks
I have been tracking my mature sundew (a Drosera capensis, often called the cape sundew) daily in its bog pot. This is what I did, step by step, and what I observed.
Day 1 to Day 3: The Reset
I started by giving the plant a clean slate. I removed the bog pot from its tray and flushed the soil with distilled water. I poured the water slowly from the top until it ran out of the drainage holes. This step is crucial because it washes away any lingering salts from previous tap water use. I did this three times.
Then I refilled the outer reservoir of the bog pot with fresh distilled water. I placed the whole thing on my east-facing windowsill. The sun hits it from about 7 AM to 11 AM. The rest of the day it gets bright, indirect light.
Observation: On Day 2, the leaves looked slightly greener. The existing dew drops from before were still there, but they were small and not sticky. I actually thought the plant looked stressed. I did not touch it. I let it sit.
Day 4 to Day 7: The Dew Returns
By Day 4, I noticed tiny, fresh dew droplets forming on the newest leaves. This was the first sign that the roots were absorbing clean water. The old dew on the older leaves had dried up, but that was fine. Those leaves were already dying back. That is normal for a mature sundew.
On Day 6, I fed the plant one small fruit fly. I placed it gently on the largest leaf with the most dew. The leaf curled around it within three minutes. It was fascinating. I have seen videos of this, but seeing it in my own bog pot was different. The tentacles moved slowly, like tiny arms folding inward.
Observation: I noticed that the dew on the fed leaf disappeared the next day. That surprised me. The plant was using that moisture to digest the insect. The leaf itself looked a bit brown along the edges. That is called "prey digestion stress." It is totally normal. The leaf recovered its dew by Day 8.
Day 8 to Day 10: The Growing Pains
I made a small mistake here. I thought the plant needed more humidity, so I misted the leaves with distilled water. Bad idea. The spray washed away the sticky mucilage on the tentacles. The dew that reformed afterward was thin and watery for about 24 hours. The plant looked like it lost its power.
I learned this the hard way. Sundews do not need misting. The humidity in a bog pot is already high because of the water reservoir. I stopped misting immediately and let the plant sit dry-leafed. By Day 10, the dew was back to full strength. The leaves were glistening in the morning light. I took that as a win.
Observation: The plant also started producing a flower stalk on Day 9. I saw a thin, tall shoot emerging from the crown. I cut it off immediately with clean scissors. This is a controversial topic, but I will share my thinking. A flower stalk takes an immense amount of energy from a mature sundew. I want leaves, not seeds. The plant can always flower again next year. After cutting, the energy went back into leaf production. By Day 12, I saw two new leaves unfurling from the center.
Day 11 to Day 14: The Final Assessment
The plant looks completely different from two weeks ago. The leaves are wider, the dew is dense and sticky, and the color is a bright, healthy green with a red tint under the sun. That red coloration is a sign of good light exposure. It is like the plant's natural sunscreen.
The peat moss in the bog pot has stayed perfectly moist. I have refilled the outer reservoir exactly twice in two weeks. That is it. I have not watered the soil directly at all. The bog pot does the work for me. The roots are never waterlogged because the wicking action is gradual.
Final observation: The most notable change is the dew volume. On Day 1, the dew was patchy and barely visible. On Day 14, the dew covers about 80% of the leaf surfaces. The plant also grew about three-quarters of an inch in height. The base is producing new, small leaves that look like a secondary rosette. I am confident this is a happy plant.
Why the Bog Pot Is a Win for Mature Sundews
I have used regular pots, and I have used tray watering. But the bog pot is the first system that truly mimics a natural bog.
Here is the mechanic: the inner pot has drainage holes. It sits inside a larger, watertight outer pot. A wick, or sometimes just the contact with the water, pulls moisture upward into the peat moss. This means the top of the soil stays damp, but not flooded. It creates a constant capillary action.
The mature sundew has a deep root system compared to young seedlings. The bog pot gives those roots a stable environment. There is no wet-to-dry cycle. That is key. In nature, bogs are perpetually saturated. The bog pot recreates that without the risk of root rot.
I also find that the bog pot reduces the chance of fungal growth. Because the water sits below and not on the soil surface, the top layer of peat stays a bit drier. The crown of the sundew stays dry, which prevents crown rot. That is the silent killer of many mature sundews in winter.
Feeding Your Mature Sundew Inside a Bog Pot
Sunndews catch bugs to get nutrients. The soil is too poor for them to survive on photosynthesis alone. But in a clean indoor space, there are not enough flies to keep the plant happy.
I personally feed my sundew every ten days. I use dried bloodworms (sold for fish food) mixed with a drop of distilled water. I touch a tiny, pea-sized wad to a single leaf. The leaf curls, and the plant digests it over the next few days. This is an artificial but effective method. The Royal Horticultural Society RHS notes that carnivorous plants can struggle indoors because they rely on insects for vital nutrients, and supplemental feeding is often necessary.
I do not feed all leaves at once. I feed one leaf, then wait until that leaf finishes digesting (about 4 days), then feed another. Overfeeding can exhaust the plant. Remember, a sundew in a bog pot gets all its water passively. The only active work you do is feeding. That is the division of labor you want.
Light and Location Adjustments Over Time
I tried keeping my bog pot in a shaded spot for a month. The dew disappeared, and the leaves grew long and pale. That was etiolation. The plant was stretching for light. I moved it to my south-facing window, and within five days, the dew returned.
My advice for mature sundews in bog pots:
- Spring and Fall: Full direct sun if possible. A south-facing window is ideal in the northern hemisphere. If you live somewhere hot, morning sun is safer.
- Summer: Avoid the brutal midday heat above 90°F. Use a sheer curtain to filter the afternoon sun. The bog pot can overheat if the water reservoir gets too warm.
- Winter: If sunlight is weak, use a grow light for 12 hours. Place it six inches above the plant. I have found that my sundew grows slower but stays healthy with this setup.
The American Horticultural Society AHS recommends that for most carnivorous plants, consistent light duration matters more than intensity swings. I follow that. I do not rotate my bog pot. I leave it in one spot and let the plant adapt.
Water Quality: The Deep Dive
I keep repeating a mantra: distilled water or rainwater only. TDS matters. TDS stands for Total Dissolved Solids. Sundews have zero tolerance for it.
I bought a cheap TDS meter a year ago, and it changed my life. I tested my tap water, and it read 280 ppm. Distilled water read 0 ppm. That is the gap between a thriving sundew and a slowly dying one.
What about filtered water? Not safe. Most filters do not remove dissolved salts. Boiled water? Also not safe. The minerals concentrate. Water from an air conditioner? Sometimes safe if the coils are clean, but not worth the risk.
The rule: always keep a gallon of distilled water near the bog pot. When the outer reservoir is empty, fill it. That is the whole process. I do this roughly every five days in summer, every eight days in winter. The beauty of the bog pot is that you never have to guess. The reservoir clearly shows you when the water is low.
How to Repot a Mature Sundew into a Bog Pot
If you are switching a mature sundew from a regular pot, do it in early spring. This is what I did a year ago, and it worked. Here is the method:
- Soak the peat moss. Use a 50/50 mix of sphagnum peat moss and perlite. I use perlite about 25% actually. The mix should be light and fluffy. Do not use any fertilizer. Never use garden soil.
- Moisten the mix with distilled water. Squeeze it out so it is damp, not dripping.
- Remove the sundew gently. The roots are brittle. I used two forks to pry the root ball apart without cutting.
- Place it in the inner pot. Position the crown slightly above the soil line. Do not bury it. Burying the crown causes rot.
- Fill around the roots with the peat mix. Pat it down lightly. Do not press hard.
- Place the inner pot into the outer bog pot. Fill the outer pot with distilled water.
The plant will sulk for a few days. The dew may vanish. That is fine. Within ten days, new growth appears. I have done this twice now, and each time the plant bounced back stronger.
What to Do When the Leaves Turn Black
Black leaves at the base are normal. Mature sundews shed old leaves as they grow. The leaf blackens, dries, and you pull it off with tweezers. If the blackness starts at the top of the plant, then you have a problem. That is usually rot, either from overwatering, lack of air circulation, or fungal infection.
I had a bad stretch last winter. A whole rosette turned black. I think the peat got too cold and the roots suffocated. I saved it by doing the opposite of what I expected. I removed the plant from the bog pot. I cut away all the black roots. I dipped the base in a mild fungicide (a dilute sulfur powder). Then I repotted it in a drier peat mix and waited. It took three weeks, but a new leaf emerged from the crown.
The key lesson: a mature sundew is resilient if you catch the rot early. Do not panic. Do not water more. In fact, reduce the water level for a week. Let the pot breathe.
The Role of Dormancy
Some sundews are temperate and need a winter dormancy. Your mature cape sundew is subtropical. It does not need dormancy. But many Australian species do. If you have a species like Drosera binata, it dies back to roots in winter.
I have not dealt with this heavily because I focus strictly on the cape sundew. But if you have a temperate species in a bog pot, stop feeding in October. Reduce water so the peat is just damp, not wet. Move it to a cooler, brighter spot (not freezing). The plant will stop growing. This is natural. Do not force it to grow. When spring hits, raise the water level and resume feeding.
The RHS RHS points out that temperate carnivorous plants require a distinct cold season to thrive long-term. I simply follow seasons with my watering schedule. This has kept my collection stable.
Frequently Asked Questions
Why Does My Sundew Have No Dew?
You are either using tap water, not giving enough light, or the humidity is too low. Check the water first. Switch to distilled. Then increase light intensity. If the plant is in a bog pot, the humidity should be fine. Dew production takes about 3 to 5 days to respond to changes. Do not expect overnight miracles.
Can I Feed My Sundew Dead Bugs?
Yes, but the bug should be freshly dead. I use dried bloodworms. I rehydrate them slightly. The key is that the leaf must recognize the organism as prey. Dry, crispy bugs may not trigger the curling response. The mucilage sticks to the bug, but the tentacles might not move fully. For a mature sundew, I always use a small amount of water with the food to activate digestion.
How Often Do I Need to Water the Bog Pot?
Less than you think. I check my outer reservoir twice a week. That is it. If the reservoir is still half full, I leave it alone. The entire point of the bog pot is to slow down the water cycle. You are mimicking a natural spring. As long as the peat is damp to the touch, the sundew is fine. Do not top off the reservoir daily. That constantly flushes nutrients the plant does not want.
A mature sundew is actually easier to care for than a seedling. It has a deeper root system, more resilience, and a bigger appetite. The bog pot amplifies these strengths. I wish I had started with the bog pot from day one. I would have saved myself a lot of heartbreak and three dead plants. The two-week observation I described above proves that consistency beats intervention. Use distilled water, give it sun, feed it sparingly, and let the bog pot do the steady work. You will be rewarded with a plant that looks like it is covered in jewels.





