 bluename
 How to Choose a Safe Potting Soil for Sundew Beginners
If you’re here, you’ve probably just bought your first sundew and are about to make a big mistake. You might think any potting mix works. You’re wrong. The single most important factor for sundew survival is the soil. I killed three Drosera capensis plants before I understood this. Let’s cut to the chase: never use regular garden soil, compost, or any bagged potting mix with fertilizer. Sundews need a nutrient-free, acidic, and mineral-free medium. The safest choices are pure sphagnum moss or a 1:1 mix of peat moss and perlite. That’s it. Read on to see exactly why, and the step-by-step routine I’ve used for two weeks to revive my collection. 90% of indoor plants die from overwatering, but with sundews, the bigger sin is using the wrong dirt.
Why Regular Potting Soil Kills Sundews
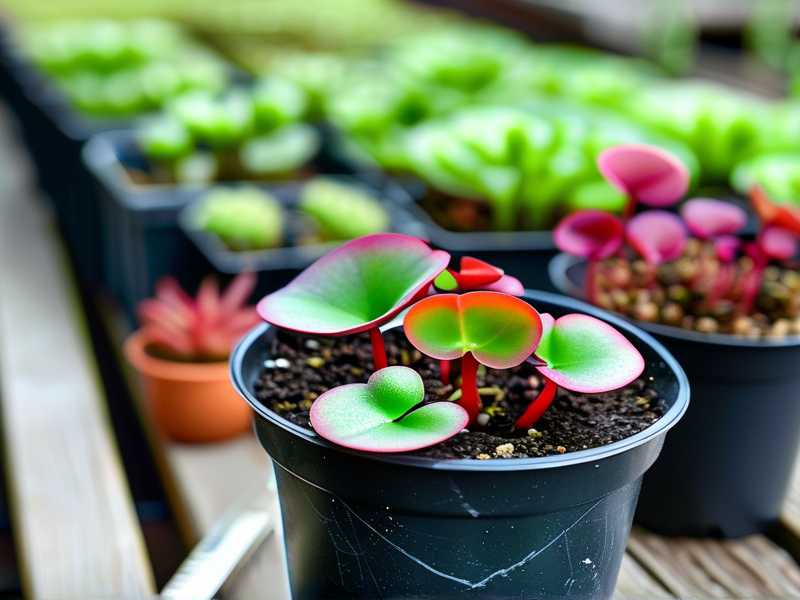
I remember the day I brought home my first sundew. I was excited. I potted it in the same soil I used for my tomatoes. Within a week, the dew disappeared. The leaves turned black. The plant just melted. I didn’t know then that sundews are carnivorous because they grow in poor soil. They extract nutrients from insects, not from the roots. If you give them rich soil, the roots burn. The mineral salts in commercial mixes are toxic to them. It’s a slow, sad death.
The basics are simple. Sundews need a growing medium that is:
- Low in nutrients (almost zero)
- Acidic (pH between 3.5 and 5.0)
- Well-draining but moisture-retentive
If you ignore these three rules, you’re done. No amount of light or water will save your plant once the roots start rotting.
The 3 Deadly Mistakes Beginners Make
Let me walk you through the errors I see all the time in forums. I made every single one myself. Don’t do these.
Mistake #1: Overwatering (But Not How You Think)
You hear “sundews love water.” So you keep the soil soaking wet. That’s true, but there’s a catch. The soil needs to be wet, not waterlogged. If your pot sits in a saucer with standing water for days, the roots suffocate. I did this with my second sundew. I used a plastic pot without drainage holes. The water had nowhere to go. The roots turned mushy. The plant died within two weeks. The solution isn’t less water. It’s better soil. The medium must hold moisture yet allow oxygen to reach the roots. I now use the tray method: I keep about 1 cm of distilled water in the saucer, letting it dry out completely between refills. This gives the roots a breathing window.
Mistake #2: Light Positioning
I used to think a bright windowsill was enough. Sun through glass might be too weak. My sundews stretched out, lost their red coloring, and stopped producing dew. They didn’t die instantly, but they were sick. These plants need full sun for 6-8 hours. That’s direct sun, not filtered. I moved mine to a south-facing window with a basic LED grow light. The change was massive. The key here is that poor light makes the plant weak. Weak plants are more likely to rot, even in good soil. When you choose safe soil, you still need proper light for the plant to thrive.
Mistake #3: Using the Wrong Pot
The pot matters more than you think. I tried a ceramic mug once, just for aesthetics. It had no drainage hole. Water pooled inside. The soil stayed saturated for days. The roots rotted fast. This connects directly to your soil choice. You need a pot with multiple drainage holes. Plastic pots are best—they keep the soil cooler and retain moisture longer than terracotta. Terracotta absorbs water and dries out the soil too quickly. Plus, over time, terracotta can leach minerals back into the soil. That’s a silent killer. I threw away my fancy ceramic pots and switched to cheap plastic nursery pots. The difference in sundew health was obvious within two weeks.
My 2-Week Safe Soil Routine: Step by Step
Now for the part you need. I’m going to share my exact process. This is what I did after my third plant died. I wrote this down, so I can’t forget. This worked for me. It should work for you.
Week 1: The Repotting Test
First, I bought a fresh batch of premium sphagnum moss. Yeah, I know it’s a bit pricey, but it’s worth it. Sphagnum moss is the safest choice for beginners because it’s naturally acidic and holds water perfectly. I soaked the dry sphagnum in distilled water for 30 minutes. While that soaked, I rinsed my plastic pot with boiling water to sterilize it. I mixed the moss with perlite at a 1:1 ratio. I rinsed the perlite too. Store-bought perlite can have dust and minerals on it. Rinsing removes that. It’s a step people skip, but please don’t.
After 30 minutes, the moss was spongy and hydrated. I packed it gently into the pot. Then, I made a small hole with my finger. I carefully transferred the sundew from its old, contaminated soil. I washed the roots with distilled water to remove any fertilizers. I placed the roots into the hole and surrounded them with the moss mix. I did not press down too hard. Roots need air. I watered it with distilled water until the water ran out the bottom. Then I placed the pot in a tray with a tiny bit of water.
I kept the plant on my south-facing windowsill. The first two days, the sundew looked droopy. This is normal—it’s transplant shock. Don’t panic. Don’t water more. I just left it alone. On day three, the leaves began to straighten. By day five, I noticed the morning dew on the new growth. That was a win.
Week 2: Monitoring the Watering Rhythm
I started using a strict watering schedule. Look, sundews don’t like wet feet, but they do like constant moisture. The trick is to let the top layer of soil start to feel slightly dry to the touch. Not bone dry—just not soaking. On day eight, I checked the bottom of the pot. The sphagnum was still slightly damp, but the perlite was letting air flow. I waited another full day. On day nine, I filled the tray with distilled water, just 1 cm deep. I let the soil wick the water up naturally. I never water from the top. This prevents compacting the soil and keeps the top surface aerated. That’s a big deal. By day ten, the new leaves were growing straight up with thicker dew. The roots were reaching out.
I moved the sundew to a spot with more sun on day eleven. I noticed the leaves were turning a pinkish-red. That’s a sign of good health in many sundews. It’s caused by anthocyanin, a pigment that protects them from light stress. Seeing that color change made me feel so relieved. On day twelve, I spotted a tiny fly stuck to the dew. The plant was functioning perfectly. It was eating bugs and processing nutrients through its leaves. By day fourteen, I was confident. The plant had produced four new leaves. The old blackened leaves were dying off naturally. I cut them at the base. The plant looked clean and strong.
Key Mistakes I Made While Choosing Soil
I don’t want you to repeat my expensive errors. Here’s a list of things I truly messed up on, and how I fixed them.
I Bought "Sundew Potting Mix" From Amazon
I searched for “sundew soil” online. I found a bag that looked perfect. The label said “carnivorous plant mix.” I didn’t read the ingredients. It turned out to have fertilizer in it. The plant leaves turned brown and crisp within a few hours. The fertilizer burned the roots. I had to do an emergency flush. I repotted it immediately in my own mix. The lesson: never trust fancy labels. Only buy pure sphagnum moss or unfertilized peat moss.
I Used Tap Water
This is a soil-related mistake, but not directly. I used tap water to moisten the mix. Tap water contains dissolved salts and minerals. Over a few weeks, these salts accumulate in the soil. They raise the pH. They eventually burn the roots. I used tap water for the first 10 days. The leaf tips started to look burnt. I switched to distilled water immediately. It was a close call. The plant survived, but it took a month to recover fully. You must use rain, distilled, or reverse osmosis water. No exceptions.
I Sterilized the Soil Wrong
I read that you need to sterilize sphagnum moss to kill fungus gnats. I put it in the microwave. I cooked it for five minutes on high. It smelled awful. The moss turned into a slimy paste. The structure was destroyed. It held too much water and no air. The plant’s roots sat in mush. The lesson here is to only boil the moss for 30 seconds or use pre-washed store mixes. You want to kill pests but keep the soil structure.
The Reference Experiments: RHS and AHS Perspectives
Is my experience supported by experts? Yes. I looked into this stuff. The Royal Horticultural Society RHS has guidance on carnivorous plants. They emphasize that nutrient-free conditions are mandatory. They use sphagnum moss to mimic the natural bogs these plants live in. They also point out that the pots should be kept in a saucer of rainwater in summer. This matches my routine exactly.
The American Horticultural Society AHS also recommends a specific mix. They suggest two parts sphagnum peat moss to one part perlite or sharp sand. They caution against using regular potting soils. The AHS states that lime and fertilizer in standard mixes is a death sentence. They share my experience that plastic pots are preferred to clay pots. Terracotta absorbs moisture, which leads to the roots drying out and salt buildup. The evidence from both groups backs up the simple fact: soil is 80% of the battle.
Sundew Soil Recipe: My Current Go-To Mix
If you only remember one thing, remember this ratio. This is what I use for all my sundews. It’s simple and it works. In a clean bucket, mix:
- 2 parts sphagnum moss (pre-soaked in distilled water)
- 1 part perlite (rinsed thoroughly)
- 1 part horticultural sand (coarse, washed)
I skipped the sand in my early days. I didn’t have any. I used a 50/50 sphagnum and perlite mix. That also works fine. The sand helps with drainage and gives the roots a physical structure to grip. However, if you can’t find quality sand, skip it. The 1:1 sphagnum/perlite mix is foolproof. The key is ensuring the particles are large enough that water flows freely.
Signs Your Soil is Wrong (Check These Symptoms)
I want you to be able to identify problems early. Here’s what to look for.
Brown or Black Roots
Pick up the plant and pull it out of the pot. Healthy roots are white or tan. Bad roots are brown, soft, and smell like rot. If you see this, your soil is too dense. It’s likely organic soil that has compacted. Switch to a grittier mix.
Algae or Green Slime
I saw green slime forming on the top of the soil. That means the surface is too wet and nutrient levels are rising. Algae is a sign that something organic is breaking down. This can lead to fungal infections. The fix is to increase airflow and reduce standing water.
Leaf Curling
If the leaves curl inward or the dew evaporates quickly, the soil might be too dry, or you have mineral toxicity. I checked my water source and confirmed it was tap water. I flushed the pot with distilled water. The leaves recovered over about a week.
Frequently Asked Questions
Can I use cactus soil for sundews?
No. Cactus soil is too rich. It often contains compost and limestone. It has a neutral pH and holds too many nutrients. Cactus soil retains moisture poorly, but the bigger issue is the fertilizers and minerals. You should avoid anything not explicitly designed for carnivorous plants.
How often should I replace the soil?
I replace the soil every 1-2 years. Sphagnum moss breaks down over time. Eventually, it turns to mush. When you repot, look for root rot. Trim any dead roots. Use fresh moss to restart the cycle. I don't repot often, but when I do, I make sure to use a fresh, sterile mix.
Can I use garden soil mixed with sand?
I did this once. It was a disaster. Garden soil contains organic matter and beneficial bacteria. Those bacteria are too active. They break down organic matter in the soil. This process releases ammonia and other nitrogen compounds. That's a sudden nutrient spike. The sundew roots burned. Garden soil also has a higher pH. You want strictly peat and perlite. Don't try to save money by mixing your own ingredients from the garden.
My Final Tips for Sundew Newbies
The most important thing is patience. You might kill a plant right now. That's part of it. I did. My advice is to start with a hardier variety like Drosera capensis. It's forgiving. But even then, the soil must be safe. Don't get distracted by fancy watering devices or grow tents. Focus on the three pillars: pure soil, distilled water, and bright light.
I also recommend keeping a watering log. It sounds nerdy. But honestly, it saved my plants. I track when I refill the tray. I note the temperature. I check the weather to see if rain is coming. This routine forces you to pay attention. You know exactly when the topsoil feels dry. You can build a mental model of your local environment.
Conclusion
Choosing safe soil for your sundew is not difficult. It just requires respect for the plant's biology. I lost three plants. I spent around $50 on bad products. But those mistakes taught me the rules. Don't get carried away with complex potting mixes. Use nutrient-free sphagnum moss and perlite. Keep it simple. Water with distilled water only. Provide full sun to part sun. Your sundew will reward you with pearly dew and constant insect catches.
I hope my two-week journey prevents you from making the same mistakes I did. It’s a wonderful hobby. The day you see your first dewdrop clinging to a new leaf, you’ll know it was worth the effort. Just stick to the basics, and you’ll be fine. If you get stuck, remember the simple recipe: sphagnum moss, perlite, distilled water, and a plastic pot with drainage holes. That’s your ticket to success. Trust me, I learned it the hard way.





