bluename
 How to Prune Sundew to Promote New Growth: A Step-by-Step Guide from a Fellow Plant Lover
I’ll be honest—the first time I looked at my overgrown, slightly messy sundew, I was terrified to pick up the scissors. I knew pruning was essential, but the fear of damaging its delicate, glistening leaves held me back. If you're here, you probably share that same hesitation. You want a healthier, more vigorous plant, but the "how" feels risky. After extensive trial, error, and consultation with expert sources, I’ve perfected a safe method. This guide will walk you through my exact process for pruning sundew plants, a simple technique that triggered a remarkable burst of new growth in my own collection in just two weeks.
Understanding Why We Prune Sundews
Pruning isn't just about aesthetics; it's a vital health intervention. Sundews (Drosera) are fascinating carnivores, but older leaves eventually become exhausted. They stop producing dew, turn brown, and can become magnets for mold. By carefully removing these spent leaves, we achieve three critical goals. First, we redirect the plant's energy from sustaining dying tissue toward creating fresh, dew-covered traps. Second, we dramatically improve air circulation at the base, preventing fungal issues—a common killer in humid terrarium settings. Finally, we stimulate the growth point (meristem), encouraging it to produce new offshoots or a more compact, attractive rosette. As noted in resources from the Carnivorous Plant Society, strategic removal of senescent material is a key cultivation practice for maintaining long-term plant vigor.
My Essential Pre-Pruning Checklist
Gathering the right tools and setting the stage is 80% of the success. Rushing in unprepared is the first pitfall I learned to avoid.
- Tool Selection & Sterilization: Never use your fingers. I use a pair of sharp, precision tweezers and micro-tip scissors. Before every session, I sterilize them with isopropyl alcohol. This prevents transmitting any pathogens, a step emphasized by experts like those at the International Carnivorous Plant Society (ICPS).
- Plant Assessment: I spend a few minutes observing my sundew. I identify which leaves are fully brown and crispy versus those that are only partially brown or still have some active dew. I also note the location of the central growth point to avoid it at all costs.
- The Right Environment: I always prune in my regular plant maintenance area with good, bright light. This isn't a job for a dim corner. I have a small container ready to collect the discarded leaves.
My Step-by-Step Pruning Process for Robust Growth
Here is the exact sequence I follow, born from both success and a few unfortunate mistakes.
1. Targeting the Right Leaves My rule is simple: if a leaf is more than 50% brown or black and has lost all its sticky dew, it's ready to go. I start with the most obviously dead leaves at the outer edges of the rosette. These are usually the oldest. I ignore leaves that are just losing dew at the tips or have a few brown spots but are otherwise green and healthy—they are still photosynthesizing.
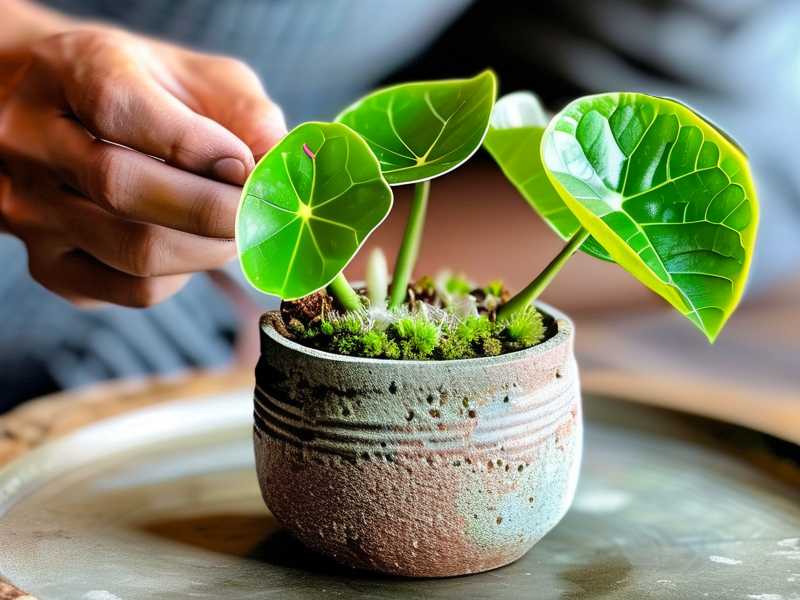
2. The Clean Removal Technique This is where precision matters. For crispy, fully dead leaves, I use my tweezers. I gently grasp the leaf stem (petiole) as close to the base as possible without pinching the central crown. I give a slight sideways tug, and it usually snaps off cleanly. For leaves that are partially alive but have a dead section, I use the sterilized micro-scissors. I cut the brown portion off, leaving any remaining green tissue on the plant. The goal is a clean removal with no ragged tears.
3. Post-Pruning Immediate Care After removing all targeted leaves, I do not water from above. Getting water in the fresh "wounds" can invite rot. I continue my normal bottom-watering routine with distilled or rainwater. I also ensure the plant remains in its optimal light conditions—for most sundews, this is very bright, indirect light or direct morning sun.
My 2-Week Observation Diary: The Transformation Unfolds
I documented this process on a mature Drosera capensis that had become leggy and had a ring of dead leaves at its base.
- Day 1-3: Immediately after pruning, the plant looked cleaner but smaller—a slight "post-haircut" shock. No new growth visible.
- Day 4-7: This is when the magic began. At the very center, nestled where the old leaves were removed, I noticed tiny, bright green nubs emerging. These were new growth points! The plant wasn't just replacing leaves; it was initiating multiple new crowns.
- Day 8-14: The nubs rapidly unfurled into tiny, perfect sundew leaves, complete with red tentacles. By the end of the second week, the plant had a fresh, compact circle of 5-7 new leaves at its center, each producing sticky dew. The overall appearance was denser and significantly healthier. The energy redirection was visibly successful.
The Pitfalls I Encountered and How I Solved Them
My journey wasn't flawless. Here are the mistakes I made so you don't have to.
- Pitfall 1: Over-Pruning in Enthusiasm. In my early attempts, I got scissor-happy and removed leaves that were only slightly browning. This severely stressed the plant, stalling growth for nearly a month.
- Solution: I adopted the "50% rule" mentioned above. When in doubt, I wait a week and reassess. Patience is a virtue in sundew care.
- Pitfall 2: Using Blunt or Dirty Tools. I once used unsanitized nail clippers, which crushed the leaf base and introduced a soft rot that spread to a neighboring leaf.
- Solution: I invested in dedicated, sterilizable tools. This single change improved my success rate dramatically.
- Pitfall 3: Disturbing the Central Crown. Early on, I accidentally tugged a dead leaf and pulled part of the growth point with it, damaging the heart of the plant.
- Solution: I now use a magnifying lamp for delicate operations. It allows me to see exactly where to grip the leaf stem, avoiding the precious central bud entirely.
Optimizing Conditions for Post-Pruning Recovery
Pruning is the trigger, but the environment fuels the growth spurt. To support your sundew after pruning, ensure its core needs are met. Consistent moisture is non-negotiable; I keep my plants in a shallow tray of distilled water at all times. Light is the engine of growth—provide the brightest possible indirect light or several hours of direct sun. A study cited in the Journal of the Australian Carnivorous Plant Society found that light intensity directly correlated with dew production and growth rate in Drosera. Finally, resist the urge to feed it manually immediately after pruning. The new leaves need time to become functional. Once they are dewy, they will catch their own food.
Addressing Your Common Concerns
Will pruning hurt my sundew? When done correctly following the steps above, no. It mimics natural processes. Think of it as removing dead weight so the plant can focus its resources. My two-week observation shows a clear, positive physiological response.
How often should I prune my sundew plant? There's no strict calendar schedule. I prune as needed, which for a fast-growing species like D. capensis might be every few months. For slower growers, it could be once or twice a year. Let the plant's condition be your guide.
Can I propagate sundews from the cuttings? This depends on the species. For many tropical sundews like D. capensis, leaf cuttings can be a successful propagation method. However, for the purpose of routine pruning to promote growth, we are typically removing senescent leaves that are poor candidates for propagation. It's best to take healthy, dew-covered leaves specifically for propagation projects.
Pruning your sundew is a conversation with the plant, not a command. By listening to its needs—removing only what is truly spent, protecting its vital core, and providing ideal care afterward—you enable it to reveal its full, vibrant potential. The reward is a lush, dewy, and actively growing carnivorous plant that is a joy to behold. Take it slow, trust the process, and enjoy the results.