How to Propagate Sundew from Seeds Step by Step: A Complete Beginner's Guide
")
I remember the first time I tried to grow sundews from seeds. I ended up with a disappointing patch of mold and a lot of frustration. If you've ever bought those tiny, dust-like sundew seeds online and felt overwhelmed, wondering how on earth to turn them into the beautiful, glistening carnivorous plants you dream of, you're not alone. The process seems shrouded in mystery, and a single misstep can mean waiting months for nothing to happen. After years of trial and error, and a particularly enlightening two-week observation period during my last successful batch, I've perfected a reliable, step-by-step method. This guide will walk you through exactlyhow to propagate sundew from seeds, avoiding the common pitfalls that trip up most beginners.
Why Growing Sundews from Seeds is Incredibly Rewarding
Starting sundews from seeds is more than just a cost-effective way to expand your collection. It’s a deeply satisfying journey that lets you witness the entire life cycle of these fascinating predators. You gain a profound understanding of their needs from day one. While leaf cuttings and division are faster,growing drosera from seedoffers unparalleled variety, as many rare species are primarily available as seeds. The joy of seeing those first, microscopic tentacles emerge is unmatched. As the International Carnivorous Plant Society (ICPS) notes, propagation from seed is crucial for conserving genetic diversity and cultivating rare species that are seldom sold as mature plants.

Everything You Need Before You Start
Gathering the right materials from the start is 80% of the battle. Using the wrong soil or container was my first major mistake years ago.
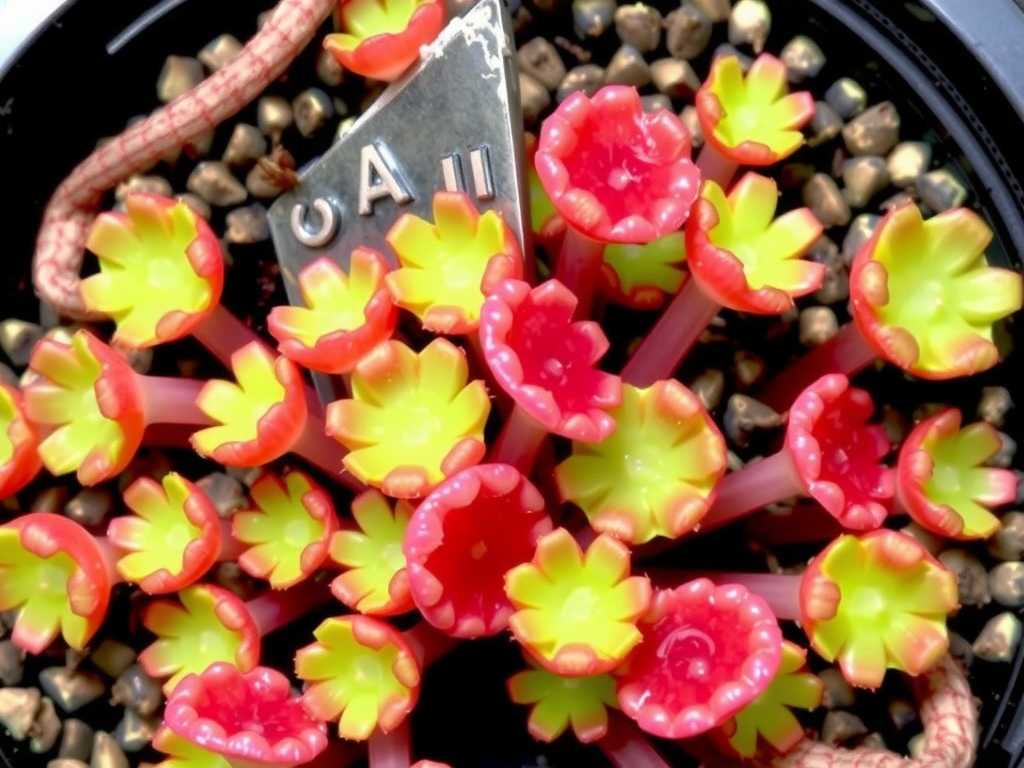
- Seeds:Source fresh seeds from reputable carnivorous plant nurseries. Old or improperly stored seeds have drastically lower germination rates. I’m currently working with seeds ofDrosera capensis, a fantastic beginner species.
- Growing Medium:This is non-negotiable. Sundews require nutrient-free, water-retentive, and acidic soil. Apeat moss and perlite mixis the gold standard. I use a 50:50 mix, thoroughly rinsing the perlite first to remove dust. The Carnivorous Plant Society of America recommends against any potting soil, compost, or fertilizers, as these will harm the seeds and seedlings.
- Containers:Use clean, shallow pots or seed trays with drainage holes. Clear plastic containers with lids (like deli containers) are excellent for maintaining humidity. Poke a few small holes in the lid for slight airflow.
- Water:Always use distilled water, reverse osmosis (RO) water, or rainwater. Tap water contains minerals that will accumulate and kill your sundews.
- Light Source:A bright, sunny windowsill (south-facing in the Northern Hemisphere) works, but a simple LED grow light ensures consistent, strong light for 12-14 hours a day, promoting sturdy growth.
- Tools:A small spray bottle for misting, labels, and tweezers for handling tiny seeds.
My Step-by-Step Sundew Seed Sowing Process
Here is the exact process I followed for my latest, most successful batch. I documented it daily for the first two critical weeks.
Preparing the Perfect Germination Environment
I start by filling my clean pot with the pre-moistened peat/perlite mix, leaving about half an inch from the rim. I gently firm the surface but don't compact it. The key here is to soak the pot from below by placing it in a tray of distilled water until the surface is visibly damp. Then, I let it drain slightly so the surface is moist but not waterlogged. A soggy surface is an open invitation for algae and fungus.
Sowing the Seeds: Precision Matters
Sundew seeds are tiny. I carefully scatter them sparsely over the surface of the medium.Do not bury them.They need light to germinate. I gently press them down with my fingertip or the back of a spoon to ensure they have good contact with the damp soil. Covering the seeds is one of the most common errors; it will prevent germination entirely. I then lightly mist the surface with distilled water from my spray bottle.
Creating the Ideal Microclimate
This is where the humidity dome (the clear plastic lid) comes in. I place it over the pot to create a mini-greenhouse, trapping in moisture. I place the setup under my grow light, about 6 inches away. The goal is a warm, humid, and brightly lit environment. I keep the tray water reservoir about a quarter full to maintain consistent moisture from below.
The Critical First Two Weeks: My Daily Observations and Adjustments
This attentive period made all the difference. Here’s what I observed and how I responded.
- Days 1-5:No visible change. The key was patience and maintaining consistent moisture and light. I checked daily for condensation on the lid, which confirmed humidity was high.
- Day 6:First sign of trouble. I noticed a faint, white fuzz in one corner—the beginning of mold. This is a common issue in sterile-looking but actually microbe-rich peat. Instead of panicking, I acted. I immediately removed the lid, increased airflow by placing a small fan nearby on low, and very carefully applied a sprinkle of ground cinnamon (a natural fungicide) to the affected area with a tweezers. I left the lid off for 8 hours before replacing it.
- Days 7-10:The mold receded and disappeared. No new growth was visible yet. I continued the cycle of lifting the lid for a few hours every other day to allow fresh air exchange, preventing further fungal issues.
- Day 11:Success! Under close inspection with a magnifying glass, I spotted several tiny, green pinpricks on the soil surface—the first germination! They looked like miniature, green beads.
- Days 12-14:More seedlings emerged daily. Their first true leaves, though minuscule, began to show the characteristic sticky dewdrops. I was elated. At this stage, I permanently removed the humidity dome, as the seedlings now needed stronger airflow to strengthen. I ensured the water tray never dried out, keeping the soil perpetually damp.
Ongoing Care for Your Sundew Seedlings
Once germinated, the journey isn't over. Your care shifts to nurturing these fragile starts.
- Light:I provided 14+ hours of strong light under my LED panel. Insufficient light causes weak, elongated, and non-sticky seedlings.
- Watering:The "tray method" is essential. I keep the pot sitting in 0.5 to 1 inch of distilled water at all times. I top up the tray as it evaporates.
- Feeding:Do not fertilize the soil. Seedlings can benefit from extra nutrients. I feed them by gently placing a single, tiny dried bloodworm (crushed) or a fruit fly on a few dewdrops of the largest seedlings every 2-3 weeks. They grow noticeably faster afterward.
- Transplanting:When the seedlings are crowded and have several leaves (usually after 3-6 months), I carefully separate them. I use a damp toothpick to tease apart the root mats and transplant them into their own small pots filled with the same peat/perlite mix.
Troubleshooting Common Problems in Sundew Propagation
- No Germination:Old seeds, buried seeds, incorrect temperature (too cold), or overly dry/wet conditions. Ensure fresh seeds, surface sowing, warmth (70-80°F), and consistent humidity.
- Mold or Algae:My experience from Day 6 is typical. Increase airflow, reduce surface moisture slightly, use a fungicide like cinnamon or a diluted sulfur-based product safe for carnivorous plants. Prevent it by using clean materials and avoiding overcrowded seeds.
- Weak, Spindly Seedlings:This is almost always due to insufficient light. Move them closer to a bright light source immediately.
- Seedlings Dying:Usually caused by drying out, using mineral-rich water, or, ironically, "damping off" fungus from being too wet with poor airflow. Re-evaluate your water source and watering practices.
How long does it take for sundew seeds to germinate?Germination time varies by species. For common types likeDrosera capensis, it can be as quick as 1-3 weeks. For some temperate or tuberous species, it may require a cold stratification period and take several months. Patience is key.
Can I use regular potting soil for my sundew seeds?Absolutely not. Regular soil is rich in minerals and nutrients that will burn the roots of your sundews and inhibit germination. The nutrient-free, acidic environment of a sphagnum peat moss and perlite mix is essential for their survival.
When will my seedlings from seed look like mature sundews?With optimal care, most common sundew species will reach a recognizable, small mature size in 6-9 months. They may take a full year or more to reach their maximum size and begin flowering. The growth from a speck to a dewy rosette is a slow but immensely gratifying process.
Growing sundews from seeds is a test of patience and attention to detail, but the process demystifies their needs completely. By providing the right sterile medium, pure water, intense light, and careful humidity management, you transform those specks of dust into thriving carnivorous wonders. The two-week window after sowing is the most critical—vigilance against mold and joy at the first signs of green set the stage for success. Start with a resilient species, follow these steps, and you'll soon have a thriving colony of your own, each plant a testament to your care and understanding.

发表评论